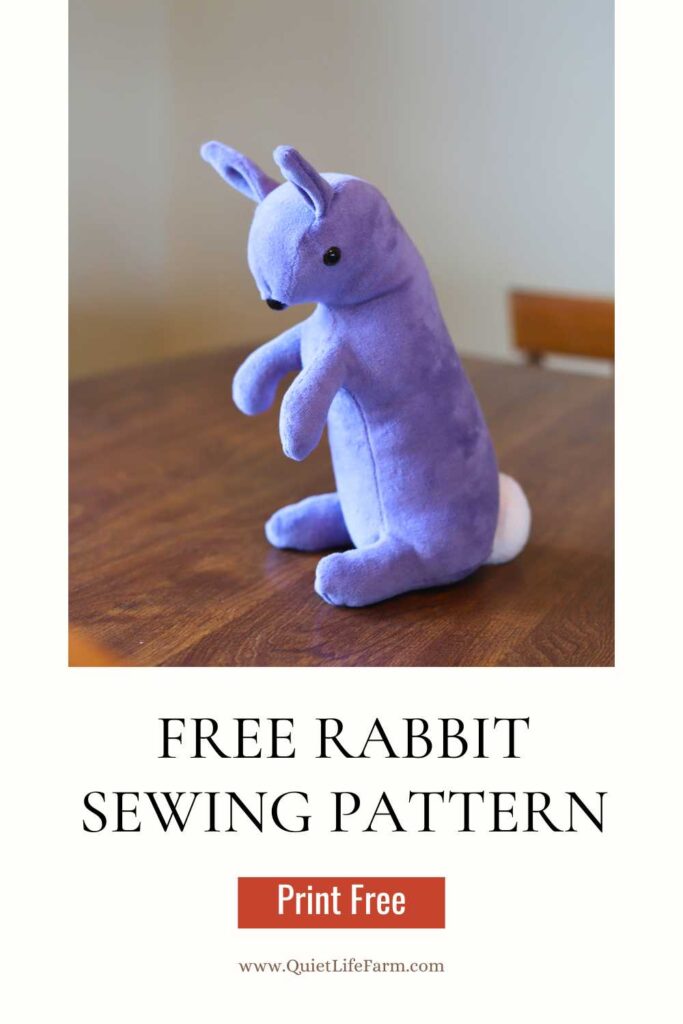
Classic Velveteen Rabbit: Free and Simple Sewing Pattern
This rabbit sewing pattern is FREE to print! Below, you will find a complete photographed tutorial and a video tutorial, too!
Below you will find how to make this velveteen rabbit style bunny!
Whether you are making this rabbit for Easter or for any other occasion, the pattern is free for you to print!
Print out your pattern, then come back to this blog post and I’ll show you how to make it step by step!
Print out your pattern HERE
Video Tutorial
To watch me make this rabbit from start to finish, you can do so in this video!
Otherwise, the written and photographed steps are below!
Step 1: Assemble Your Pattern
To print out your pattern, you will want to set your printer settings to 100% scale (do not “fit to page”).
This will ensure that it comes out at the correct size!
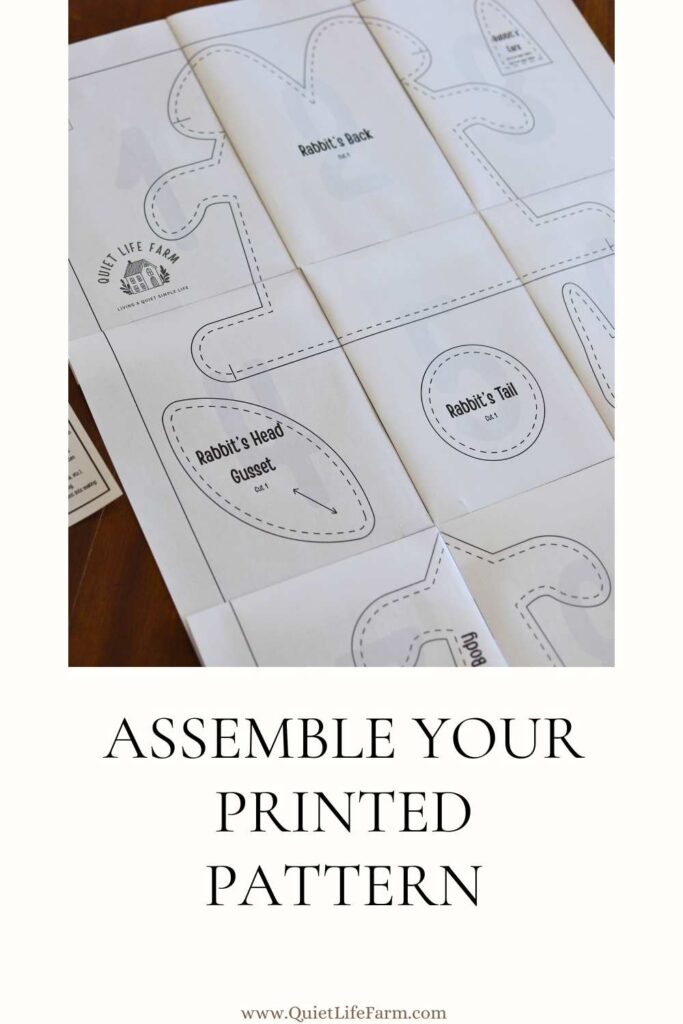
After printing out your pattern, you will need to tape or glue your pieces of paper together at the margins.
You can fold your pieces of paper at the margins (that’s my preferred method), or you can cut them out and then tape them together.
The pieces of papers are numbered, and I’ve included a chart (on the first page of your PDF) so that you can see just how to lay out your papers!
After you’ve made a full sized pattern, go ahead and cut out all of your pieces.
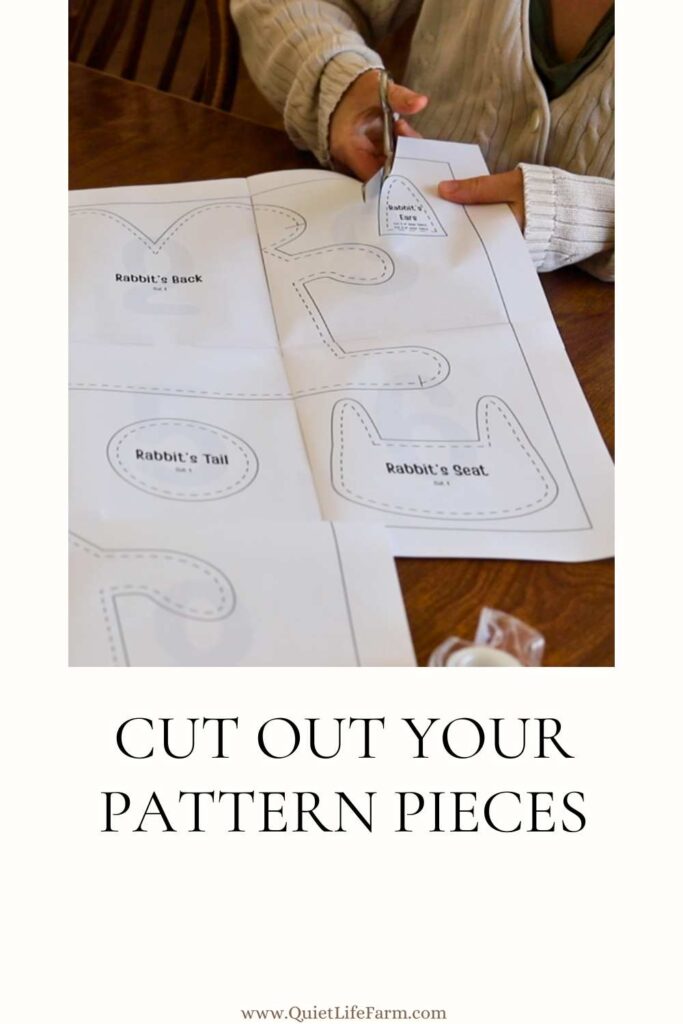
(a dotted line is included on all pattern pieces — this is your 1/4″ seam allowance!)
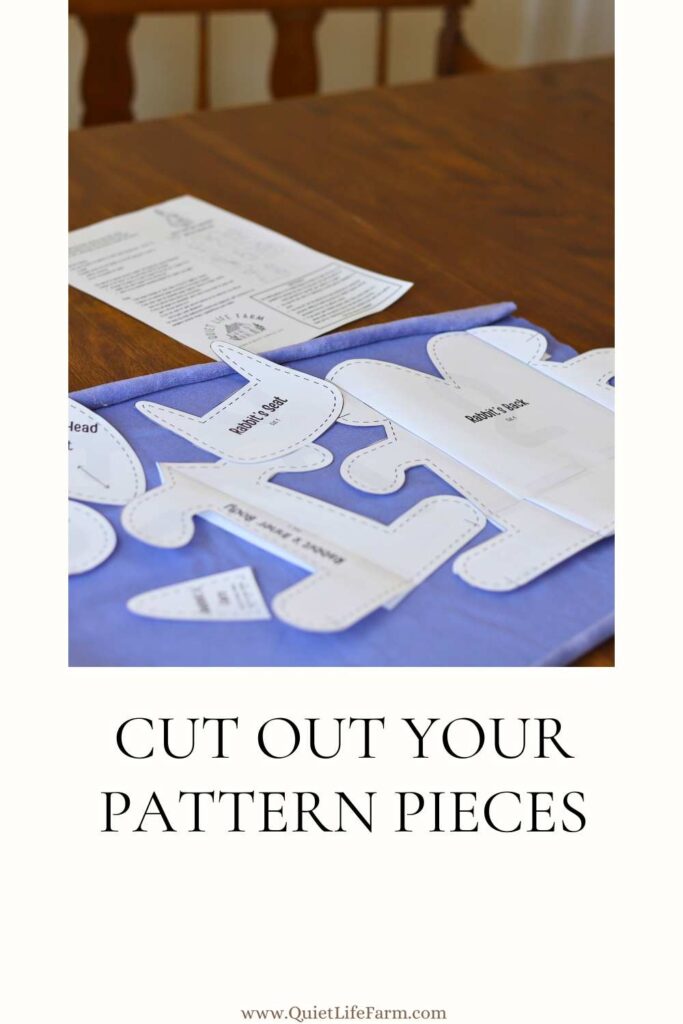
Cut Your Fabric
Cut out your fabric.

There is a little mark on the feet of your rabbit — mark this on the WRONG side (the side of the fabric you will NOT see) while tracing this part of the pattern. This mark shows you where to start and stop sewing the seat onto your rabbit.

The amount of pieces you need to cut out are indicated on each pattern piece.
You will need to cut out:
- 1 back body piece
- 1 front body piece
- 1 head gusset
- 1 seat (the bottom of your rabbit)
- 4 ear pieces (2 should be inner ear fabric, if you want to have a different piece for the inside of the ear!)
- 1 tail piece (I used a fluffy piece of fabric for the tail!)
Sew the Front and Back Together
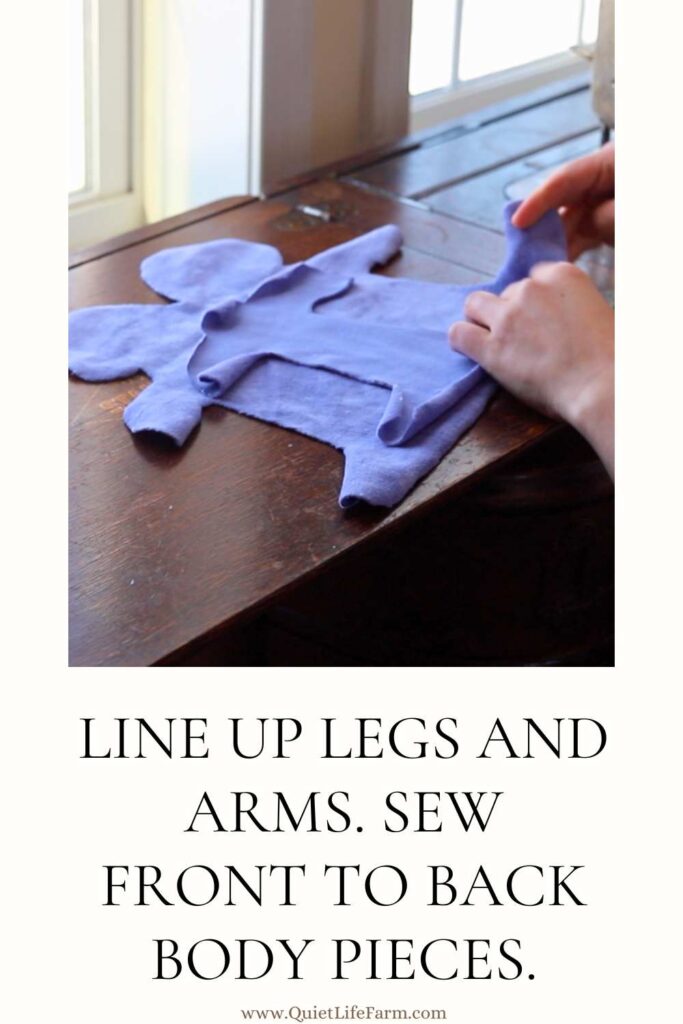
The first thing you will want to do is sew the front body piece to the back body piece.
Lay the front of the body and the back of the body right sides together.
Line up the leg pieces.
The back of the body is wider than the front of the body (this creates the curved back), so don’t worry that the bottom of the body does not line up. You will NOT be sewing across the bottom of the body. Leave this portion open.
Sew the sides of the body together starting at the bottom of the foot where there is a little mark. This little mark indicates where you should begin sewing. Leave the remainder of the bottom edge of the legs and belly/back OPEN. (see photo)
Sew the Ears

Sew your ears right sides together.
If you’re using a different fabric for the inner ear, be sure to sew one “inner ear” to each “outer ear” piece.
Clip into your seam allowance before turning your ears right side out.
Sew the Head Gusset and Ears
Next, you’ll sew the head gusset.
Start at the back of the head and pin the head gusset into place all the way around the rabbit’s head.
Now — there are two ways to sew on the ears. You can either pin them into place and sew them on NOW while sewing on the head gusset, or you can sew the head gusset on entirely, and then undo some stitches with your seam ripper where you’d like to place the ears and sew them on afterwards.
When sewing on the ears, keep the rabbit’s body inside out, and pin them into place between the side head pieces and the head gusset. You may choose to fold your ears before sewing them to the head to give them a “curved” instead of “flat” look. It’s up to you! Line up the edge of the ears with the seam allowance and sew across.
There will be a small part of the rabbit’s mouth/side head pieces that will be sewn together between where the head gusset and front body piece start/end. Sew this front portion of the side head pieces together after sewing on the head gusset.

Sew The Seat
Now you’ll go ahead and sew the seat of your rabbit onto your rabbit.
The seat of your rabbit is the bottom piece of the rabbit — the part your rabbit “sits on.”
Pin the bottom of each leg/foot into place, and continue pinning all the way around the “seat”, right sides together.
Leave a portion of the back OPEN. You might write a couple of little “x’s” on this portion to remind yourself not to sew it closed.

Sew all the way around, leaving a portion open for turning out.
Assemble Eyes and Nose
If you are choosing to use a pair of safety eyes and a safety nose, now is the time to do so!
Turn out your bunny’s body.
Stuff with a little wool to get a good idea of how the rabbit will look.
Decide on eye and nose placement — mark lightly with a pencil.
Then, very very carefully, cut a teeny tiny hole where you want your eyes and nose to be. Make the hole much smaller than what you think it ought to be.
The hole should be too small for the safety eyes and nose to go through — push the safety eyes and nose through the rest of the way so that the holes are as tight as they can possibly be.
Snap your eyes and nose into place. You may need to unstuff your rabbit’s head first so that no wool gets in between the snaps!
Stuff Your Rabbit
Finish stuffing your rabbit with wool.
It’s best to stuff your toys with small bits of stuffing, “fluffing” each bit as you go along, and “squishing” your toy to make sure it’s properly shaped.
Think of it as shaping, not stuffing, your toy. This yields the best possible result.
Sew the Seat Closed
Next, sew the seat of your rabbit closed.
Do this by using a ladder stitch.
Rethread the tail ends of your thread and pull them inside your rabbit’s body to hide them.
Sew the Tail
Lastly, sew the tail onto your rabbit!
You’ll do this by first sewing a basting stitch all the way around the tail.
Pull up your stitches to gather the tail, forming a little ball.

Stuff a bit of wool into the tail, and sew closed.
Then, sew the tail onto the back of your rabbit.

Pull your tail ends of thread into the body of your rabbit to keep them secure and to hide them after knotting.
I hope you enjoyed this free pattern and tutorial! Say hello in the comments and let me know how your rabbit went!