Loose Limbs? How To Restring an American Girl Doll At Home
Wanting to skip the doll hospital and save yourself some time and money? Here’s how to restring an American Girl doll at home for just a few dollars!

Disclaimer: As an Amazon Associate, I earn from qualifying purchases.
Here’s a quick step-by-step guide to how to fix the limbs on an American Girl Doll.
There are two variations for a step in this tutorial: on for the earliest dolls, which were made with a soft “squishy” head and limbs, and one for the “newer” (well, dolls made around 1999 and newer) dolls.
The doll I’m using as an example today is one of the pre-1999 softer vinyl dolls, so just want to make a quick note NOT to try and do any squishing/bending/hair-dryer-action on your newer hard vinyl dolls.
Also as a disclaimer — make your repairs at your own risk! This is me sharing my experience repairing my daughter’s doll in hope it might help another mama out there!
(you can also watch me repair this doll in my YouTube video, although all the good step by step information is in the blog post below!)
What You Need
To make this repair, you will need:
- 1/8″ round elastic cord (I paid $4)
- 1/8″ crimping loops (I also paid $4)
- Vice grips (I already owned)
- A pair of tweezers (I also already owned)
So, I paid a total of $8 to fix this doll, and spent about 20 minutes of time fixing her. The doll hospital would have cost me $50 with a month or more of wait time.
(fyi, the links above are the exact elastic cord and crimping loops I used)
Remove The Head
The first thing you want to do is remove the head.
If you’re able, DO NOT CUT THE STRING!
Already cut the string? Here’s the fix:
If the string has already been cut, you can fix this by using strong cotton dollmaking string and a blunt plastic tapestry needle to rethread string for tying on the head.

Untie the head, and remove the stuffing.

Remove The Limb
Remove one limb at a time.

If you remove them all at once, it is really easy to get confused and actually attach one on backwards.
Remove one limb, reattach, then move onto the next.
Remove each limb by cutting the elastic. It’s not difficult to cut through, especially if it’s already worn out.
Note How Each Limb Is Attached
Take a look at how each arm and leg is attached.
There are two white plastic cups with a hole in the center, one inside the limb, and the other inside the body.
A piece of elastic runs between both cups.
The elastic is secured behind each cup with a (flattened) crimping loop.
It’s also important to note that each plastic cup has the curved side facing AWAY from the joint (and the open end facings TOWARDS the joint).

Repairing The Arms And Legs
This is the part of the tutorial that varies slightly between the pre-1999 dolls and post 1999 dolls.
In the OLDER squishy vinyl dolls, you will be able to heat each limb a little bit with a hair dryer to remove each cup from inside the arm/leg.


In the NEWER HARD VINYL dolls, you will NOT be able to remove the cup and will just spin the cup inside the doll to reattach the elastic.

Take your elastic cord and cut off a piece LONGER than what you will need.
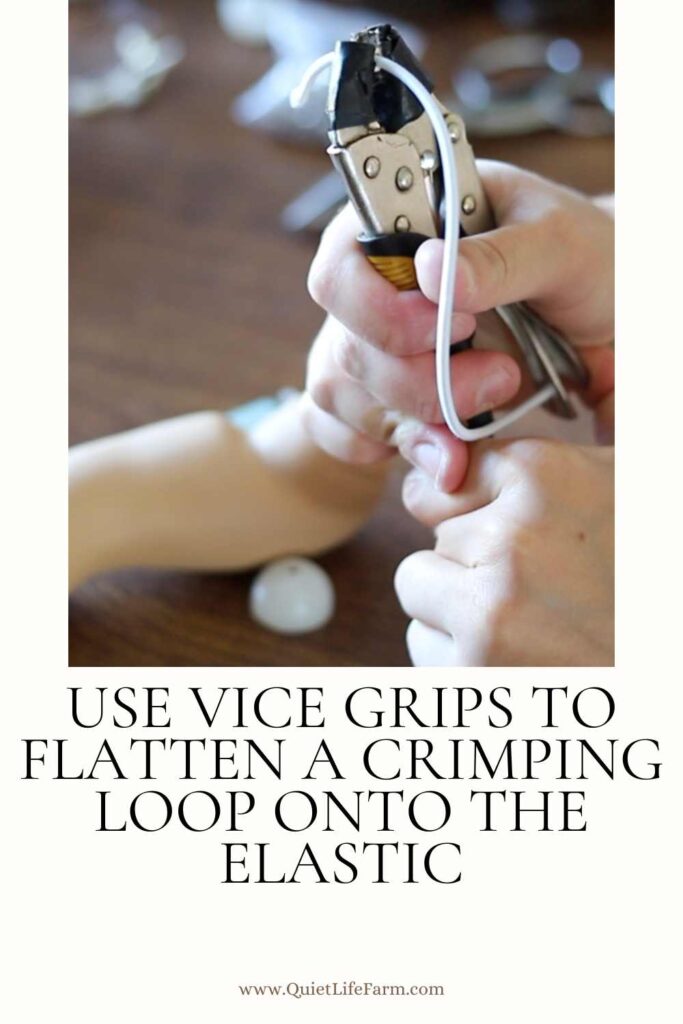
Thread a crimping loop onto one end of your elastic cord, leaving about 1″ of elastic off the end, and use the vice grips to squeeze the crimping loop flat onto the elastic cord so that there is no chance of it falling off of your elastic. Really make sure you get it on there tight.
On the SOFT vinyl dolls, remove the cup from the limb, and thread the long end of the elastic through the small hole in the top (closed) end of the cup.

(Warming up the arm/leg a little bit with a hairdryer and pulling the cup out with tweezers or the vice grips really helps — just use the vice grips GENTLY to grab the cup so that you don’t damage it!)
Place the cup back inside the arm/leg of the doll, leaving the long end of elastic hanging out of the limb, and the short 1″ end of elastic inside the limb.
On the HARD vinyl dolls, the only difference is that you will use your tweezers to “spin” the cup inside the arm/leg so that the top/closed end of the cup is facing towards you, thread the long end of your (crimped) elastic cord through the hole, then use your tweezers to turn the open/bottom end of the cup towards you before pulling out the long elastic cord so that it’s dangling out of the arm/leg.
Repairing The Arms And The Legs PART 2
The second half of repairing the arms and the legs is the same for both the soft and hard vinyl dolls.
Thread the elastic cord through the joint of your doll, then through the second cup that’s located inside the doll’s body.
Remember, the cup should be positioned so that when you crimp the crimping loop onto the elastic, the crimping loop is sitting on the top of the cup, not hanging out on the inside of the cup.
Thread another crimping loop onto your elastic cord, and pull the elastic cord tight while crimping the loop right against the second cup. This part goes much more smoothly if you have one person to hold the elastic tight, and one person to flatten the crimping loop.

Trim any excess elastic, leaving 1″ of elastic sticking out of the crimping loop. Leaving extra elastic helps make sure the elastic won’t pop out of the crimping loops over time.

Reassemble Your Doll
After you’ve restrung your doll, put all (yes, all) of the fiberfill stuffing back into your doll’s body.
Place the head back inside your doll, tie it tightly, and tie a knot around 4 times tightly with the string.

That’s it! You’re done!
Enjoy sewing? Here’s a free printable 18″ doll dress you can print and make!