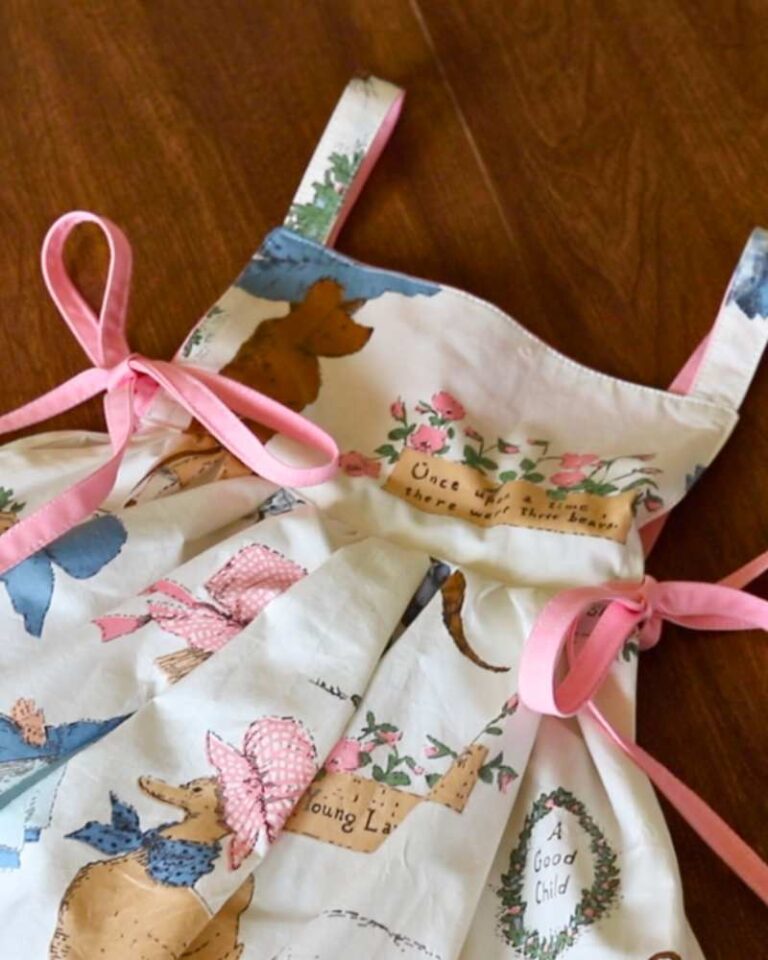
Novalie Dress | How to Sew a Girl’s Dress: Free Printable Pattern for Beginners
Here’s a free sewing pattern you can PRINT for an easy girl’s dress: sizes 2T, 4T, 6, 8, and 10! Plus, a video tutorial!

As an Amazon Associate, I earn from qualifying purchases.
I’m so excited to share with you my newest free pattern today that you can print for FREE!
This is a basic little girl’s dress that comes in sizes 2T up to a 10.
Below, you”ll find the printable PDF pattern as well as a photographed tutorial. I have also filmed myself making this dress (in size 4T), so if you want a video tutorial, you can view that here!
I’m going to show you how to make this dress step by step.
I made this dress pattern with absolute beginners in mind, so even if you haven’t done much sewing but wanted to make a simple dress for a little girl in your life, you can do so with this pattern.
I used easy techniques and simple finishing methods so that anyone can try their hand at making a sweet little dress that holds up well to everyday play!
I do my best to clearly explain the construction and each step to this dress so that beginners can make a garment that turns out looking great!
Free patterns that can be printed is where my heart is, so if you aren’t a confident sewist and don’t want to spend the money on a pattern, or maybe you don’t have the financial means to purchase a pattern, I want this pattern to be available to you so that everyone can enjoy expanding their skillsets and try their hand at sewing.

Printing The Pattern
Use this form below to print out your free pattern:
This pattern can be printed at home on standard A4 size printer paper.
It prints on 9 total pages. 8 pages are the paper templates that you will assemble by taping together, and the other page is a guide for how to tape together this pattern, as well as a guide for how long and wide you will need to cut out your skirt panels.


How Much Fabric?
I would suggest budgeting for 1 yard of fabric for the two smallest sizes, and using 2 yards of fabric for the larger sizes.
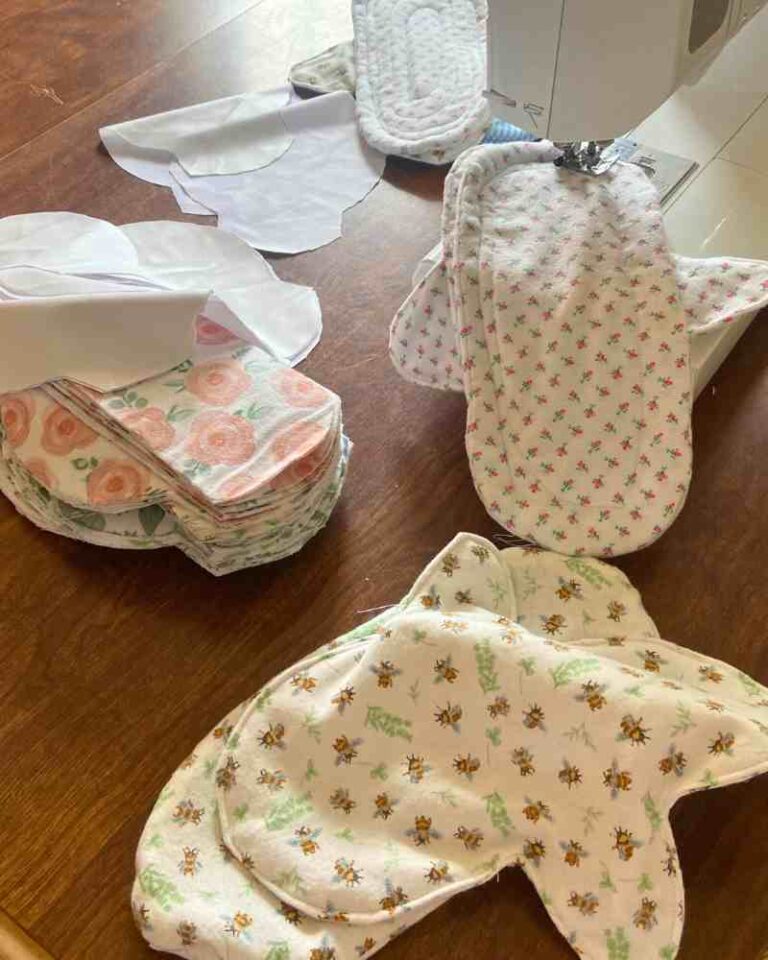
You can also repurpose secondhand bed sheets from the thrift store to make this a super budget-friendly project.
The Bodice
Cut out all of your pattern pieces as specified on the pattern.
The bodice is the top part of the dress. Sort of like the shirt of the dress.
For the front of the bodice, you will need to cut out one piece in your main fabric, and one piece for lining.
There are two pieces for the back of the bodice, allowing the dress to open and close. You will want to cut two pieces in your main fabric and two pieces of your lining.
You will want these pieces to be mirrored, so after you use your template to cut out your first piece of fabric and lining, flip it over before cutting out your second piece of fabric and lining.


About Lining
For the lining, I often will use the same fabric as the main dress fabric if I have enough, or I use some neutral fabric that I have in my fabric stash that I might not be a tremendous fan of, since lining isn’t really seen on a garment.
The two main things you will want to consider when picking out a lining is that you don’t want your lining to be a super duper heavy material, and you also do not want it to be a color or print that might show through the dress in a negative way.
For example, lining a white dress with thick red canvas fabric is probably the worst possible thing you could choose to line it with.

The Skirt Panels
The skirt panels are cut as simple rectangles.
I do not have paper pattern pieces for them to cut out since they are very basic shapes and providing a paper pattern would just be a waste of paper and time.
Instead, I have a sizing chart for what sized skirt panels you will need to cut for each size dress.
You will cut 2 panels.
One skirt panel is attached to the front of the bodice, and the other skirt panel will be attached to the back of the bodice.
Sewing The Bodice
Next we’ll start assembling the dress together.
The first thing you will do is sew the front bodice and the lining for the front bodice right sides together at the curved neck line, and at the curved arms.
Leave the shoulders and other straight edges open.

You’ll want to use a 1/4″ seam allowance for this project. This means your seams should be about 1/4″ away from the edge of your fabric.
Next, clip into the seam allowance into your curved seams.
This will prevent the fabric from bunching.

Turn the front bodice right side out.
For each of the back bodice pieces, line up a piece of the fabric and a piece of the lining right sides together.
Just like with the front bodice, you want to sew the curved armhole and the curved neckline.
You will also want to sew the long straight edge for the center back all the way down.
This is the edge that will allow the dress to open and close.
Do NOT sew the straight edge under the armhole, just the center back.
Just like you did on your front bodice, clip into your curved seam allowance.
You’ll also want to snip the right angle corner of your fabric off where the neckline meets the center back – just be careful not to cut into your stitches.
Doing this allows the right angle corner of your dress to point out all the way instead of looking rounded.
Sewing French Seams
After turning your bodice pieces right sides together, iron them flat.
Then, bring them back to your sewing machine.
Lay your bodice pieces WRONG sides together.
This means that the “Pretty” sides of your fabric will be facing out, while the lining of each piece will be touching each other.
Sew the front bodice to the back bodice pieces at the shoulders, sewing as closely to the edge of the fabric as you can while still making sure you “catch” all of your layers of fabric.

Cut off any extra fabric as close to your stitches as you can without cutting INTO your stitches.

Then, turn the pieces right sides together, adn sew again at the shoulders.
This creates a nice and neat French seam, which will help your garment last a good long time.

Topstitch The Bodice
Next, you want to sew a line of stitches close to the edge around the arm holes, the neckline, and the center back of your dress.
This is called topstitching and helps keep the lining in place over time and keeps your dress looking nice and neat.

Some people like to make their stitch length just slightly longer when they top stitch to make the stitches look a little straighter, so if you’d like to do that here you can – just remember to put your stitch length back to normal before moving onto the next step.
Next, you will gather one of your skirt panel on the width side.
You want to do this by sewing a basting stitch all the way across.
You can do this on a sewing machine or by hand.
I can’t create a basting stitch with my treadle, so I created an uneven basting stitch by hand to gather the skirt.
You can see that for an uneven basting stitch, I just quickly move my needle in and out of the fabric to gather it on the needle, pull it onto the thread once the needle is full, and keep moving all the way across the fabric.
Don’t knot your thread for the basting stitch – just pull your thread once you’ve sewn across to create a nice gathered effect for the skirt.
If you want a more professional way to gather your skirt, you can use a machine to sew two lines of basting stitches right next to each other, then pull them both to get a very even gathering.
Attach The Skirt To The Bodice
Lay your bodice down on a flat surface, and adjust the gathered edge of your skirt panel to be the same width as the bottom of the front of the bodice and pin into place.

We’ll sew this portion with a french seam just like we did with the shoulders, so first sew wrong sides together, then carefully trim off any extra fabric without cutting into your stitches.
For this gathered part, it can be fairly easy to accidentally cut into your skirt while trimming off your extra seam allowance, so cut slowly so that you don’t accidentally snip your skirt. (ask me how I know, lol)

Then, turn right sides together, and sew across again, being careful not to catch any of your seam allowance into your new line of stitches.
This contains all the raw edges of your dress nicely.

You are going to do the exact same thing that you did to the front bodice to the back bodice, except that first you are going to slightly overlap your two back bodice pieces and sew them together at the bottom to hold them into place.


Finishing The Dress
Here comes the fun part where your dress really starts to look like a dress!
We are going to use a french seam again to sew the sides of the dress together.
So, line up one of the side seams of your dress wrong sides together (that’s the pretty side of the fabric showing).
We’re all humans, so if you notice that this lengthy seam no longer lines up perfectly in length, don’t worry about it – just line up the bottom of your arm holes evenly, and we will even out the skirt at the bottom here soon.
Sew this side seam starting at the arms and go all the way down to the bottom of the dress.

Trim off your seam allowance – again, do this part carefully so that you don’t accidentally cut into your skirt.

Then fold right sides together and sew down the side seam again.

Repeat for the other side of the dress.
Next, we’ll hem the bottom of the skirt.
If the bottom of the skirt became a little uneven, that’s okay.
You can recut a straight and even edge off of it now before continuing.
Then, you’ll want to hem the bottom of the dress by folding the raw edge over twice.

You can iron the hem first to really hold it into place and to make sure it looks nice and even before you sew it into place with the machine.
In my experience, ironing the hem will also make it so you don’t have to use any pins to hold the hem into place.
I’ll also admit that often I just follow my own “mom sewing rules” and fold and sew the hem as I go, forgoing both the iron and the pins.
For a closure on this dress, you can sew on buttons, a zipper, or even some velcro.

I find that velcro is probably the easiest notion to attach for a beginner.
You will just sure that the scratchy side of the velcro is facing scratchy side OUT, away from the want to make child’s skin, and that the soft side of the velcro is facing towards them.
Sew the velcro on by first sewing a square around the edges of the velcro, and then sew an “X” in the middle.
Here’s some great velcro to use for this dress!
I hope that this free pattern and tutorial blesses you and gives you the confidence to enjoy sewing for whatever child you know.
If these are the sorts of patterns and tutorials you would like to see more of, please let me know in the comments! I would love to hear if you made this dress!
Please take the time to see the other free patterns on my blog!
Happy sewing!


I can’t find the printable pattern. Ive read through several times and clicked on everything. Still can’t find it.
Hi, Penny! The pattern is right under “Printing The Pattern” — I’ve gone ahead and sent it to your email for you! (If you don’t see it, check your promotions inbox! Sometimes my free patterns end up there!)
Your Novalie dress pattern is so lovely! I featured your fantastic project on Crafts on Display today. I love that it’s available in so many sizes – what a versatile and beautiful design!
Thank you for your lovely comment! I’m glad you enjoyed it!
i cannot find the pattern to print.
There is no place to click.
Would love to sew them for my granddaughters.:)
Hello! There is a form for the pattern right under “Use this form below to print out your free pattern:” — I’ve also gone ahead and emailed it to you! (Check your “promotions inbox” if you don’t see it!) Happy sewing!
Hi, I am hoping you can help me. My great granddaughter has outgrown her princess dresses and asked for more. I was thinking that I can transform your dress pattern with a bit of imagination, fabric choices and maybe a bit of bling to make her wish come true. I am unable to find where to click to get the printable pattern however. Would you be so kind as to help this old lady with my problem?
Thank you and happy holidays to you and your family.
Paula
How sweet of you to make princess dresses for your great granddaughter! That is such a thoughtful heirloom gift for her to have and cherish forever! I’ve emailed your free pattern — if you do not see it, check your “promotions inbox!” Sometimes my freebies end up there!
I love this pattern. I signed up to get the pdf file, however, when I opened it to download it, I received a warning that the site was a security risk or something about the certificate being expired. I would appreciate any help you could give me. This pattern is perfect for my sewing skills.
Hi, Christy! The pattern should come to you through EMAIL, please make sure you’re not clicking on anything else instead!! If it’s an email from me, the PDF pattern will be available through a clickable button within the email.
looking at making the party Dress for my granddaughter but having a problem finding the pattern to print it looks absolutely gorgeous
thank you
That sounds like a wonderful project for your granddaughter, how sweet!! There is an email form that says “Get your free sewing pattern!” — this is how I automatically have my free PDF patterns emailed to you!
Hi, I’ve put my email in twice to receive this pattern, I was hoping to use it for my niece, but I haven’t received the pattern yet. It is neither in my inbox nor promotions. How long does it usually take to be sent? Thank you for making sewing so accessible
Thank you for your sweet comment! I’ve gone ahead and sent the pattern to you directly! All the best to you and your niece!
I can not find a way to get the pattern emailed to me would love to make this.
Hi, Deeon! The form is right under “printing your pattern” but I have gone ahead and sent it to you personally! Happy sewing! (check your
“promotions inbox” if you don’t see it in your primary inbox folder!)
Thank you for the free pattern. I will be making dresses using your pattern for Project Dress A Girl. Information on this organization is on YouTube by Mari Sews. A big Thank you!!
Thank you for your kindness and generosity in making these for charity! I appreciate your heart for others! Thank you for your beautiful comment!
Hello! I’m curious how long this dress will be. Does it hit mid shin? At the knee? Above the knee? Obviously it will be different for each child, but I’m curious about the general design! Thanks!
Hello! It lays at just below the knee for my children! It would be very easy to adjust the length as the skirt is just made from basic rectangles.
Hi I also cannot find the pattern but very keen to make this cute dress!
Hi, Sophie! I’ve sent you the free pattern! Happy sewing!
hi, please can you send link for pattern as the form is no longer showing. would love to make this for my granddaughter. many thanks sue
Hi, Sue! I’ve sent the pattern to your email for you! Happy sewing and best wishes to you and your granddaughter.
my front bodice and back bodice shoulder straps never match in width. Am I doing something wrong?
Did you make sure that you cut out both pattern pieces in the same size? I would check your pattern pieces and make sure you followed the correct cutting lines around your shoulders!
I would love to get the pattern for this dress. Is it still available?
Yes, it is! There is a form on the page to have the PDF pattern sent right to your email inbox for free!
Hello,
For some reason the pattern wont email to me? i’ve tried quite a few times now 🥲
Hi, Jess! Did you check your promotions inbox/other inboxes your email provider may automatically sort emails into? If you still don’t see it, please send me an email and I would be happy to send it to you personally!
Hello, Jess! I am so sorry you’ve had trouble finding the email with the pattern in it! Did you check your other email inbox folders (for example, often Gmail organizes my emails into their “promotions inbox”, even though my patterns are free 😅)? Another problem people will sometimes run into is if they are using a work email — sometimes their work will set up extra security on their end that makes it difficult to receive an email with a PDF in it. If you’re still having trouble, please let me know so that I can send it to you personally!
Is there still a way to dnloaded? Did I miss it?
I’m just starting to learn to make little girl’s clothes. This is so cute.
You haven’t missed it, it’s still there!
The pattern is available for free under “Printing The Pattern” using the form “Get your free sewing pattern!”
Thank you for your kind words! Happy sewing!
Thank you for the tutorial.May you please send me the pattern l can’t see it anywhere
Hello, Audrey!
The pattern is available for free under “Printing The Pattern” using the form “Get your free sewing pattern!”
If you still have difficulty finding it, please let me know and I’d be happy to further help!
Happy sewing!
Novalie Dress girl pattern please. I am glad I found your youtube channel. making it for friends. Thank you for sharing pattern.
Hello, Lily! Thank you for your kind words!
The pattern is available for free under “Printing The Pattern” using the form “Get your free sewing pattern!”
Happy sewing!
Very cute dress, easy to assemble when I quit making mistakes with the French Seams.
I would like to add side seam pockets, possibly side pockets. About how far down the side of the dress would be good to start the pocket?
Also I am making dresses for girls 5-10 for an organization called Samaritian’s Purse. I would like permission to use this pattern. They are not sold but donated to young girls in poor situations all over the world.
Thank you for the pattern and you assistance.
That is so sweet of you, thank you!! I would love for you to make these dresses for charity. Your kindness warms my heart!
It’s difficult to say how far the pockets should go down because I have not tested the pattern with pockets… however, my guess would be somewhere around 4-6″ lower than the bodice, but that is a total guess!
Hi, I like the Novalie dress pattern; however, I click on the free pattern and not making the connection to print.
Thank you for sharing your pattern, and love your treadle machine.
Ella
I’m so sorry you’re having trouble finding the pattern! There is a form titled “Get your free sewing pattern!” (no button) You can get the pattern that way!
Thank you for your sweet comment! I hope this helps!
In your printing instructions, it says to print on A4 paper (8.27″ x 11.69″); however, the link you provided to the paper you used is standard letter (8.5″ x 11″). Just curious which one you intended for printing to save paper and a lot of frustration. Thank you
Hello! Either sized paper will work. As long as you are printing at 100% scale (do not “fit to page”), it will print out at scale on either sized paper.
I cannot find the pattern. When I look for it under Printing the Pattern the only link sends me to Amazon. Pls help
Good morning, Katie! There is no link — there is an email form under Printing the Pattern. My patterns are sent via email!
Thank you for replying. Maybe it is just my browser however I am not seeing a form. I see where it says there is one but not seeing an actual form
Hello, I switched over to Chrome. Wanted to let people know if they had the same issue of not seeing a form. I use firefox and there is no form shown with firefox
Thank you so very much for sharing your solution!!
Where is the Form to print the pattern? My page has no where to click… Please help – I love this dress!
Thank you,
Robin Crawford
Hello, Robin! I have emailed you your patterns!
could you please send me a link to the pattern?
Hello, Robin! I have emailed you the pattern! Please check your “promotional inbox” if you don’t see it — Gmail has the tendency to sort my freebies there! (there is an email form on each page of my patterns that you can use to automatically receive the free patterns in the future!)
Thank you for this!!! I am a beginner and this was such a wonderful experience for a first project to have detailed instructions and a follow along video! The only problem I ran into was because I decided to also line my skirt pieces.. made it a bit too thick and bunchy by the time it was gathered and seams were lined up etc. But for a child who won’t sit still long enough for anyone to notice imperfections, I’m happy with the final result 🙂
Thank you so much for your kind words, Melanie! I’m so happy to hear that it worked out so well for you!
Hello,
I entered my email and i have not received the pattern.
Hello, Jia! Please check your “promotional inbox.” Often my free patterns end up there! Happy sewing!