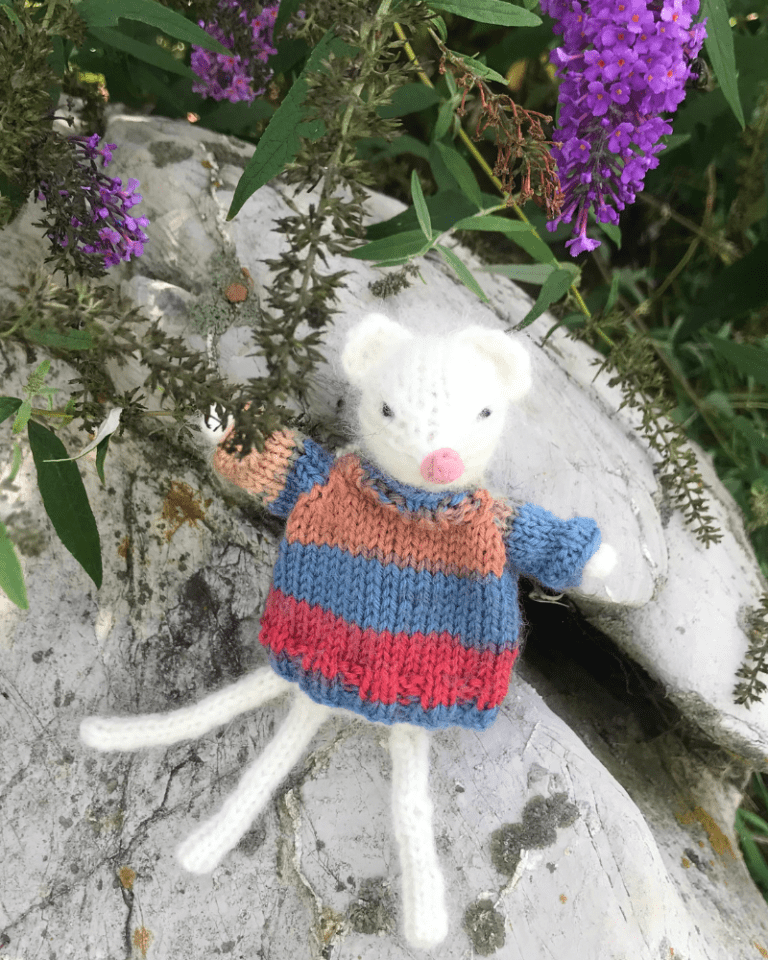
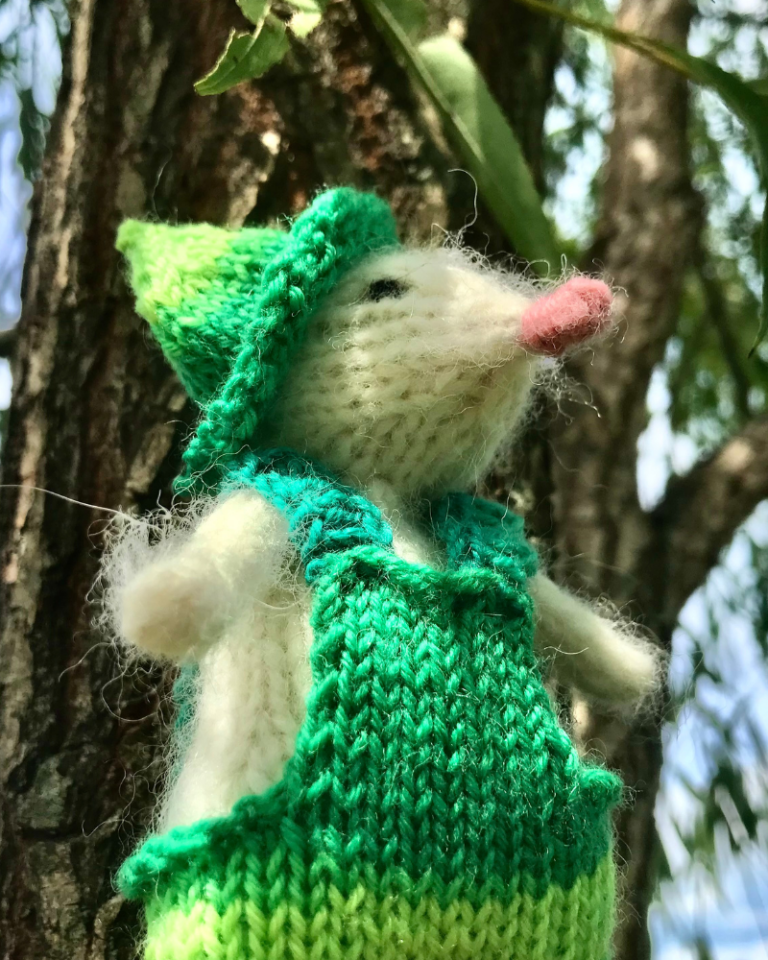
How To Knit a Doll From Squares Easy Free Pattern

Here’s how to make a knit doll by only knitting squares!
If you’re an absolute beginner knitter and are interested in toy making, this is a perfect project for you!
To make this doll, you will knit several squares (rectangles), and use some simple sewing skills to assemble this doll.
The body and even the dress are made just by knitting squares!
If you can knit a square, you can make this doll!
Only knit and purl stitches are used.
Get this pattern by reading this blog post. You can also print out a printable PDF version I have made (free to print!)
If you’re a visual learner, I also have a YouTube video tutorial you may watch!
Let’s get right to it!
Printable Pattern
If you want a quick printable guide for this pattern, you can get it for free below! Otherwise, keep reading to get the pattern right here on the blog!
Supplies Needed
I used Knit Picks Wool of the Andes Worsted to make this doll. You can find it here.
The colors and exact amounts I used are:
- Almond (the body, 2 skeins)
- Garnet (the dress, 1 skein)
- Merlot Heather (the hair, 1 skein)
You will also need:
- A tapestry needle
- 3.5 mm knitting needles
- Scissors
- A ruler
- Wool for stuffing your doll
Some Quick Notes
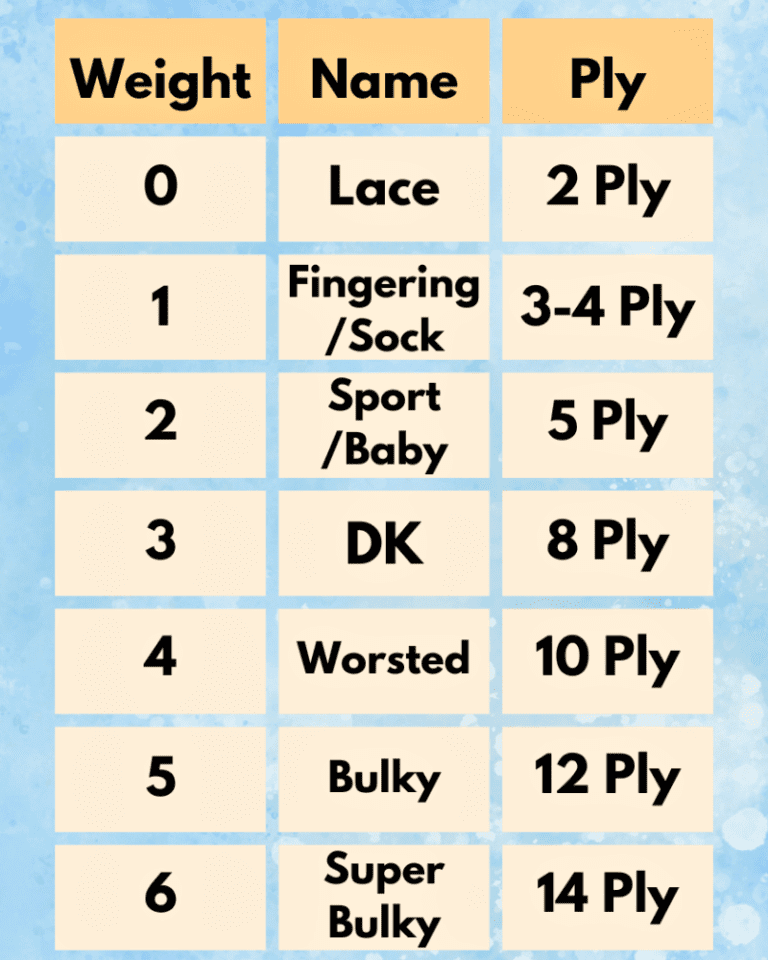
All squares/rectangles will be knitted with 3.5mm knitting needles and worsted weight yarn.
Stockinette stitch will be used the most often for this project. To knit stockinette stitch, alternate knit rows and purl rows. You will know that you are knitting stockinette stitch correctly when one side of your knitting is all smooth knit stitches, and the flip side is all rough purl stitches.
Garter stitch will also be used for some of the doll’s dress. To knit garter stitch, knit every row.
Knitting the Squares

To make this doll, you will only need to knit square/rectangular shapes.
There will be 7 pieces total (including the dress for the doll).
Knit all the body pieces in the recommended color, or in the color of your choice.
I also think it would be fun to make some color changes partway through knitting each piece of the doll to make it appear like the doll is wearing non-removeable clothes! If any of you play around with that variation, I’d love to see pictures of what you come up with!
But — For this project/tutorial, I’ll be knitting each square all in one color.
Below, you will find instructions for how to make each square for this doll. Make each square, then keep reading for assembly instructions! (or watch the video!)
Square 1

Square 1 – The Body and Head: Cast on 40 stitches. Work in stockinette stitch until piece measures 8″ long. Cast off.
Squares 2 and 3
Squares 2 and 3 – The Legs: Cast on 18 stitches. Work in stockinette stitch until piece measures 6″ long. Cast off. Make 2.
Squares 4 and 5
Squares 4 and 5 – The Arms: Cast on 18 stitches. Work in stockinette stitch until piece measures 4 1/2″ long. Cast off. Make 2.
Squares 6 and 7

Squares 6 and 7 – The Dress: Cast on 38 stitches. Knit 6 rows. Work in stockinette stitch for 28 rows. Knit 16 more rows. Cast off. Make 2.
Assembly
To assemble your doll, fold each body, arm, and leg piece in half lengthwise (making each piece LONGER, not wider).

With knit sides together, sew mostly closed using a tapestry needle and matching yarn, leaving a small opening to turn right side out and to stuff with wool.
Turn the body, arms, and legs right side out (knit side out) and stuff with wool.
Remember — the arms are SHORTER than the legs.
Only stuff the arms and legs 3/4 way full, otherwise the arms and legs will be too stiff and stick out straight. This is especially important when stuffing the arms of your doll!
Sew closed with matching yarn and a tapestry needle.
Use matching yarn to gather around the neck of the doll and pull tightly to shape a separate head and body on your doll.

Knot tightly, and use a tapestry needle to hide the yarn inside the doll’s body. (you can see a demonstration of this in the video)
Embroider facial features onto your doll.


Cut hair to length, and use matching yarn to sew a “part” down the center of the hair to hold the hair in place. Sew very tightly, making lots of little knots as you sew.


With right sides of the dress pieces together, sew up the sides of the dress, leaving the edges of the top/longer garter stitch portion OPEN for the arm holes.

Sew the top shoulders of the dress closed, leaving an opening for the head. Each shoulder should be 2″ long. You can also measure how far to sew the tops of the shoulders of the dress closed by holding up the squares against your doll.


Weave in your ends and turn right side out.
Happy knitting!

Very nice pattern enjoy making simple shapes and turning into great little cute fun
Thank you! I’m so glad you enjoyed it!