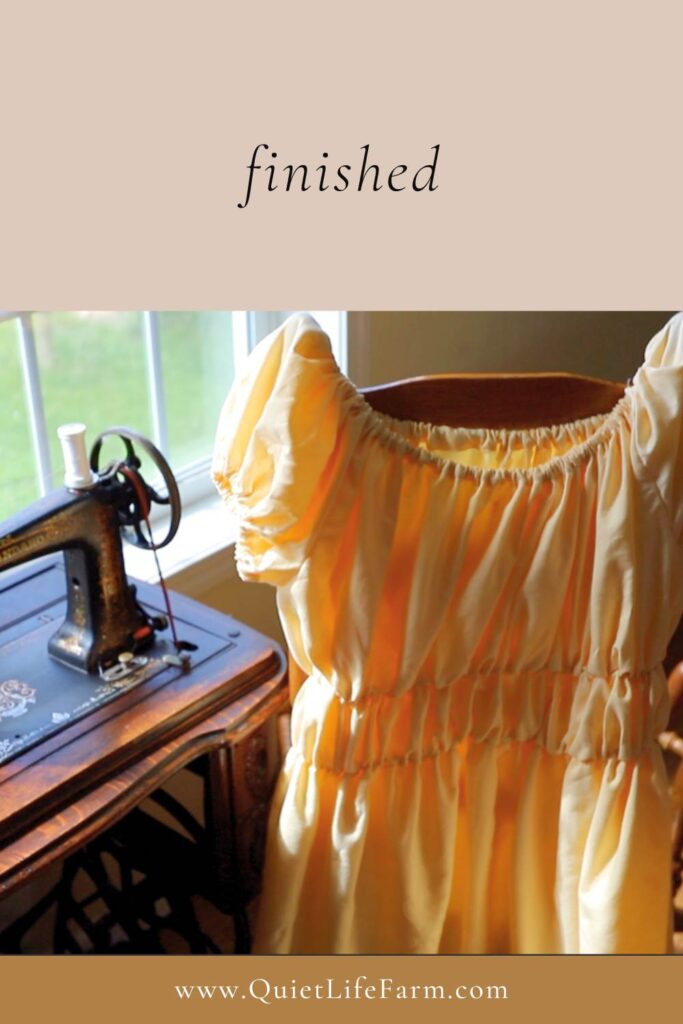
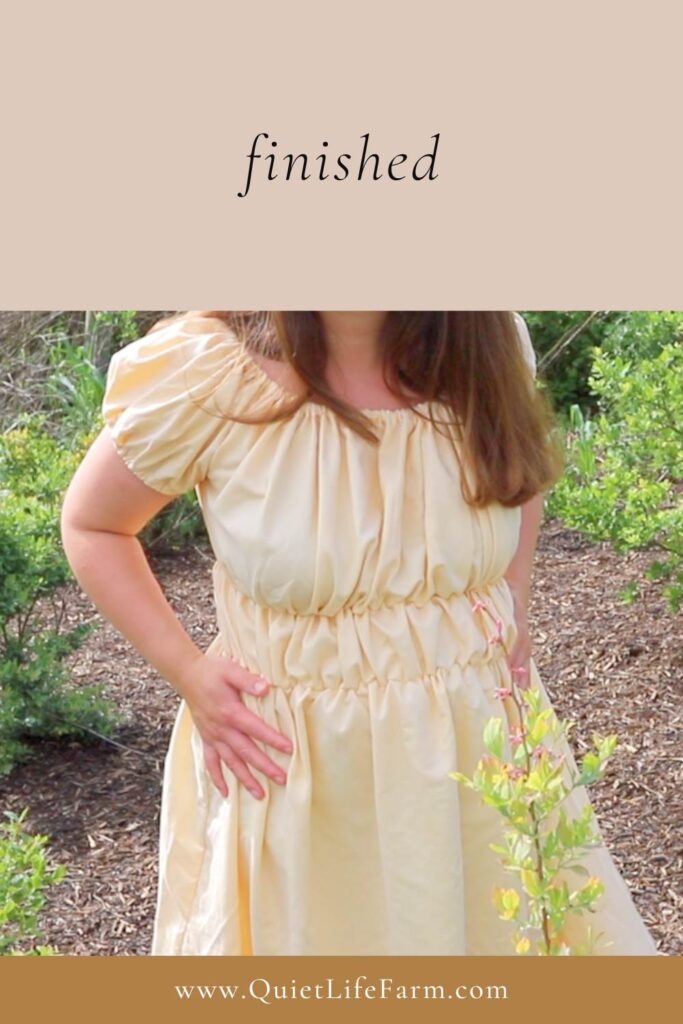
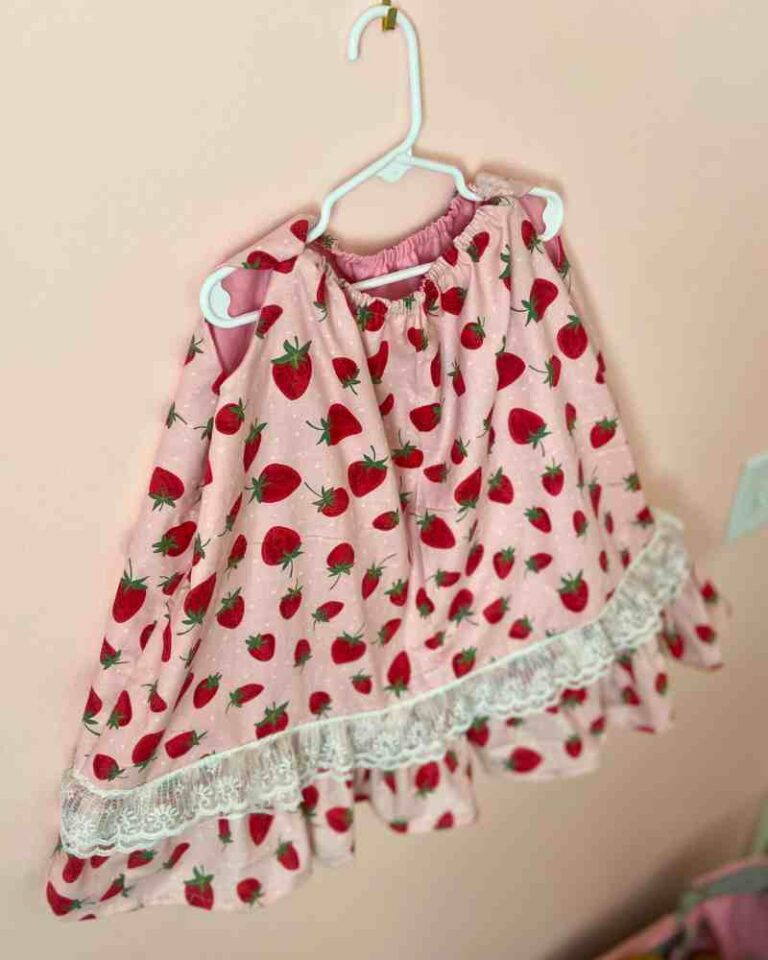
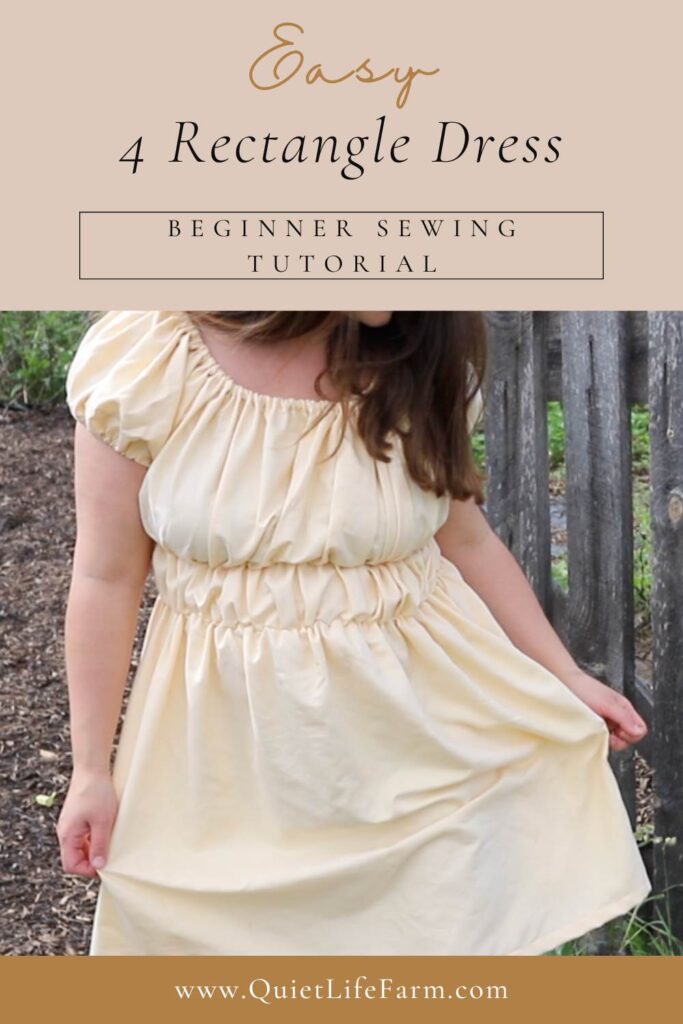
The 4 Rectangle Dress: Easy Beginner Friendly Sewing!
How to make a beginner friendly, flattering dress out of 4 rectangles! (any size!)
As An Amazon Affiliate, I earn from qualifying purchases.
Today I’m going to show you how to make this dress out of 4 rectangles.
It’s simple to make, a flattering style, and can easily be made in any size, so you can make it for yourself, or even for your children.
I also have a YouTube video tutorial so that you can watch me make this dress from start to finish!
I feel like this style dress is really popular right now. I see it both as a finished sold item in the fast fashion world, and I see all sorts of sewing patterns for this style dress.
I’ve personally made similar dresses with a couple of different sewing patterns, and the more and more I thought about it, I realized that it could easily be made with just a couple of rectangles.
What You Need
All you will need to make this dress is some fabric, some 1/2” width bias tape, and some 1/4” width elastic.
I also used a heat erasable pen to mark where my elastic should go. It’s pretty crucial to this project. Always test heat erasable pens on a tiny scrap of the fabric you’ll be using!
Now, you will really want to use lightweight fabric to make this dress.
I have used just a normal quilting cotton to make this dress before, and it ended up being so heavy that I literally never reach for it when I’m choosing what to wear each day.
For this dress, I actually opted to use a thrift store sheet.
It’s pretty worn out, which makes it nice and thin, which is absolutely perfect for this style of dress.
Watch The Video Tutorial
Do you learn better through video content instead of reading through a tutorial?
You can watch my YouTube video below, or keep scrolling to read through my written and photographed tutorial!
Measurements You’ll Need
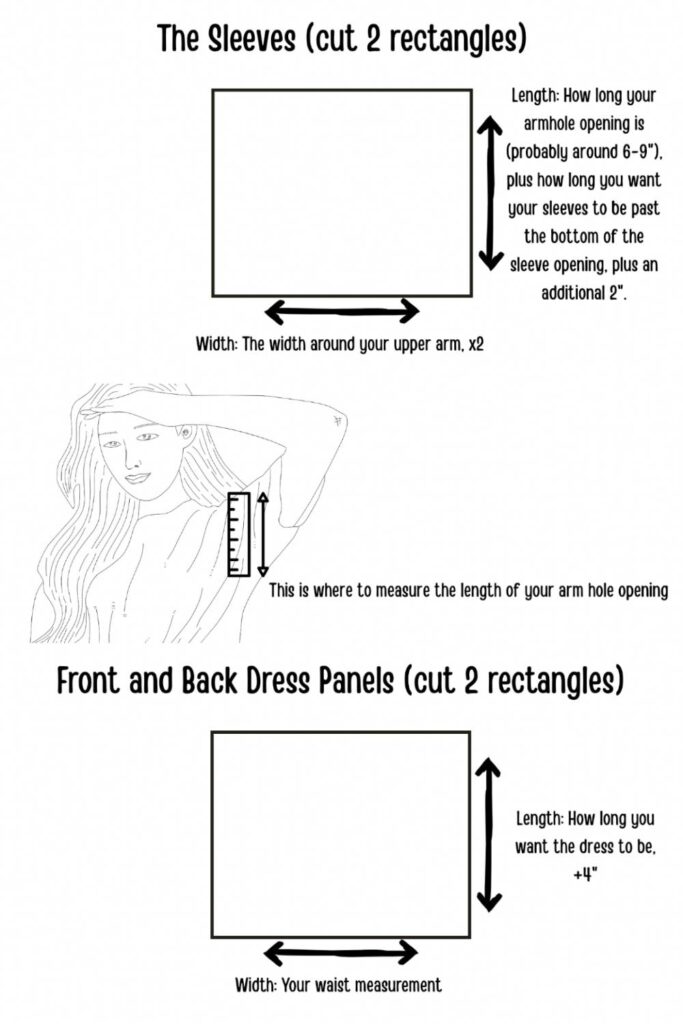
The first measurement you will want to take and write down for later is how long you want your armhole opening to be.
On average, it’s probably going to be somewhere between 6-9” long.
This is NOT the measurement all the way around your arm. It is just a straight line from your shoulder to where you would comfortably want a sleeve opening to end.
You don’t want this opening to be too short, or you won’t be able to stick your arm through the hole, and you also don’t want it to be too large, as you want this to be a fairly fitted dress.
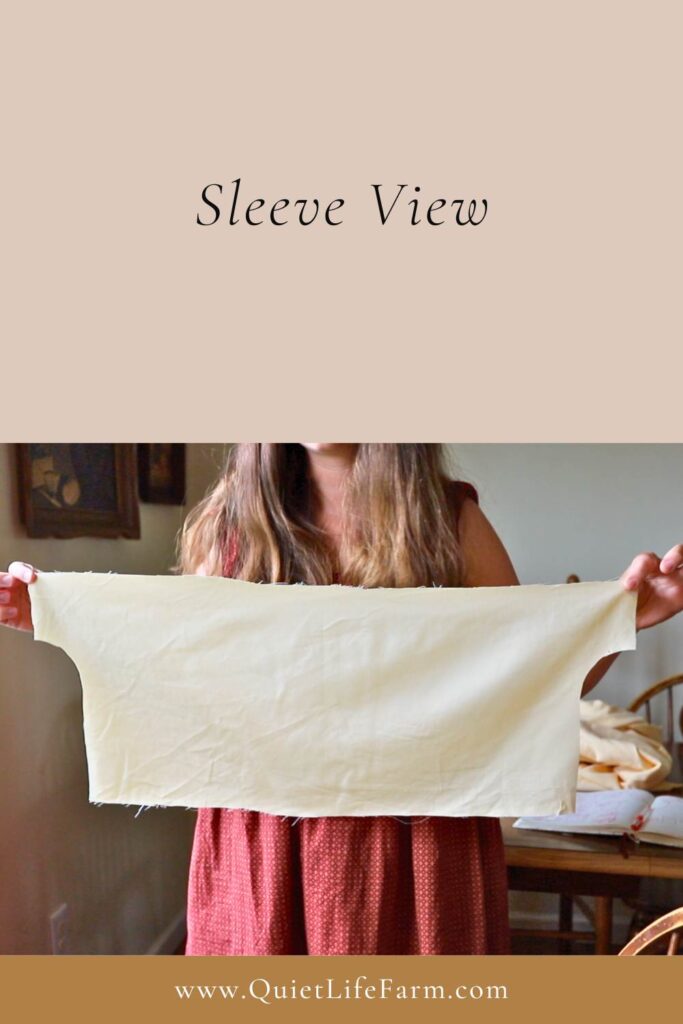
You will want to cut out 4 rectangles: Two large rectangles will be for the front and back of the dress, and the other two rectangles will be for the sleeves.
The front and back panels of the dress should each be your waist measurement for the width, and then however long you want your dress to be, plus 4”.
For the sleeve rectangles, you want to measure around your upper arm and multiply that by 2 for the width, and then measure however long you want your sleeve to be (past the bottom of the sleeve opening) and add 2” to that measurement.
You will want your sleeve rectangles to be at least the length of your armhole plus an additional 3”. So, if your armhole opening is 6” long, your sleeve needs to be at least 9” long. I wouldn’t suggest going any shorter, otherwise you’re going to run into issues attaching elastic to the edge of your sleeve.
The Importance of Ironing
Now, I should note that I did not iron my sheet before cutting this dress out. I really do not like ironing sheets. They’re just so big and bulky, and since this is not a dress of precision, I’m not too worried about it. I did iron these rectangles after I cut them out, and I you will see how important it is to iron this dress through different steps as we go through this tutorial.
One Additional Rounded Rectangle Cut
You are going to make one additional tiny and simple cut to each rectangle you cut out.
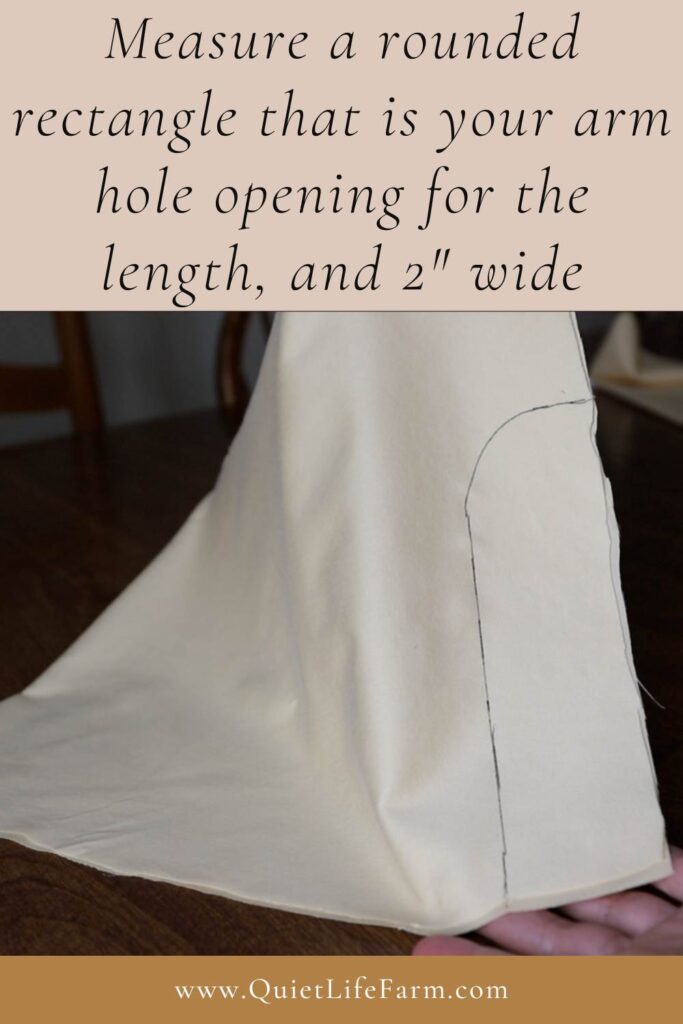
Fold your front dress panel in half lengthwise. On the corner of the dress, measure out a little rectangle that is however long you want your armhole opening, and 2” wide. Curve the inside corner of your rectangle. Repeat for the back panel of your dress.
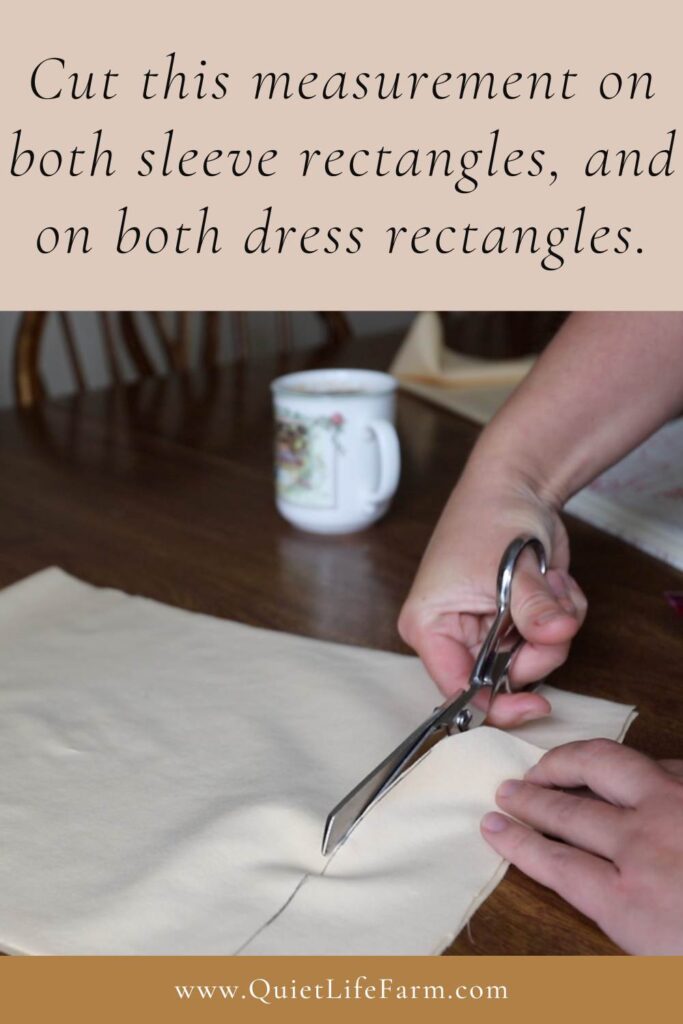
For each sleeve, fold it in half and again measure out the same size cut you just made on the front and back panel of your dress, curving the corner just as you did before.
Sew The Sides Of The Dress
The next thing you will want to do is sew the sides of the dress together.
Start at the bottom of where you cut out an opening for your armhole – you want to leave that opening OPEN for attaching the sleeves later.
You can sew the sides right sides together, but they are going to hold up so much better if you use a french seam.

So, I suggest sewing the front and back of the dress wrong sides together, cutting your seam allowance as close to the stitching line as you can, and then sewing the dress right sides together.
Your seam allowance doesn’t really matter for this project, as long as you’re not using something excessively large or excessively small as your seam allowance. Just be consistent with whatever seam allowance you use.
Sew The Sleeves
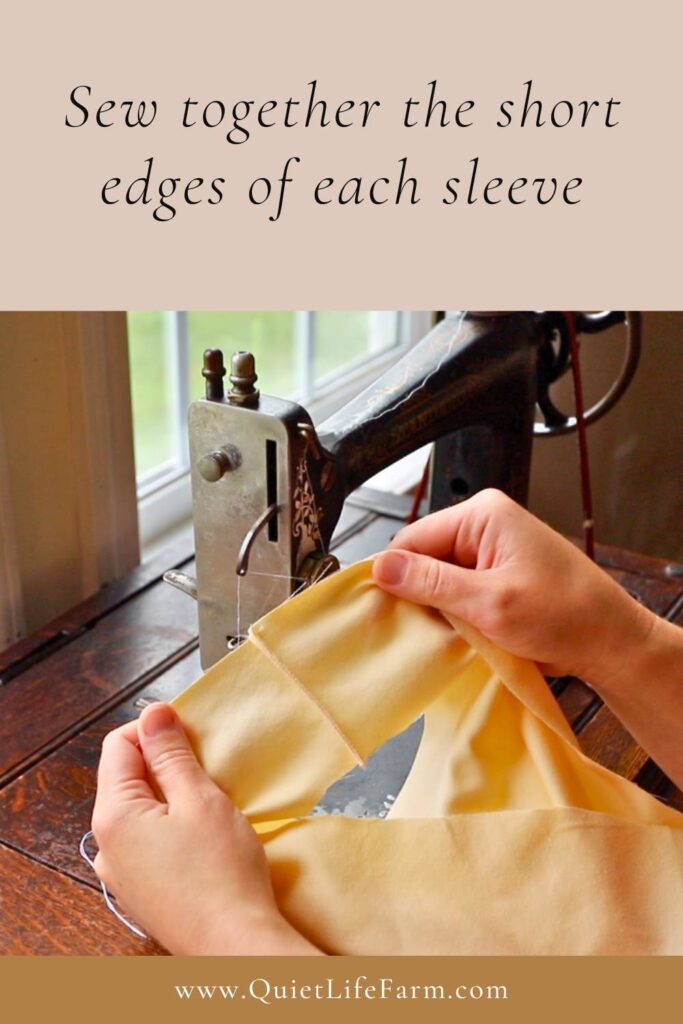
Next, you’ll want to sew your sleeves together.
Again, you’ll want to leave the cut you made for the armholes OPEN. (don’t sew the cut you made)
Just sew the remaining length of your sleeves together.
Again, I used a french seam for this part.
Sleeve End Elastic
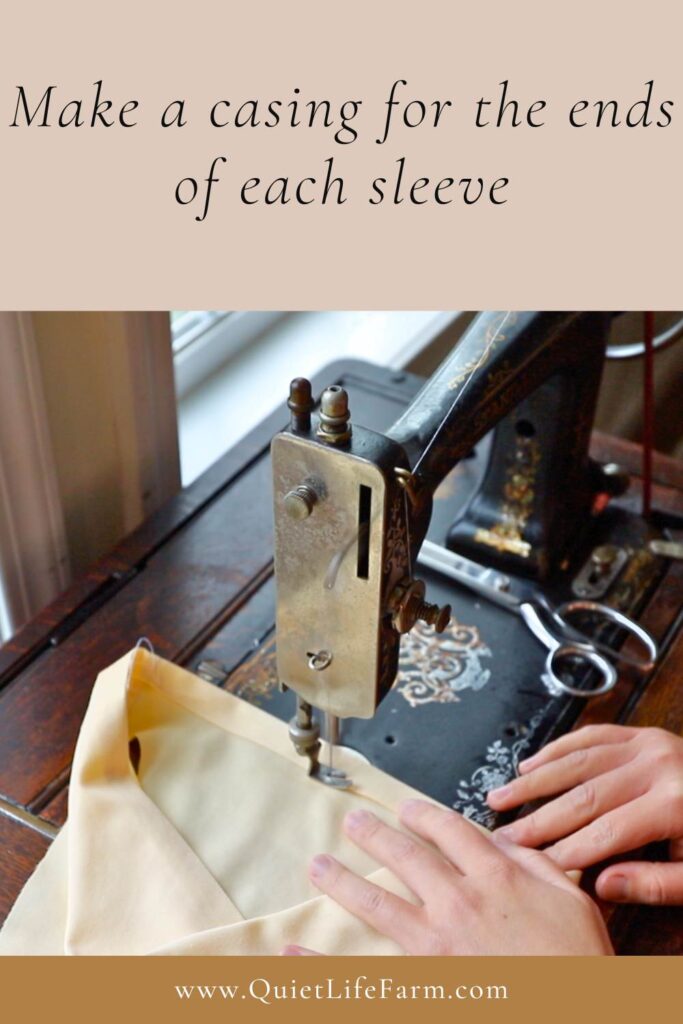
Next, you’ll want to iron down a casing for your elastic at the edge of your sleeves.
This is going to make a puff sleeve for your dress. (Instead of hemming the sleeves, we’ll be putting some elastic there)
Fold down the very edge of your sleeve and iron it into place.
Then, fold a second time to enclose the raw edge of your fabric, making this fold just large enough to put some 1/4” width elastic through it.
Sew this fold down into place, keeping as close to the inside edge of the fold as you can.
Leave a little opening while sewing this part down, as you need to stick some elastic through here next.
Measure how long you want your elastic to be around your arms, and subtract 1” of that measurement.
Cut your elastic to length, and weave it through your sleeve.
Overlap the ends of the elastic about an inch, and sew them together.
Lastly, you’ll want to sew the little opening of your casing closed.
Repeat this for your other sleeve.
Sew The Sleeves To The Dress
To sew the sleeves to the dress, find the openings you cut on both your dress panels and on your sleeves.
You’re now going to sew each sleeve to each one of these armhole openings.
I used a french seam to sew the sleeves onto the dress, too.
The sleeves should line up in the armhole openings pretty exactly.
Neckline and Shoulder Elastic
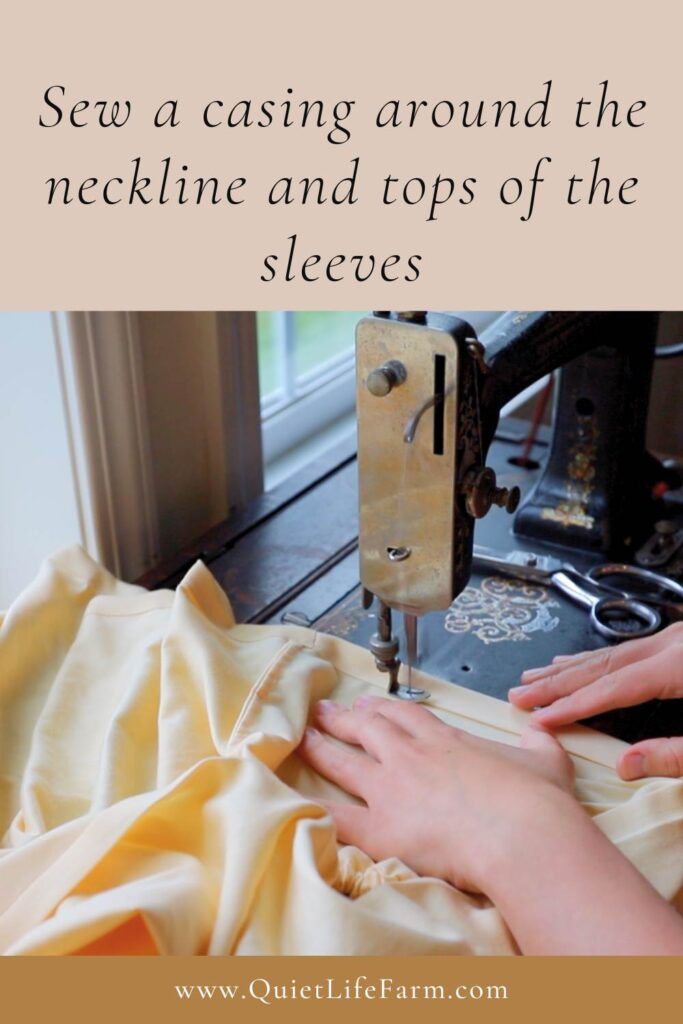
Now that the sleeves are attached, we are going to iron down another casing at the top of the dress for more elastic.
This casing needs to go all around the neckline AND all around the tops of the sleeves.
I have found that the best way to measure the elastic for this part is to fit it directly to your body.
It’s easiest to weave the elastic through the casing of your dress FIRST, but do not cut it to length.
Then, carefully put on the dress.
From here, you can adjust it exactly how you want it to lay on your body.
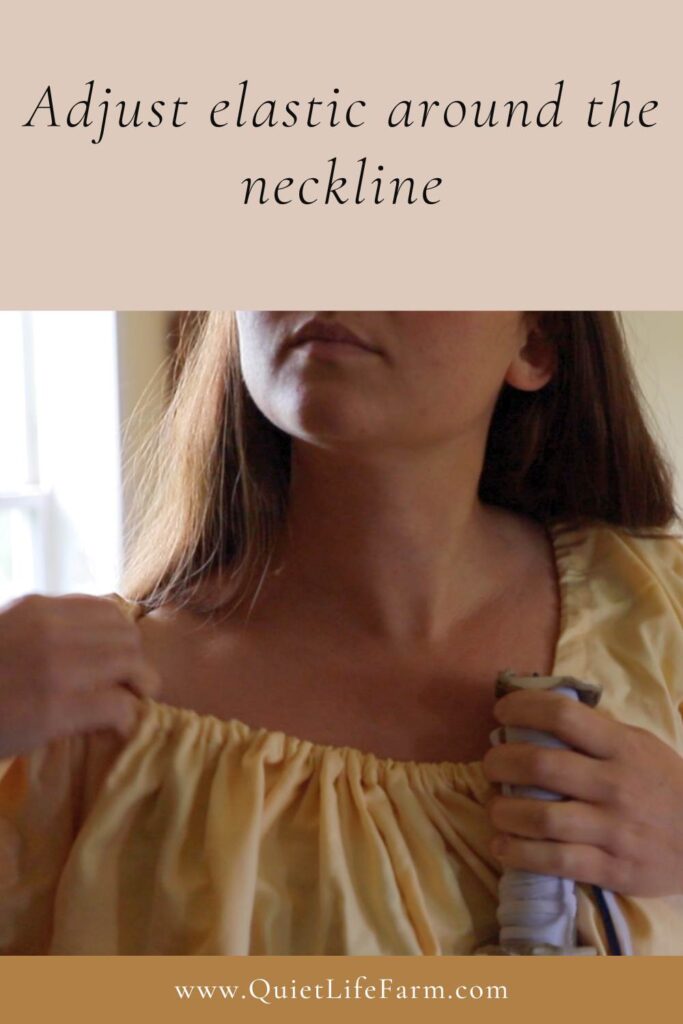
Sew the elastic together, and sew the opening of the casing closed.
Waistline Elastic
Next, we’ll want to mark where we want the top elastic around the waist to go.
Put your dress back on, but put it on inside out.
I used a heat-erasable pen to mark where I wanted my top row of elastic to go, being as straight as possible and just making a few marks as guides.
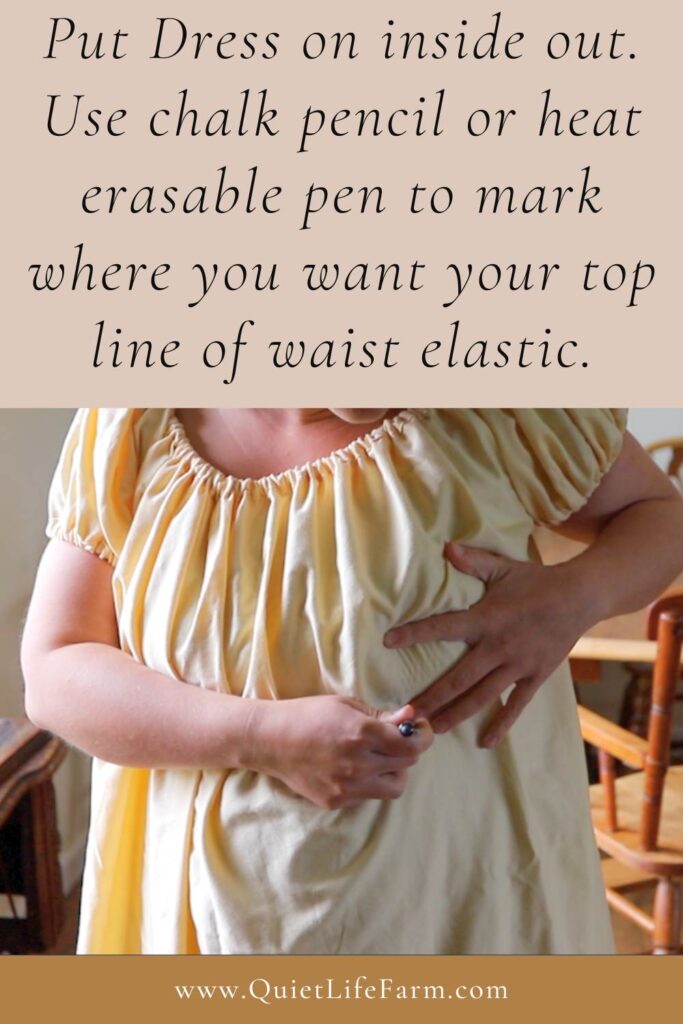
Then, take off the dress, and lay it on a flat surface.
Use a straight line as a guide, and even a ruler if you have one handy, and make your “official guide line” for your elastic where it should go.
Don’t forget to mark both the front and the back of your dress.
Then, use a ruler and measure a second row of elastic somewhere between 3-4” down from this line of elastic.

Make sure it is consistently the same distance lower from the top elastic line.
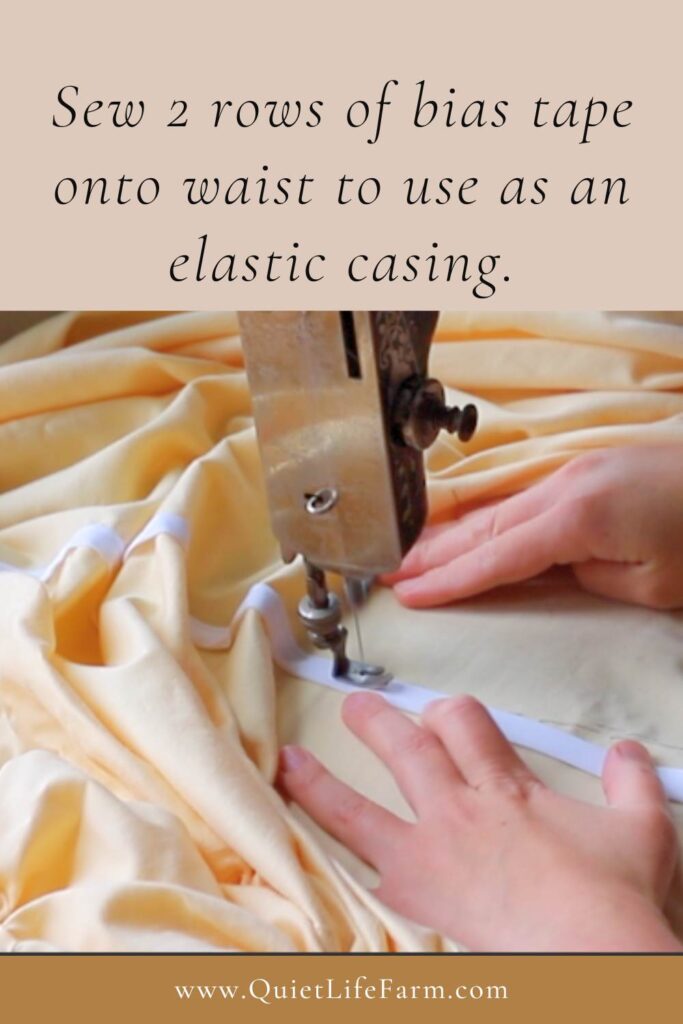
Now, I have found that the easiest way to attach the elastic to the waist is with some bias tape to use as a casing.
I used 1/2” bias tape and left it folded.
I sewed the edge of the bias tape directly onto my traced lines, making a “tube” for the elastic to go through, and leaving an opening at the beginning and the end.
Measure how long you want your elastic to be around your waist.
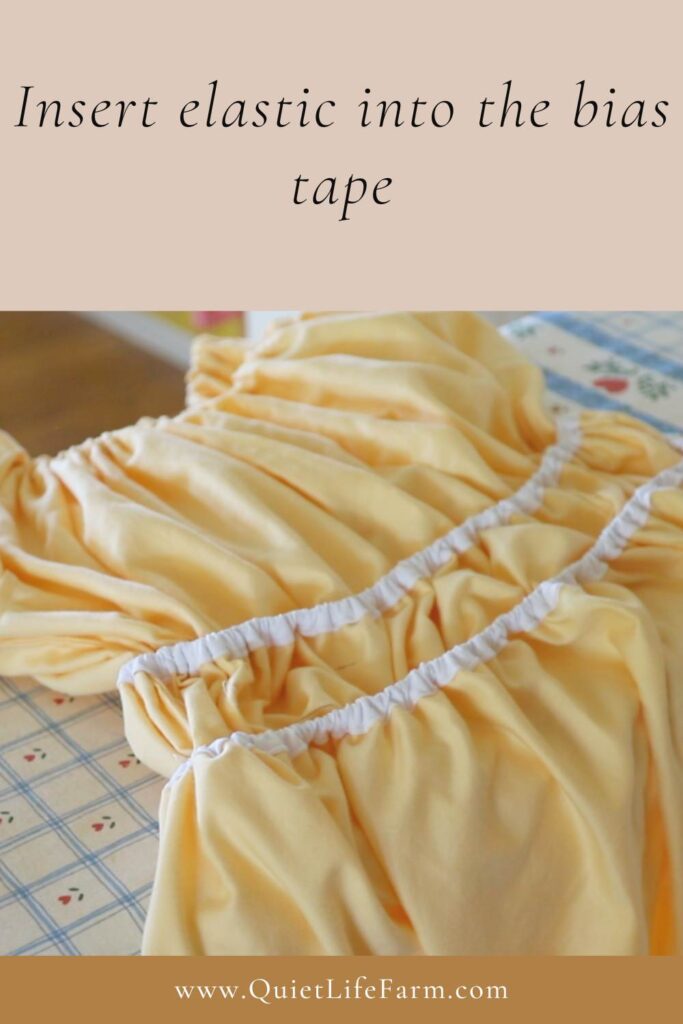
You can measure this by putting the dress directly onto your body if you’d like, but if you don’t want to have to weave it through your casing a second time, you will want to use a safety pin to pin together the beginning and the end of your elastic, otherwise it will pull itself out of the casing when you take the dress back off to sew the elastic to the dress.
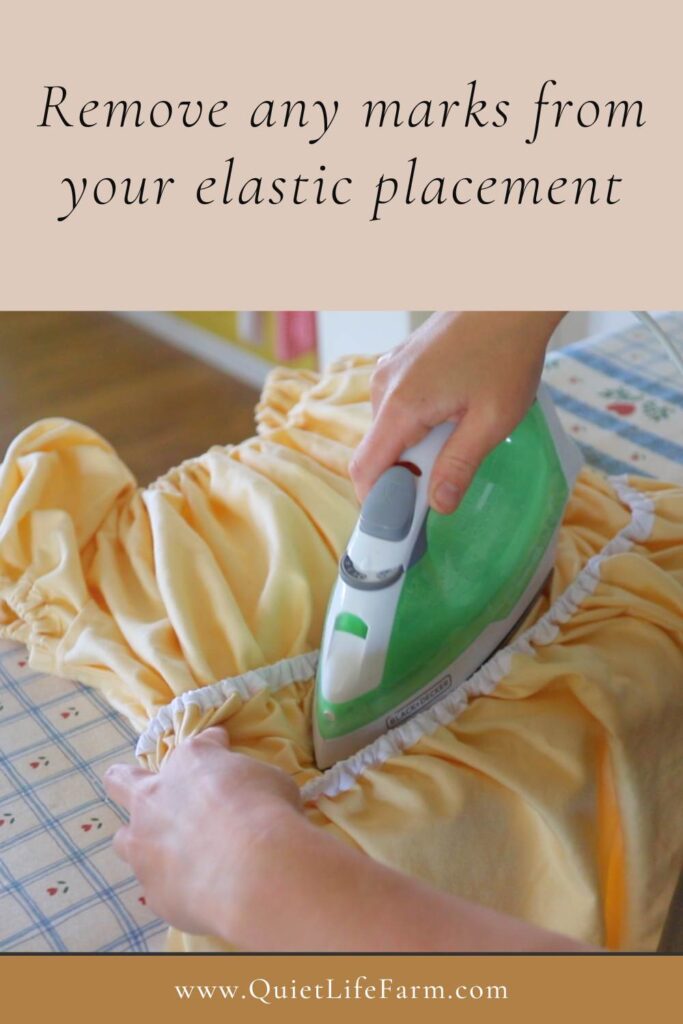
Ideally, if you use a heat erasable pen, you will iron away your pen marks BEFORE you put the elastic into the casing, but I don’t always play by the sewing rules. A chalk pencil would be another great tool for marking where your waist elastic should go, too.
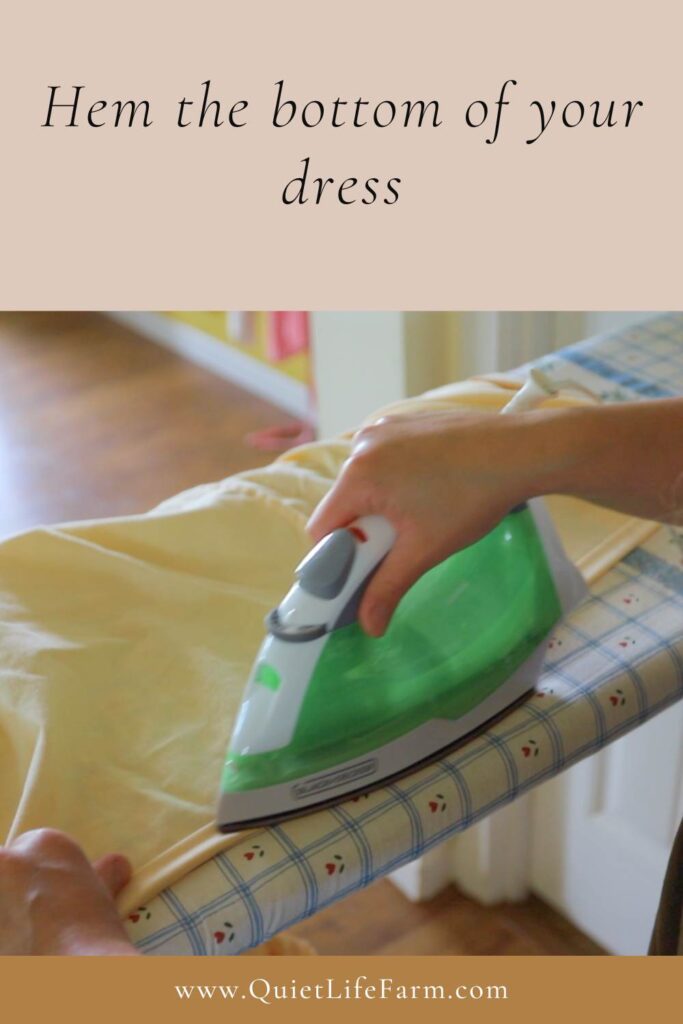
Hem Your Dress
Lastly, you will want to hem the bottom of your dress. Fold your hem twice over, iron it into place, and sew.
That’s it! Your dress is completed! Let me know how it went in the comments below!