How to Sew a Simple Gathered Skirt (without a pattern!)

As an Amazon Associate, I earn from qualifying purchases.
Here’s how to easily sew a gathered elastic skirt in any size!
No need for a pattern — all you’ll need to do is measure and cut out two squares.
No complicated measurements, either! No scary math!
It’s so easy to make this style skirt, and it only takes about 30 minutes to make one!
Please be sure to check out my YouTube video on how to make this skirt by clicking this link!
The Supplies
To make a skirt, you’ll need:
- Fabric
- 3/4″ width elastic
- Sewing measuring tape
- Pencil
- Scissors
- Sewing Machine
- 2 Safety pins
Elastic
This skirt uses elastic to create a gathered waist.
Elastic makes this skirt extra comfy!
I like to buy my elastic in bulk. It’s so cheap that way! I paid $5 for the whole roll of elastic — it’s going to last me a very long time. This is what I bought. Of course, you can use any 3/4″ width elastic that you want to!
The Measurements
You’ll need to make 2 measurements for this skirt.
- Measure around your waist where you want your skirt to lay.
- Measure how long you want your skirt to be. (knee length? ankle length?)
Write down those two measurements!
The Math
There’s some very simple math you need to do with your measurements now.
- Subtract 1″ from your waist. Cut your elastic to this length. (If your waist measurement was 20″, cut your elastic at 19″ long)
- Add 4″ to the length of your skirt. (if you want your skirt to be 21″ long, you will want to measure out 25″ in length)
Next, you will cut two squares for your skirt.
Tip: Fold your fabric in half so that you only need to trace and cut once!
For the width of your skirt, measure out the full width of your waist. (don’t subtract anything like you did for your elastic!)
For the length of your skirt, measure out the “+ 4″ length measurement (if you want your skirt to be 21″ long, you’ll want to use the 25” measurement in length we discussed)
So, if you measured 20″ for the waist, and want your skirt to be 21″ long, you will need to measure a square that is 20″ wide and 25″ long (and cut out two squares in this size!).

Use a Zig Zag Stitch
Now that you’ve cut out your squares, you’ll want to use a zig zag stitch on the edges of your squares all the way around.
(it’s okay to NOT use a zig zag stitch on what will be the bottom edge of your skirt, but if you aren’t sure which side this is yet, just use a zig zag stitch all the way around)
Using a zig zag stitch will prevent your skirt from fraying.
Attach Your Squares Together
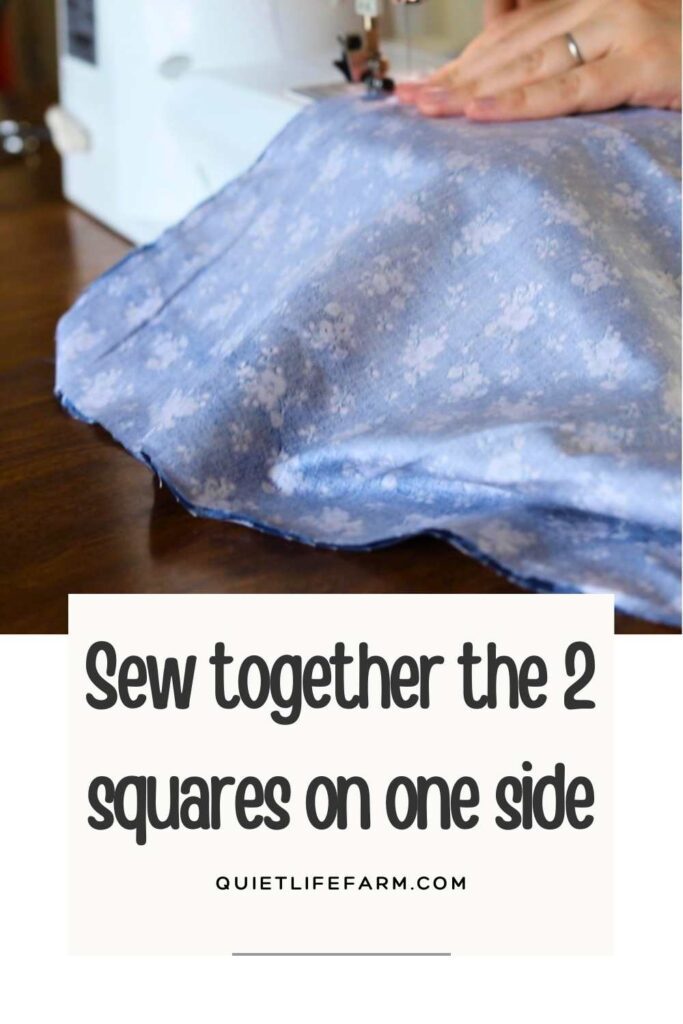
Next, lay your fabric right sides together.
Sew along one edge (your “length” edge).
Use a 1/2″ seam allowance.
This will make one long rectangle.
Make The Waistband

Next, we’ll make a little “pocket” for your elastic to go through.

This will be the waistband of your skirt.
Fold the top zig-zagged edge of your skirt down, about 1″ or a little more.
Use your 3/4″ width elastic to figure out how much of your fabric to fold down.
You’ll want to fold it down enough for the elastic to go through — bearing in mind that you will need some room to sew, too!
Sew the waistband into place.
Attach Your Elastic

Next, attach a safety pin to the end of your elastic.
Use a second safety pin to secure the other end of your elastic to your skirt.
Use the safety pin attached to only your elastic to guide your elastic all the way through this “pocket” you have created for your waistband.
Once your elastic comes out the other end of your waistband, sew each end of your elastic firmly into place before removing your safety pins.
Create your “skirt shape”
Now that your skirt has the elastic in it, you should have a nice gathered piece of fabric!
Fold your skirt in half so that it looks like a skirt.
Sew (with a 1/2″ seam allowance) up the side of your skirt.
It should really look like a skirt now! You’re nearly finished!

Hem the bottom of your skirt
Lastly, you will need to hem the bottom of the skirt.
Fold the bottom fabric of your skirt over TWICE so that all the raw edges hidden.
Even if you used a zig zag stitch on this portion of your fabric, it is still a good idea to fold the fabric over twice before sewing your hem. This is the the area of your skirt most likely to fray over time, so folding over the fabric twice will remove that possibility entirely!
Once you’ve hemmed your skirt, it’s finished!
Happy sewing!