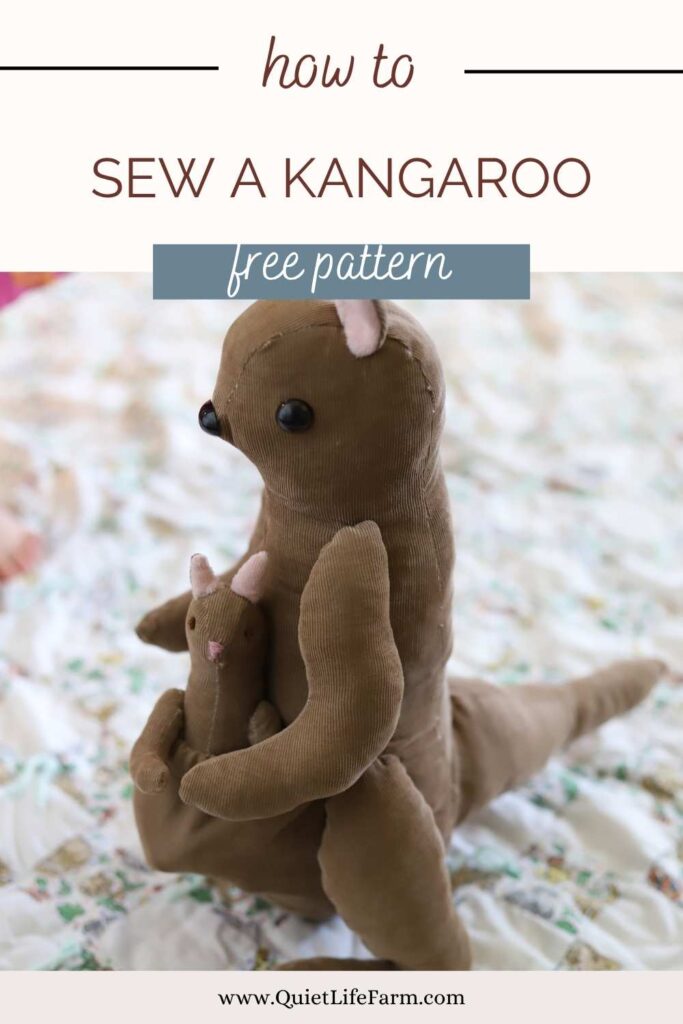
DIY Kangaroo Stuffed Animal: FREE Sewing Pattern
Here’s a free sewing pattern for a kangaroo doll, complete with her baby joey!
This kangaroo is a FREE sewing pattern that you can print out below!
The kangaroo has a stretchy pouch that fits a baby kangaroo inside.
The baby joey is part of this free pattern, too!
Print out the pattern below, then come back to the blog and follow along with my photographed, step-by-step tutorial.
You can also watch me make this kangaroo in my YouTube video!
Free Sewing Pattern
Make sure your printer is set to 100% scale when printing the pattern!
The pattern comes with a 1″ guide to make sure everything printed out properly.
(if it’s slightly off on your printer, don’t stress too much! As long as everything is EVENLY off and nothing is TOO large or TOO tiny, it should work up just fine!)
Here’s the free sewing pattern:
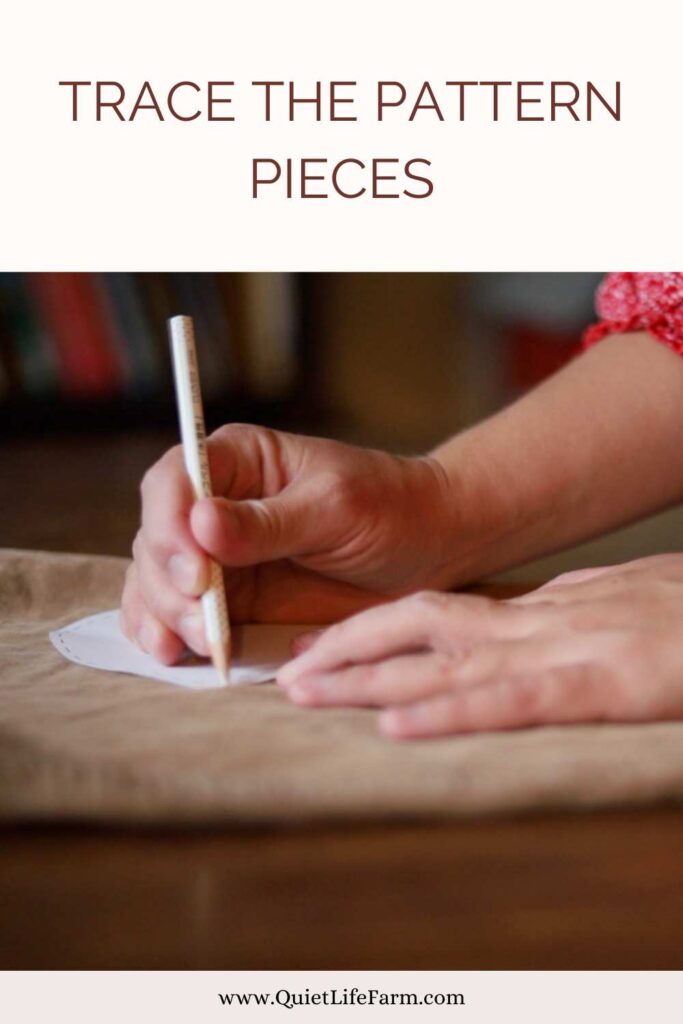
Cut out your templates
The sewing pattern prints out onto standard sized printing paper, which means a couple of the pattern pieces are divided onto two pieces of paper.
You’ll need to tape these pattern pieces together before getting started.
Don’t worry — the pattern marks where you’re supposed to tape everything together!
Cut out your templates, and trace as needed.
Getting Started
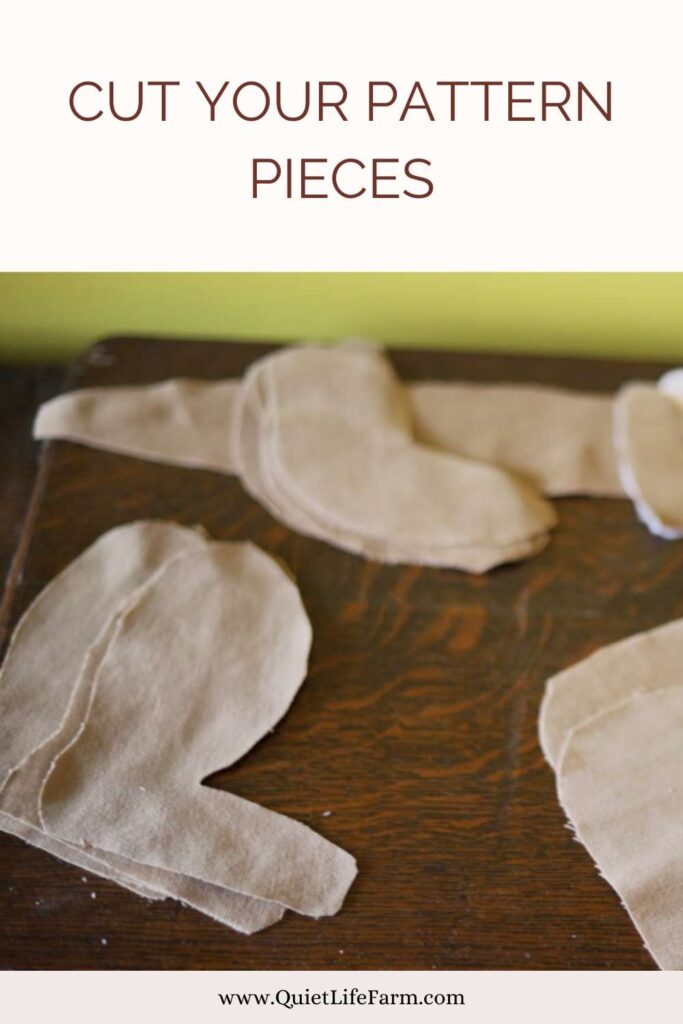
Cut out your pattern pieces and trace them onto your fabric.
You’ll also want to use two pieces of interfacing for each ear, a contrasting fabric for the inner ear, and a bit of lining for the inside of the kangaroo’s pouch.
I used featherweight interfacing, a soft cotton velvet for the inner ears, and I used a cute bedtime printed Flannel for the inside of the pouch.
Iron your pieces, and iron the interfacing onto your ears.
You’ll want a piece of interfacing onto the back of each ear and onto each inner ear. You’ll do the same for the little joey.
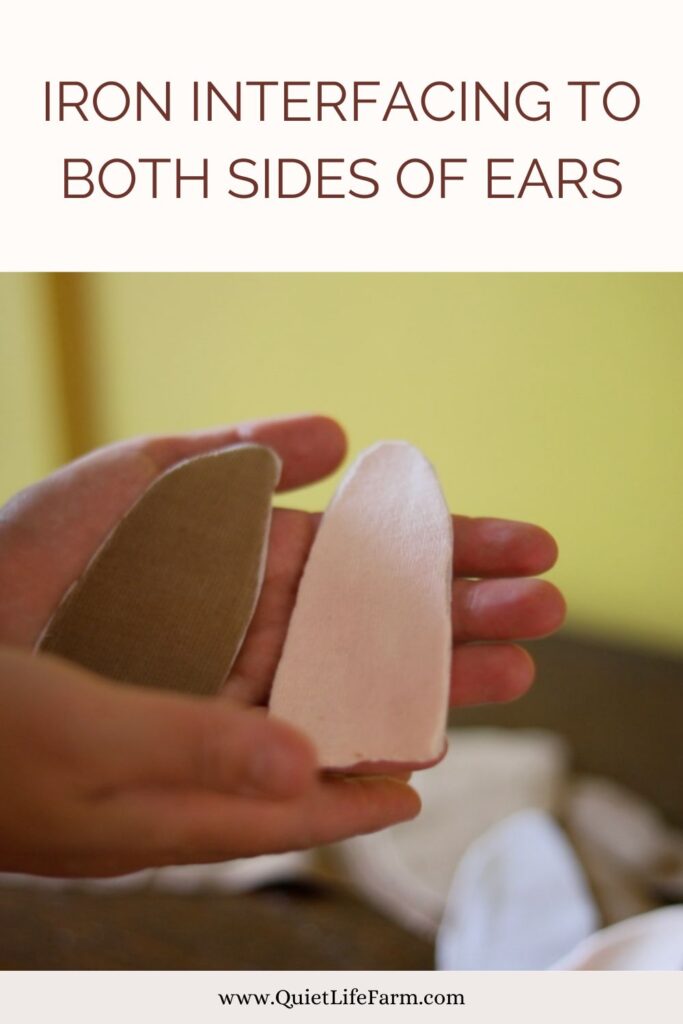
Iron all of your pieces.
Making the Body
The body of the kangaroo is made up of three pieces: two sides, and a gusset that runs from the tip of the nose, down the back, and all the way to the rear of the kangaroo.
Sew the sides of the body right sides together from the tip of the nose, down to the bottom front of the body.

Sew the dart at the bottom of the gusset.
Then, sew the gusset to each side of the body.
Leave a little opening at the bottom of the body so you can turn it right side out and stuff it.
Attaching the Eyes and Nose
I like to stuff just a little bit of the head to see what shape it takes, and then attach a pair of safety eyes and a safety nose.
You can also simply embroider some eyes and a nose onto your kangaroo, but I would wait to do that at the very end of the project.
After stuffing the body, hand sew the opening closed.
The Arms and Legs
The arms and legs are made by sewing the pieces right sides together all the way around.

Then you’ll cut a little hole through one layer of fabric right at where a shoulder or hip joint would be.
Pay close attention when doing this to the arms and to the legs.
Cut one limb, then closely examine both arms or legs before cutting the second hole, because you’ll want to cut the opposite side for the second limb so that both arms and both legs are facing forward when you attach them to your kangaroo.
Use the holes to turn each arm and leg right side out, then stuff them tightly before using a hand sewing needle to sew the hole closed.
You’ll want to use a hand sewing needle to attach the arms and legs to the body of your kangaroo, sewing a little circle all the way around each sewn-up joint hole. I used a ladder stitch for this part.

The Tail
To sew the tail of your kangaroo, sew each sides together from the long top edge to the tip of the tail, then sew the gusset to the bottom of the tail.
Turn right side out and stuff.
Leave the opening open, as it will keep the tail in a nice round shape when you sew it to the kangaroo’s body.
Sew the tail of the kangaroo on by hand. Sew it closer to the bottom of the body rather than the middle, because that’s where the tail is on a real kangaroo.
The Ears
Sew the ears right sides together.

When you hand sew these to the top of your kangaroo’s head, you’ll want to fold the raw edge of the ears to the inside of the ear while sewing around.
(You’ll attach the tail of your kangaroo in the same way.)
The Pouch

To make the pouch, sew the outer piece and lining piece right sides together, leaving a bit of the top edge open for turning it right side out.
Fold in the remaining opening and sew closed. Then, sew the dart at the bottom of the pouch.
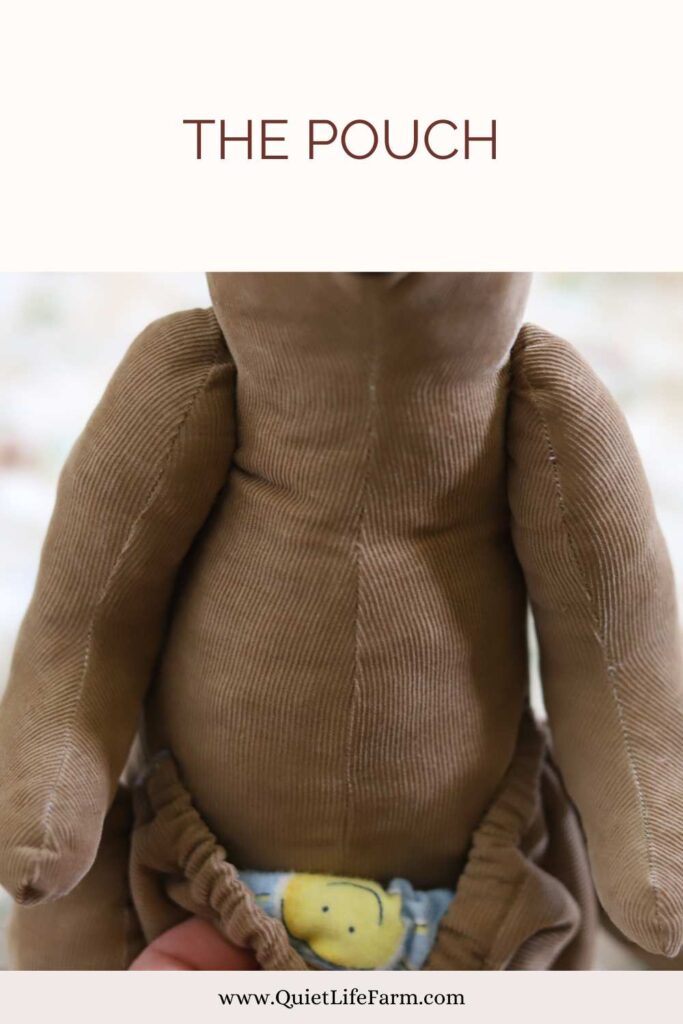
I used some 1/4″ elastic to attach to the top of the pouch to make a nice and stretchy opening, and I attached it to the kangaroo’s belly by hand.
The Joey

This mama kangaroo needs a little joey for her pouch, and I still had a little leftover fabric from the shirt, so I made her a little baby, too.
The joey is made in the exact same way as its mama, except that you’ll likely want to do some of the sewing by hand since some of the pieces are tiny.
I sewed the ears by hand, and used a pencil to help me turn them out.

It’s also worth noting that you will NOT have to tape together any of the paper template pieces for the joey.
It is small enough that all of the pattern pieces fit onto one page.
Happy sewing!


Hi there! My daughter is really interested in your sewing patterns but we can’t seem to find any links at the bottom of your posts. Specifically right now she’d love to make the Waldorf bunting doll.
Thank you!
Katherine
Hello, Katherine! I’m happy to help! 💛
My free patterns aren’t downloaded directly from the blog — they’re sent to you by email after you fill out the form on each pattern page.
Here’s what to check next:
1️⃣ Look for an email from Quiet Life Farm in your inbox
2️⃣ If you don’t see it, please check your Promotions, Updates, or Spam folder — sometimes it lands there
3️⃣ Once you find the email, it will include a link to the pattern that you can open and print
If you still can’t find it after checking those folders, please send me an email and let me know — I want to help and be sure that your daughter has access to my free patterns!
Thank you so much for being here and for your patience. I hope your sweet daughter enjoys making all the patterns!