Little Duckling Free Sewing Pattern
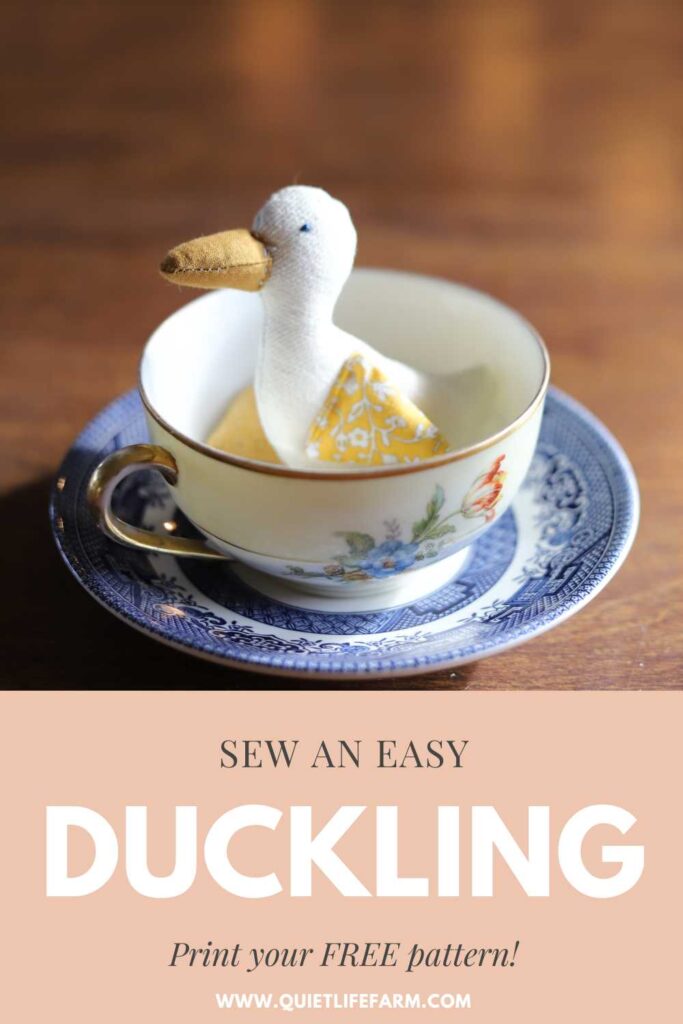
Today I will be showing you how to sew a tiny duckling.
Since this duckling is so tiny, it is the perfect project for scrap fabric!
This is a free sewing pattern that you can print below.
You can also watch my video of me making this duckling for a complete sew along!
Print your free pattern below!
Below, you can print your free duckling pattern.
The pattern will be sent right to your email inbox, ready to print!
Trace Your Pattern

After you print out your sewing pattern, cut out each little pattern piece.
For such a tiny sewing project, we will not be cutting out such tiny pieces of fabric to work with.
Instead, fold each piece of fabric right sides together, and trace each pattern piece onto your folded fabric without cutting it out afterwards.

Sew Your Pieces

Instead of cutting out each piece after it is traced onto your fabric, sew directly on your traced lines, right through your two layers of fabric.
Creating each piece of your little duckling this way is so much easier than cutting out each piece and trying to sew it together.
When you sew over your traced lines, be sure to leave any edges on your template marked with dotted lines open.
Leaving the dotted edges open is important for being able to later turn your pieces rights side out and stuffing them with wool.
Sew slowly and carefully over your traced lines. When you need to make sharp turns, just stop sewing, leave your needle down in your fabric, and lift up your presser foot while turning your fabric the way you need it to go. Then put your presser foot back down before you continue sewing.
Backstitch at the beginning and end of your stitches so your stitches don’t come undone.
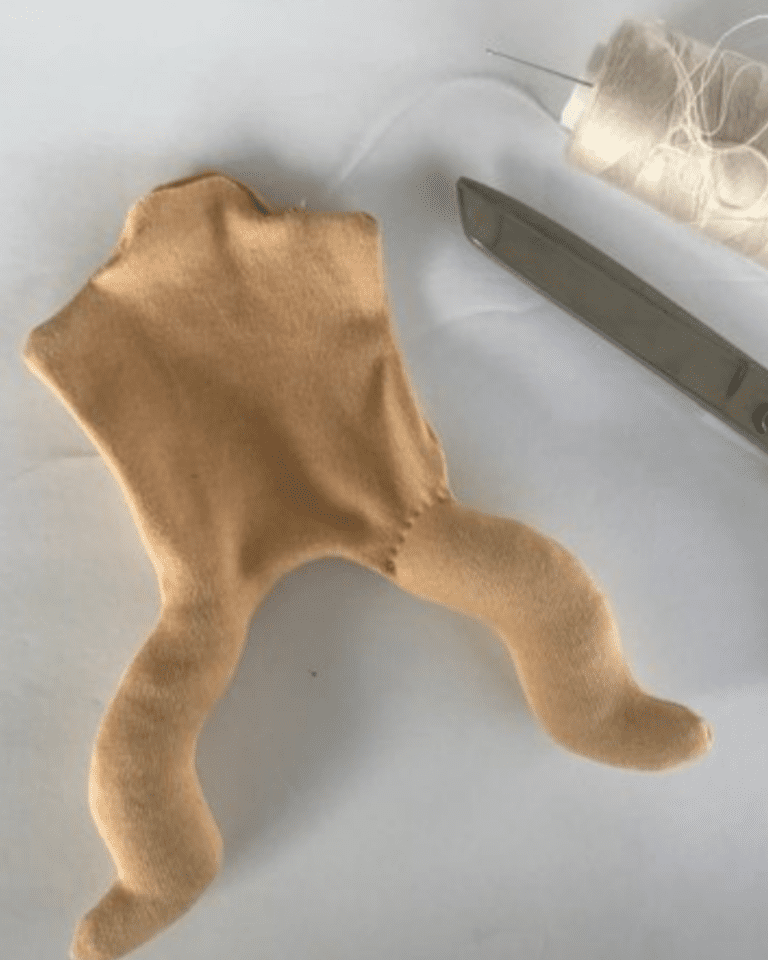
You will want to make one beak, one body, two legs, and two wings for your duckling.
Cut Your Fabric

Once you have sewed everything you need for your duckling, cut each piece out, leaving a seam allowance around your stitches.
I leave somewhere around a 1/4″ seam allowance, and even leave a seam allowance on each of my open edges that were marked with a dotted line on my template.
Before turning your pieces right side out, you will want to cut notches in your seam allowance around any curved edges.
This will help your fabric to not bunch up once you turn your pieces right side out.

Turn your pieces right side out.
I like to use the eraser end of a pencil to help me turn out such tiny pieces.
The eraser on the pencil helps give a little extra “grip” on my fabric. It really helps make this process easier.
Stuff With Wool

The pencil is also great for stuffing your pieces with wool.
I like to use wool because I have it in abundance from our sheep.
Wool adds a nice weight to your duckling and also helps it hold its shape for a very long time.
Any kind of fiberfill will work for this project.
I’ve been known to even remove the fiberfill from a thrift store pillow to use in similar projects.
Fold the raw edges of the duckling’s body inside your little duck.
Take a hand sewing needle and thread, and sew the bottom of the body closed using a whip stitch.
After making a knot at the end of your stitches, use your needle to hide the end of your thread inside the duckling’s body before cutting your thread short.
This helps keep your stitches neat, hidden, and strong.
When stuffing the legs with wool, don’t stuff them all the way to the top of the leg unless you want the legs to be very stiff and not have much movement.
Then, use a pencil to fold the raw edges of the tops of the legs inside the legs.
There’s no need to sew the raw edges into place before sewing the legs onto your body.
Stuff the wings firmly with wool, and just like you did with the legs, use a pencil to fold the raw edges of the wings to the inside of the wings.
Use your pencil to stuff the beak and fold in the raw edges.
Assemble the Duckling

Use a hand sewing needle to sew the beak onto your duck.
When sewing on the beak to the duckling, I sewed with the needle coming out the opposite end, sewing in a circle until it was firmly attached.
Tie a knot, and use your needle to pull both ends of thread deeply inside your duck’s body before cutting the thread.
Hold the wings against the sides of your ducks body, and use a hand sewing needle to sew through both wings and the body all at the same time to attach the wings.
This will allow you to sew on both wings at the same time.

When sewing on the legs, you will sew them in the same way you attached the wings.
Sew both legs onto the body at the same time.
Hide all ends of thread inside the body of your duckling.
Embroider the Eyes
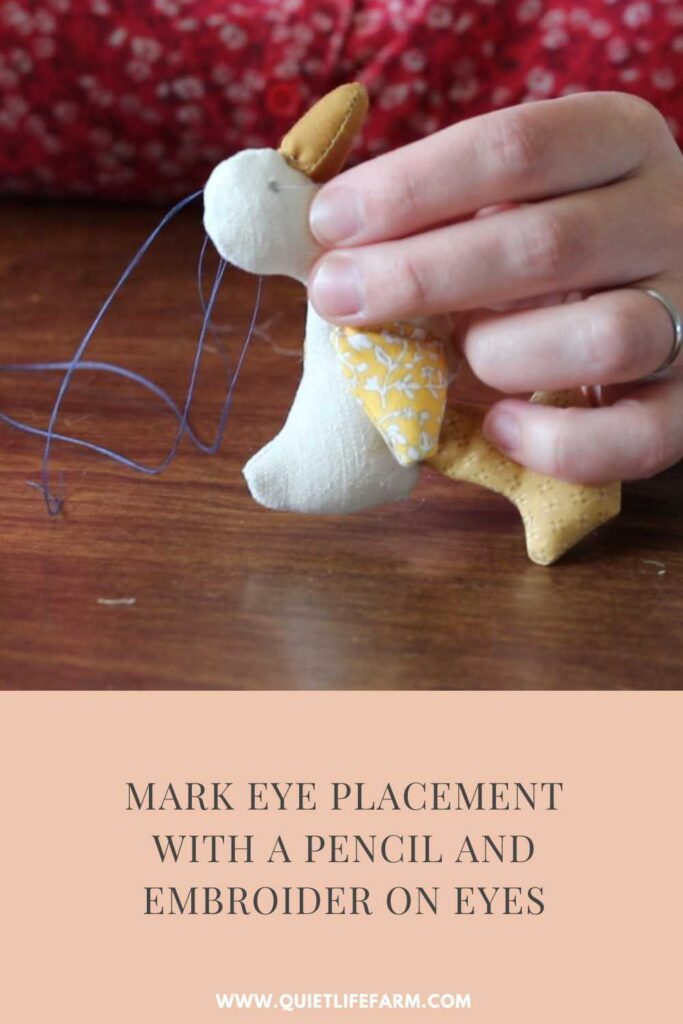
Use a pencil to mark where you would like to place the eyes on your little duck.
Then, embroider little eyes on your duck using a french knot or two.
After embroidering the eyes onto your duck, you’ll want to hide the ends of your thread inside your duckling, just as you have done with the other long ends of thread while sewing together your duck.
Happy Sewing


Thank you Emeline for these super helpful patterns. Today I made the Little Mouse, and I have plans to make the Duck, Dinosaur, Cat eye pillows and Envelopes. ALL for family Christmas presents. Sending thankful hugs and excitement from sunny South Africa xxxx
Those are such sweet and ambitious plans! How wonderful! You are so skilled to be making these!
Warmest wishes to you.