Cloak with Hood Sewing Pattern and Tutorial: FREE
Want to make a dress up cloak with a hood? Look no further — today I’m sharing a printable pattern complete with a tutorial! Perfect for children’s dress up, this is a quick and easy sewing project!
Disclaimer: As an Amazon Associate, I earn a small commission on qualifying purchases at no extra cost to you! Thank you for your support!
Update: Click here for my free tutorial on making a Jedi robe!
Supplies Needed:
- Cotton Fabric – 2 yards
- Additional 2 Yards Cotton Fabric for Lining
- Your basic sewing supplies: scissors, a sewing machine (if you have one!), needle and thread
- Sew on clasps to keep the cloak on
- Embellishments such as this gold trim I used!
- My free printable pattern, found below!
Getting started on your cloak
I have made a ton of them over the years.
Cloaks are one of my kids’ favorite playthings!
They’re so versatile — you can act out so many stories with them!
I’ve made cloaks that are lined with silk that close with beautiful ornate clasps and are trimmed with the most beautiful and sparkly trim!
I’ve even made nearly 20 child sized cloaks for my aforementioned son’s birthday party.
They went GREAT paired up with inflatable light sabers!
It was a birthday party to remember!
I used clearance fabric for all those birthday party cloaks so that each cloak cost a little over $1 each to make.
It was cheaper than buying and filling up a pinata, and the children and parents alike appreciated it much more than candy and cheap plastic pinata fillers!
Those cloaks are still in circulation in those little guests’ homes!
While making those bulk party cloaks, I timed how long it took me to make each one.
Each cloak was made withOUT lining and took me 15 minutes to make.
Not bad at all!!
So, I drew up a pattern for how I made these beloved cloaks, tested out my pattern, and now I’m thrilled to be sharing it with you!
Grab your free pattern below, print it out, and head back over here to the blog and I’ll walk you through the entire process on how to make a cloak!
Lining or no lining?
Please note that in an older version of this pattern, I made these cloaks withOUT lining (such as in the story I mentioned above about making these cloaks as party favors! Much faster to make without lining!).
You can absolutely make these cloaks without any lining! Just use 2 yards of fabric and skip any of the steps involving lining.
Instead of relying on the lining to hem all your raw edges, you will have to fold all the edges of your cloaks after assembling the hood to the cape, and you’ll probably just opt to leave the raw edge attaching the cape to the hood of your cloak as-is. (you could also finish it off with bias tape, or sew it together using a French seam!)
But — in this tutorial, I will go ahead and show you how to make these cloaks with lining. It really makes a special cloak when it’s fully lined!
And with that, let’s get started on the tutorial!
Sew The Hood
To make this cloak, use your paper template to first cut out two pieces of fabric and two pieces of lining for the hood.
Put the main fabric hood pieces right sides together, and sew the curved back side of the hood using a 1/4” seam allowance.
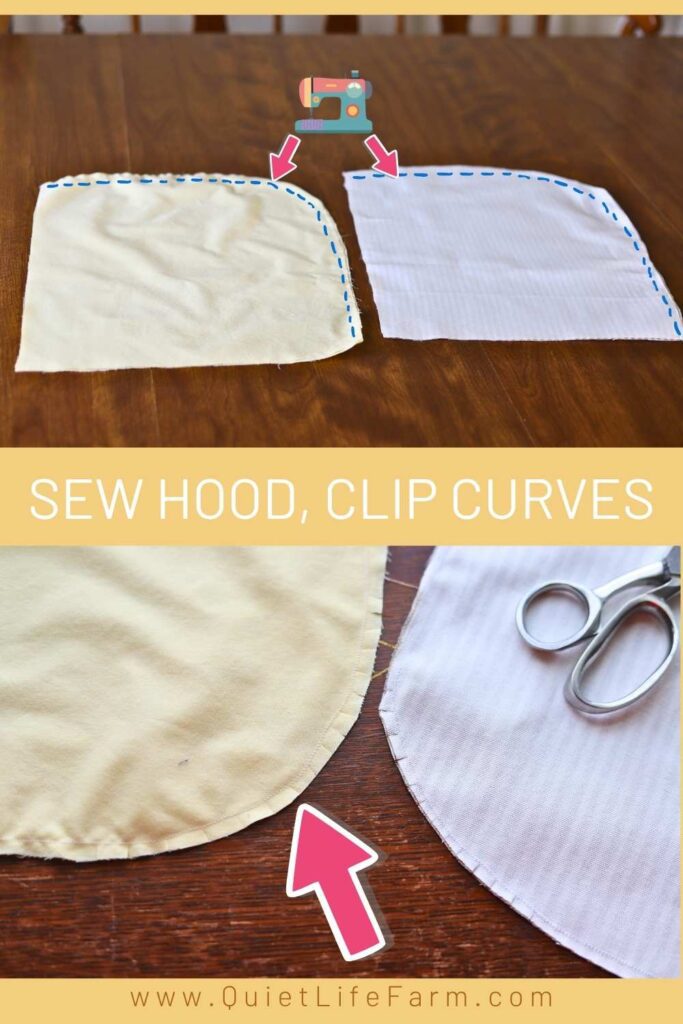
Clip into your seam allowance around the curved edge, being careful not to cut into your stitches.
Repeat this process for the lining of the hood.
Hood Lining
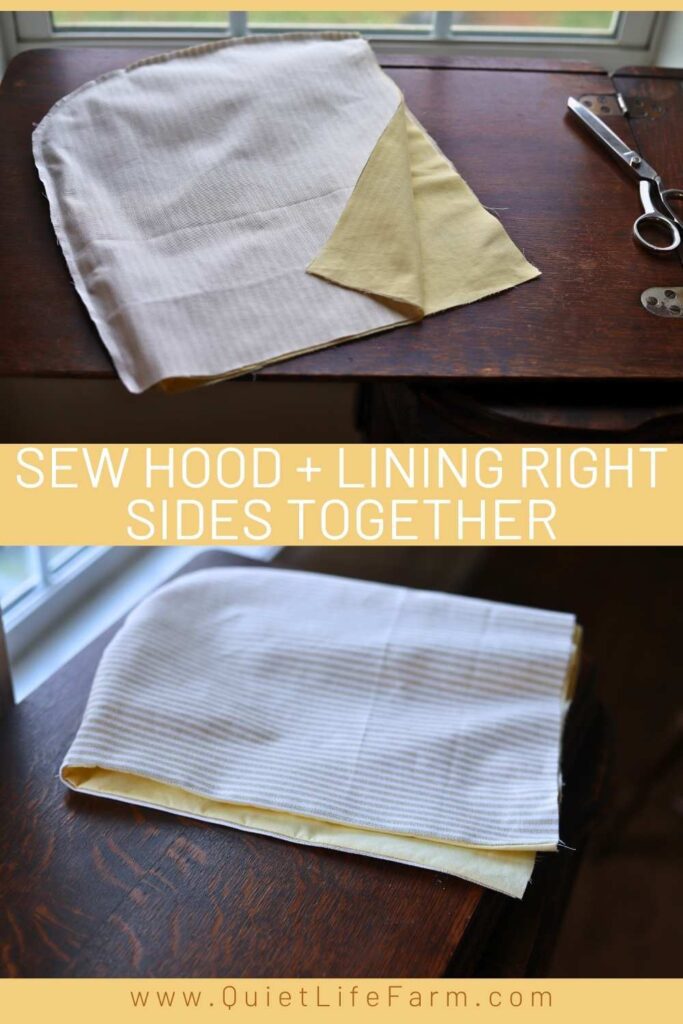
Now we’re going to sew the hood to its lining.
Put the two hood pieces right sides together.
Sew all away around the part of the hood where your child’s face will be.
The neck portion of the hood should be left open.
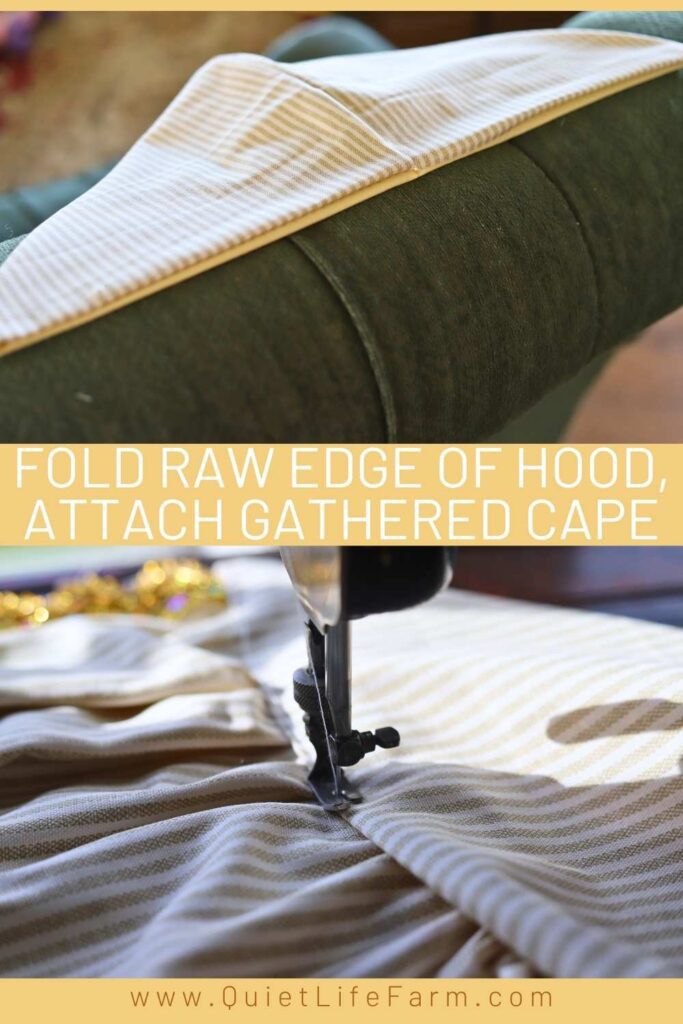
Finish The Hood
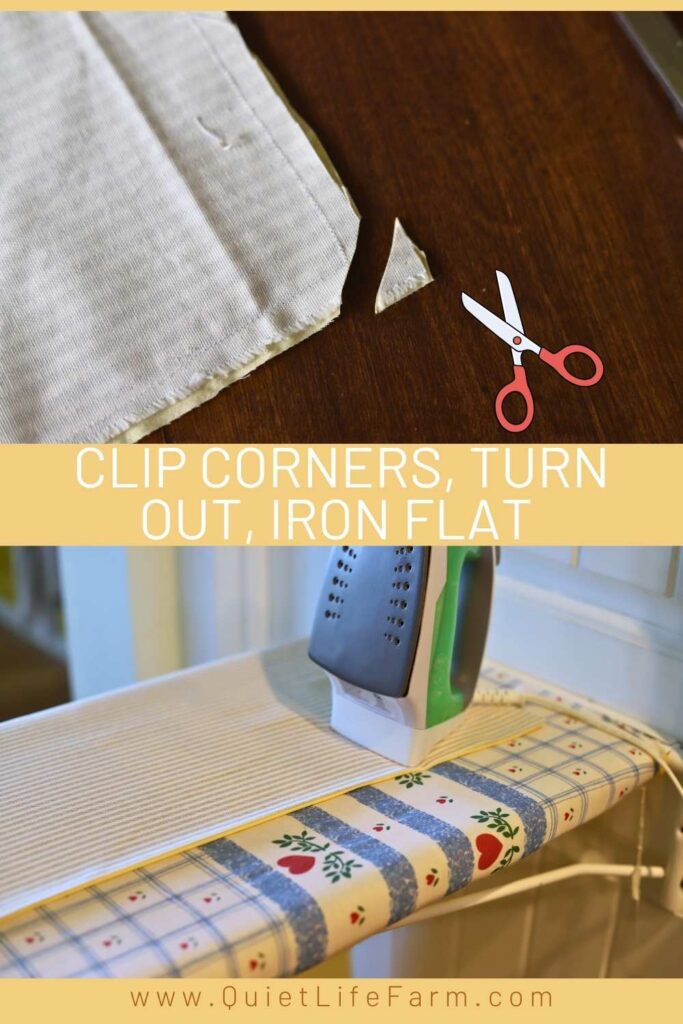
Turn the hood out, and iron it flat.
While you’re ironing, tuck in the raw edges around the neck to the inside of the hood and iron them into place.
Topstitch around the face part of the hood, but leave the neck open.
Cape
Next we’ll work on the cape part of the cloak.
Please note that the cape is just a rectangle, so I opted to not waste your paper by including it in the pattern. Just cut a rectangle that measures 44″ wide and 37″ long.
Put the two pieces of the cape right sides together, and sew the bottom edge, and the side edges.

Leave the top of the cape open.
Snip off the right angle corners of the bottom of the cape, being careful not to cut into your stitches.
Then, turn the cape right side out and give it a good iron.
Finishing the Cape
Now is the time to topstitch these side edges and bottom edges of your cloak, or to add any fancy trim you might want on your cloak.
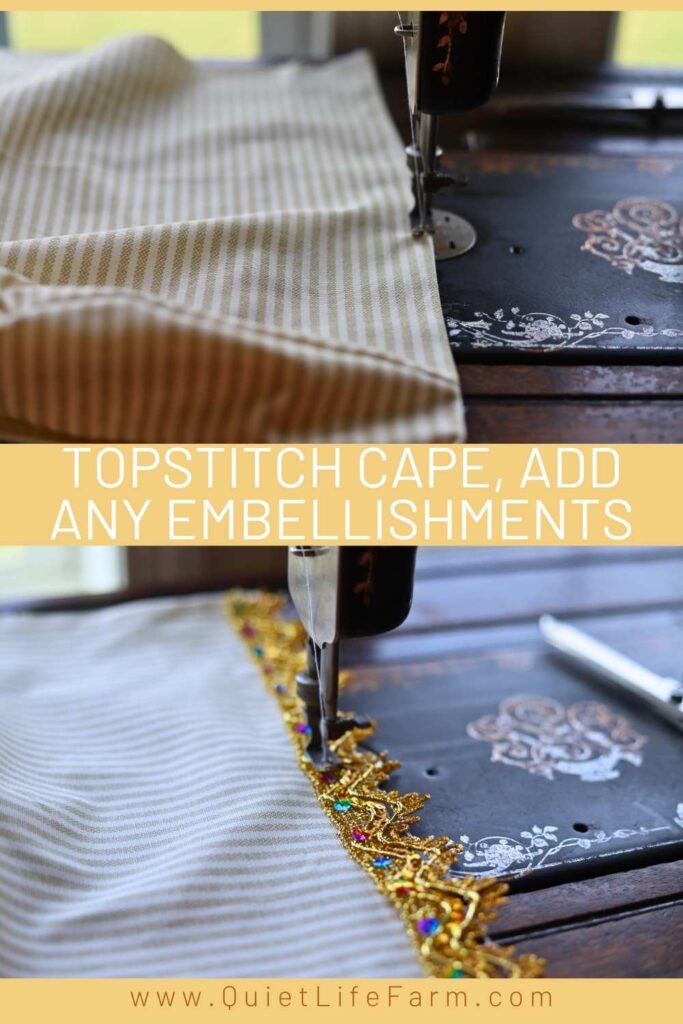
I absolutely love this fancy looking gold trim I found. It really makes this cloak feel special.

Gather The Cape + Sew To Hood
Now is the time to gather up the top of the cape.
Adjust the gathered edge so that it is the same length as the bottom of the hood, then stick the gathered edge into the hood, pin into place, and sew it together.
Sew On Clasps
The last touch you will want to do is to sew these clasps onto the cloak.
You can use any clasp that you want.
These particular clasps have a little clip on them so that you don’t actually have to sew them on if you don’t want to, but I did make a couple stitches into them just to make sure that they stayed on during play.
thank you so much for creating & sharing this Easy pattern! I’m a beginner sewer & have enjoyed doing some easy curtains, tote bags, & table runners
my daughter asked if I could do 3 star wars capes ( 2 adults / 1 child) for their Halloween costumes. Since she showed me this pattern, I know I can do it!
Thank you for ALL your free patterns & homemade goodness! Bless you!
Hi, Lisa! I’m so glad you’ve enjoyed the pattern! It’s so sweet of you to be making these cloaks for your daughter — they will be all the more special and memorable because they were made by YOU! What a blessing you are to them! Happy sewing!