How to Make Easy Pants
How to make a pair of easy elastic pants — any size!
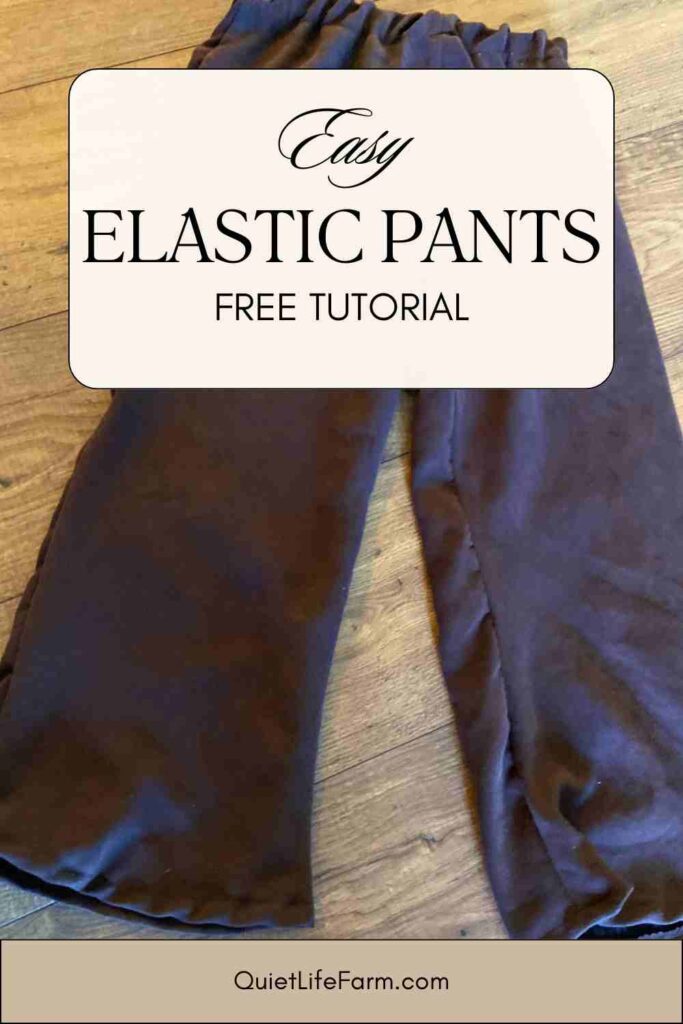
Here’s a tutorial on how to easily make a pair of elastic pants — no pattern needed!
For these pants, we’ll just use an existing pair of pants to quickly figure out sizing.
You will need:
- Fabric
- 3/4″ elastic
- Scissors
- A pencil to trace with (I use a chalk pencil)
- 2 Safety Pins
- Thread and a sewing machine
- An existing pair of pants
I made these pants as part of my son’s Jedi costume.
You can find links on how to make a Jedi robe HERE, and how to make a Jedi shirt HERE.
Although these pants were made as a costume, pants made this way are suitable for every day use, too!
Step 1: Trace The Pants
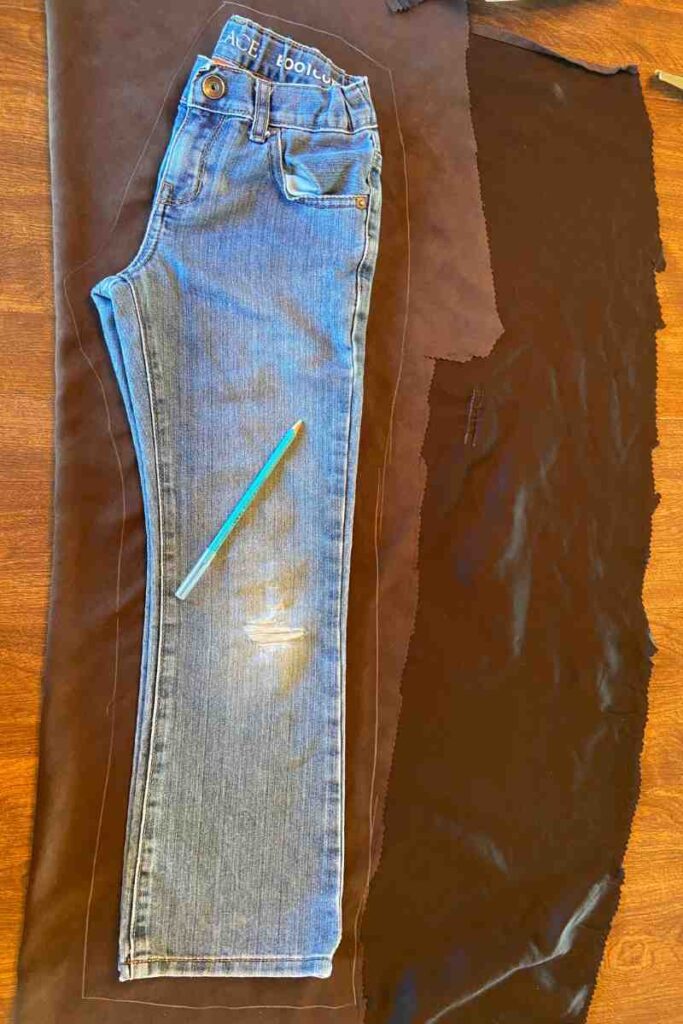
Take the fabric you want to use for these pants.
I used a woven (stiff, not stretchy) fabric.
If you’re using a knit fabric (stretchy, not stiff), make sure you sew everything using a zig-zag stitch, otherwise your fabric won’t stretch as it should.
If you’re using a knit fabric, you’ll also want to make sure that the direction of the stretch stretches WIDER, not taller.
Either way — fold your fabric in half.
Then, fold your pair of existing pants in half and lay them on top of the two layers of fabric.
Next, you’ll want to trace around your existing pants. You’ll want to trace about 1″ (if you’re eyeballing this, it’s best to trace a little MORE than 1″ than a little less to make sure the pants aren’t too small) around the pants onto your two layers of fabric.
At the top of the waist — you’ll want to trace 1 1/2″ above the waist to have enough space to add an elastic waistband.
Step 2: Cut and Sew
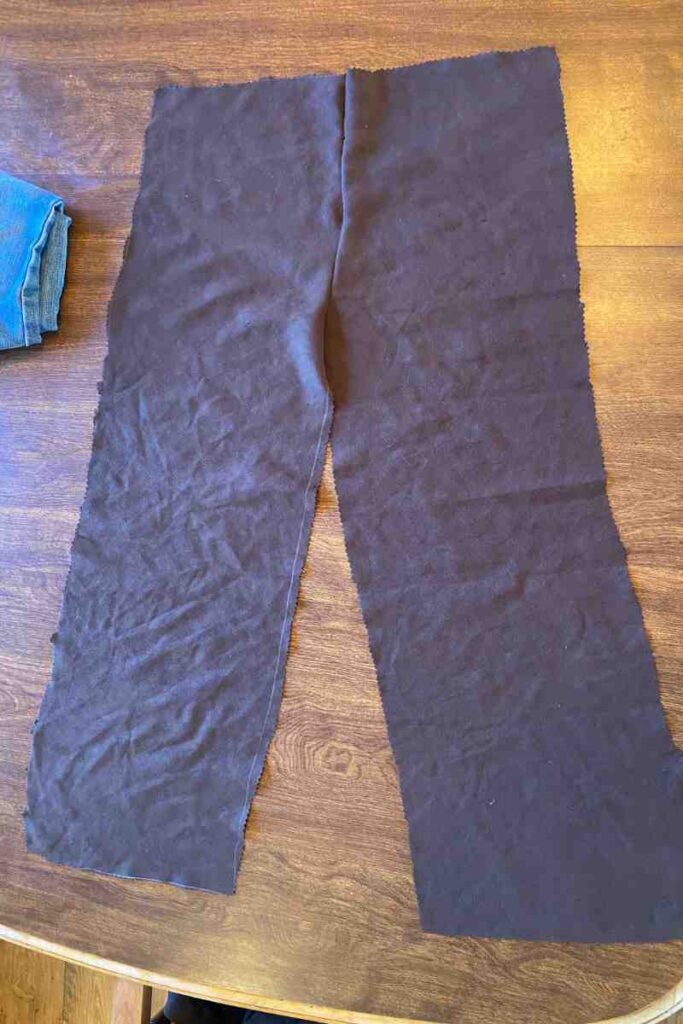
Once you’ve traced your pants, cut out what you have traced through your two layers of fabric. You’ll have two pieces.
Sew them together from the waist to the crotch.
You can sew them right sides together, or make a french seam.
Just be sure to use a 1/2″ seam allowance TOTAL for either method.
Repeat this entire process — tracing to sewing — a second time.
When tracing and cutting a second time, it’s best to use your first pants panels that you have already cut out and sewn as your guide. This way, you can trace your second pants panels EXACTLY the same size as the ones you have already cut out.
Just re-fold the pants panels you have already sewn together, lay them on top of 2 layers of fabric, trace EXACTLY along the edge of the folded pants panel.
Then cut out your two layers of fabric and sew exactly as you did the first time — that curved line from waist to crotch.
You’ll now have two matching panels that resemble the shape of pants.
Step 3: Sew Together Your Panels
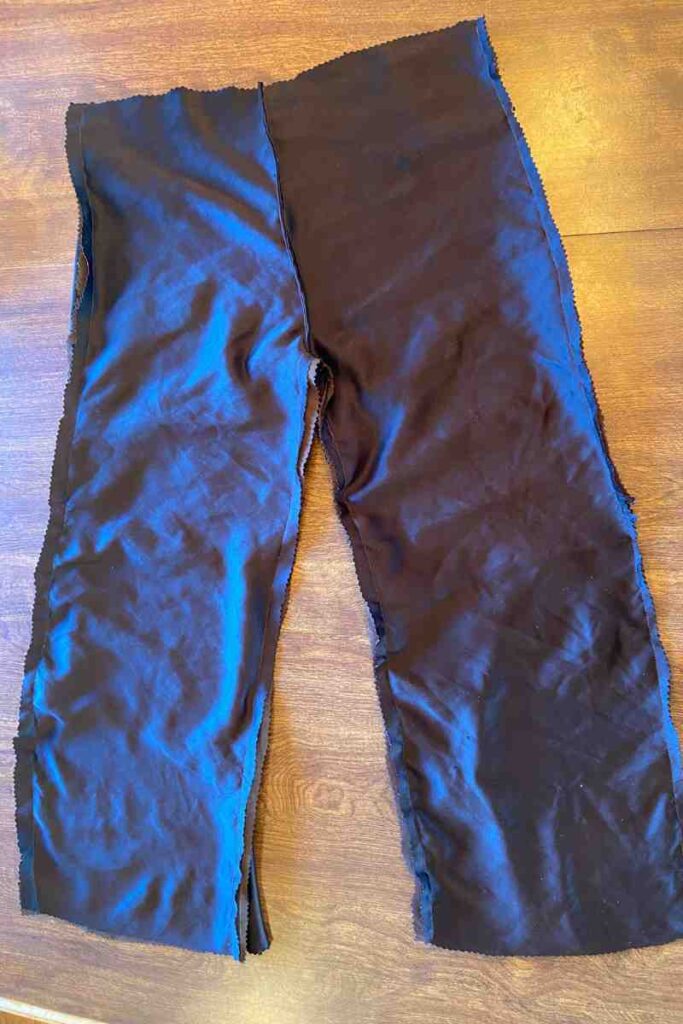
Take your two pants panels you have made.
Remember, you will have cut out 4 pieces of fabric at this point and have sewn them from waist to crotch. This will leave you with 2 pants-shaped pieces total.
Unfold your pants panels and lay them together.
First, sew the outside lines of the pants.
Then, sew the inner legs and crotch of the pants.
It can be helpful to start right at the crotch when sewing the inner legs of the pants so that the center seams are neatly lined up on your pants.
Again, you can either use a french seam or just sew with right sides together, as long as you don’t go over a 1/2″ seam allowance.
Step 4: Elastic and Hemming the Ankles
Now we’re on to the final stages of the pants!
These pants are so easy — just take 3/4″ elastic and measure around your waist, right where you want your pants to lay against your waist. Make the elastic as tight as you want it to lay against your waist.
Add a little bit extra elastic to your measurement — just enough for however much you will use when you overlap the elastic to sew it closed into a loop.
Next, fold your fabric down 1 1/4″ at your waist, and sew around the waist. Do not sew all the way around — you’ll want to end your stitches 1″ away from where you started sewing so there is an opening into your waistband “pocket.”
Be sure to give yourself a 1″ seam allowance while sewing the waistband so that your 3/4″ wide elastic can fit into it!
Take your elastic that you have cut to size and put a safety pin onto the end of it.
On the other end of your elastic, use a second safety pin to pin it to your fabric, near the opening of your waistband on your pants.
Use the safety pin to weave the elastic all the way through your waistband until it comes out the other end.
Sew your elastic together several times over so that there is little chance of it ever coming undone.
Finish sewing the 1″ opening on the waistband of your pants closed.
Lastly — hem your pants. You can fold the fabric twice over while hemming the ankles so that all the raw edges are closed in entirely.
There you have it! Some quick, easy, comfy elastic pants you can make in any size!