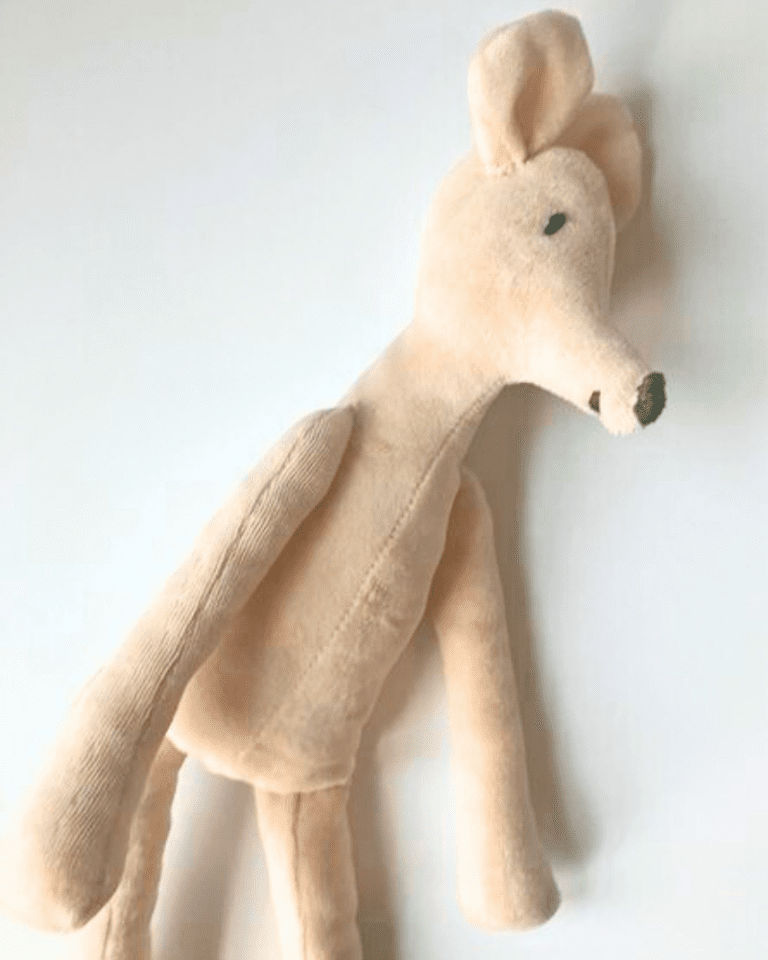
FREE Horse Sewing Pattern Stuffed Animal Tutorial How to Sew
Below you will find a free pdf pattern for this plush sewing pattern. Plus — a photo gallery with step by step instructions!
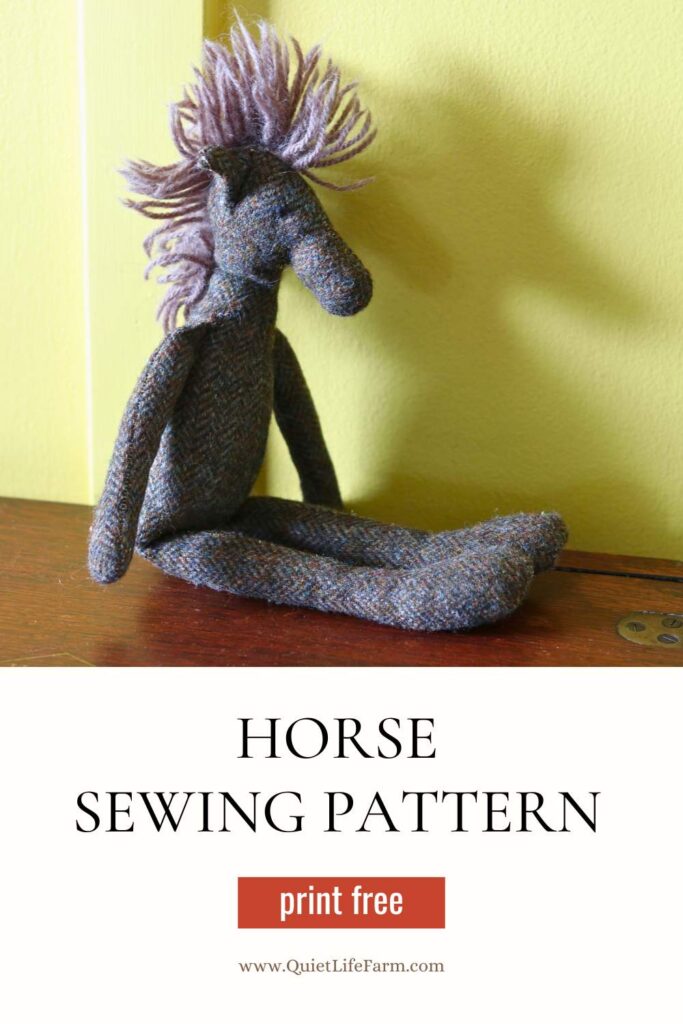
I’m happy to share with you my newest design!
Sure to please any horse lover, this horse pattern is free to print in a PDF format, and I walk you through the entire process of how to make it!
You could also easily adjust this pattern to become a unicorn pattern or a giraffe pattern — just add a horn, or make a longer neck!
So, grab your PDF file, then scroll down for the instructions, plus PHOTOS of all processes!
Supply List:
- 1/2 yard of fabric (non-stretch fabrics will work best)
- Hand sewing needle and thread/sewing machine (sewing machine is helpful but optional!
- Yarn for the mane (and optional tail)
- Wool or fiberfill of your choice
- Embroidery floss for the eyes
Let’s dive right in!
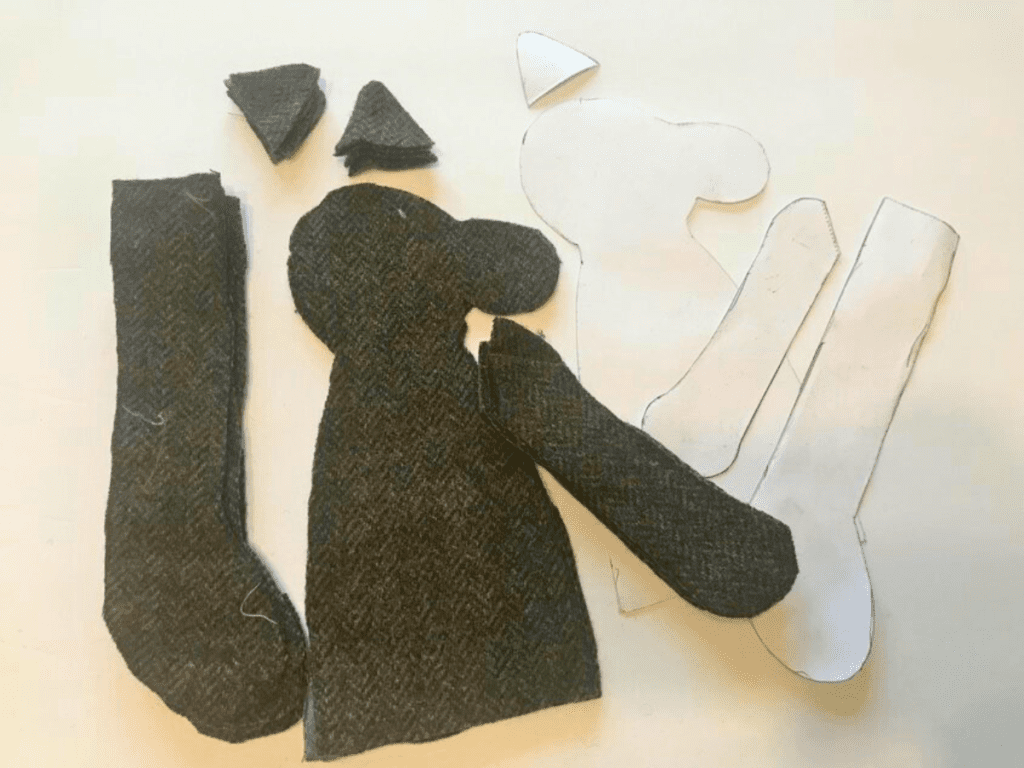
First, you’ll want to print your pattern pieces.
I have these available to you as a free digital download PDF file that can be instantly printed!
Grab it below!
Next, lay out your set of materials.
It’s best to use a fabric that isn’t terribly stretchy.
I actually grabbed a men’s 100% wool dress jacket from the $1 rack at the thrift store, and it created such a fun texture for this project!
We’ll start by tracing the pattern pieces onto the fabric.
Fold your fabric in half before cutting out your pieces.
By folding your fabric in half, you will create “mirror images” of each pair of pattern pieces.
You can also achieve this by cutting out one piece of fabric with your template facing one way, then flipping your template over and tracing your pattern piece this way.
This will make it so you can sew all of your pieces “right side together.”
You’ll want enough “sets” of pattern pieces to create one body, two legs, two arms, and two ears.
(So, you’ll have 2 body pieces, and 4 arm/leg/ear pieces total.)
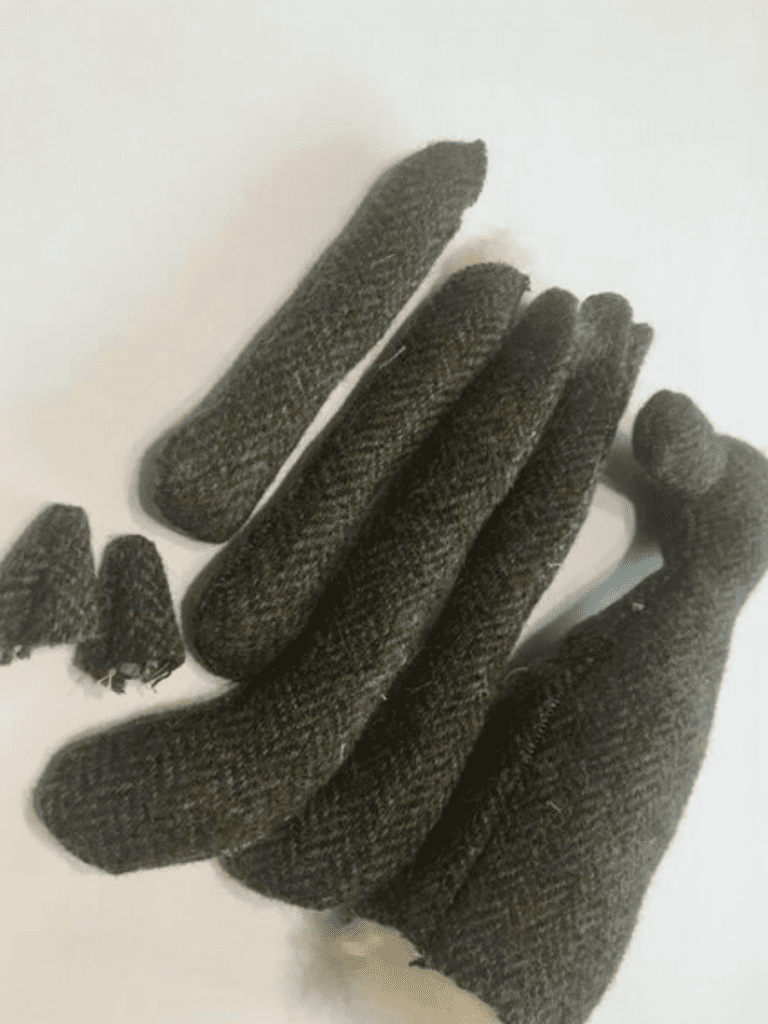
Sew everything right sides together, leaving the edges with the dotted lines open.
Note: You’ll want all seam allowances to be 1/4″.
Stuff everything except the ears.
You can absolutely stuff the ears if you want — you’ll get more perky ears if you do! I just left mine unstuffed.
I used wool to stuff my horse. You can use whatever fiberfill you prefer. I love wool because of the natural weight and warmth that it provides. I love filling plush toys with wool because it keeps its shape for many years, no matter how loved the toy becomes! Lastly, being a natural fiber, wool creates the most snuggliest foal!
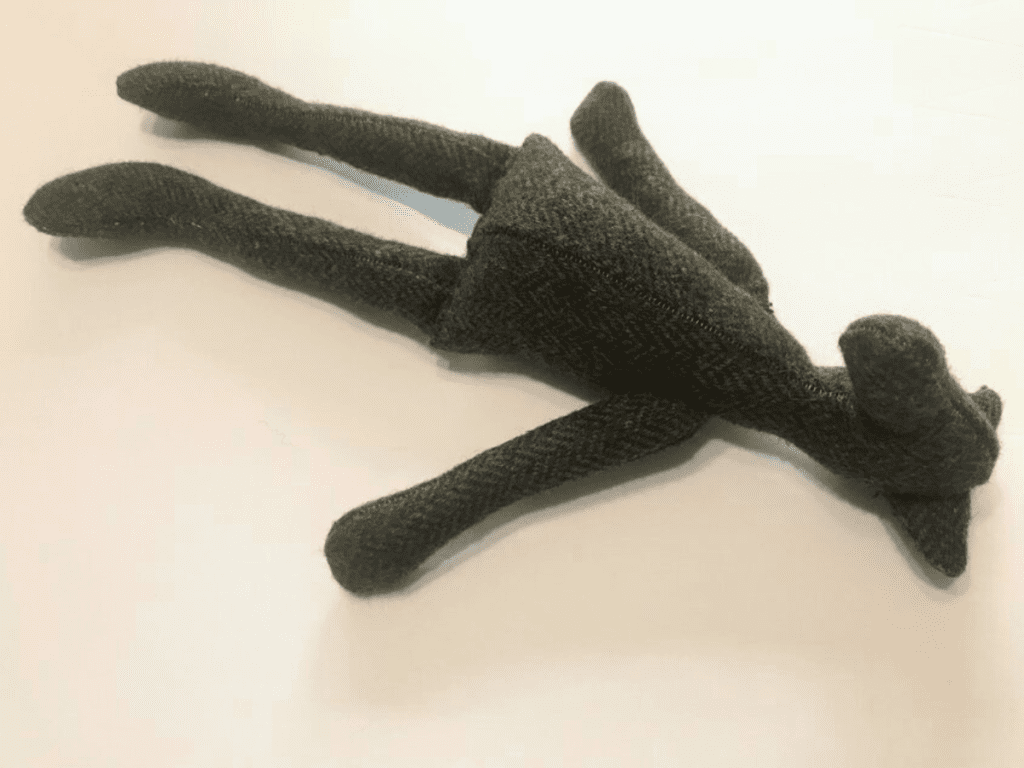
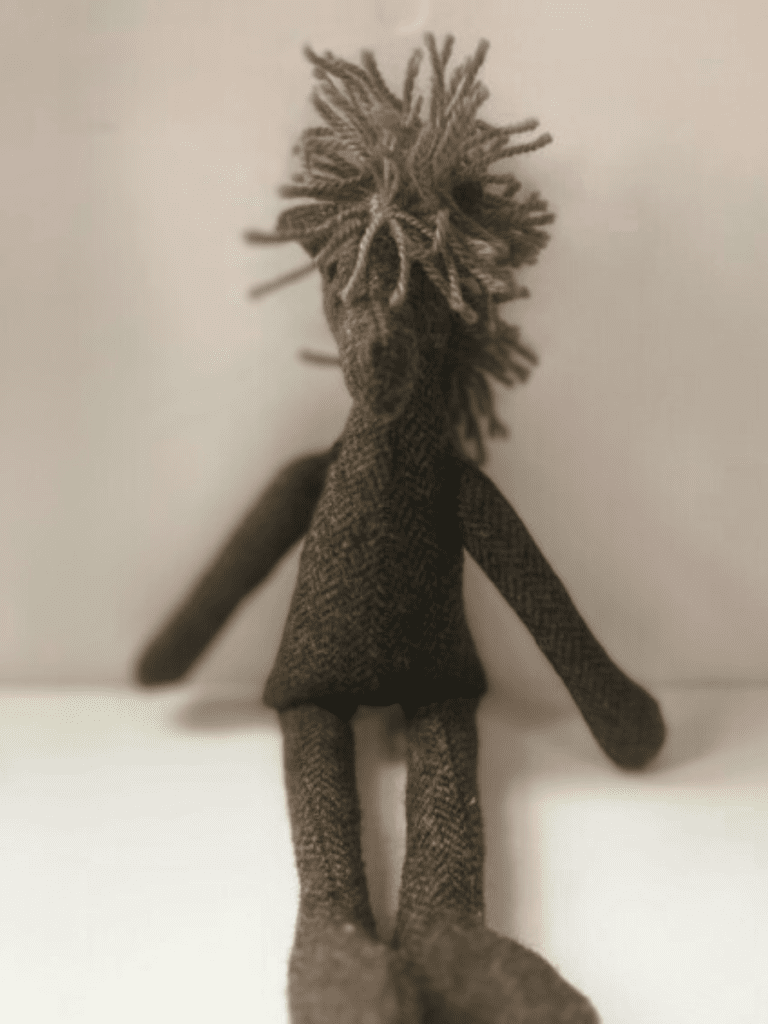
Assemble your horse toy
Once you have all the individual parts assembled, it’s time to put together your horse!
This part is best done by hand sewing.
I find it’s helpful to sew the arms closed before attaching them to the body.
Attach the arms and ears to the horse’s body.
Tip: using a ladder stitch makes your stitches look hidden and neat! It’s the best way to sew toys together!
Next, attach the legs by neatly lining them up inside the body. Then, fold the raw edges of the bottom body to create a hem before sewing. It is helpful to use pins or a basting stitch for this portion.
Tip: Keep the long tail ends of your thread hidden and strong by rethreading them to a needle and pulling them inside the horse’s body before snipping short.
Final touches
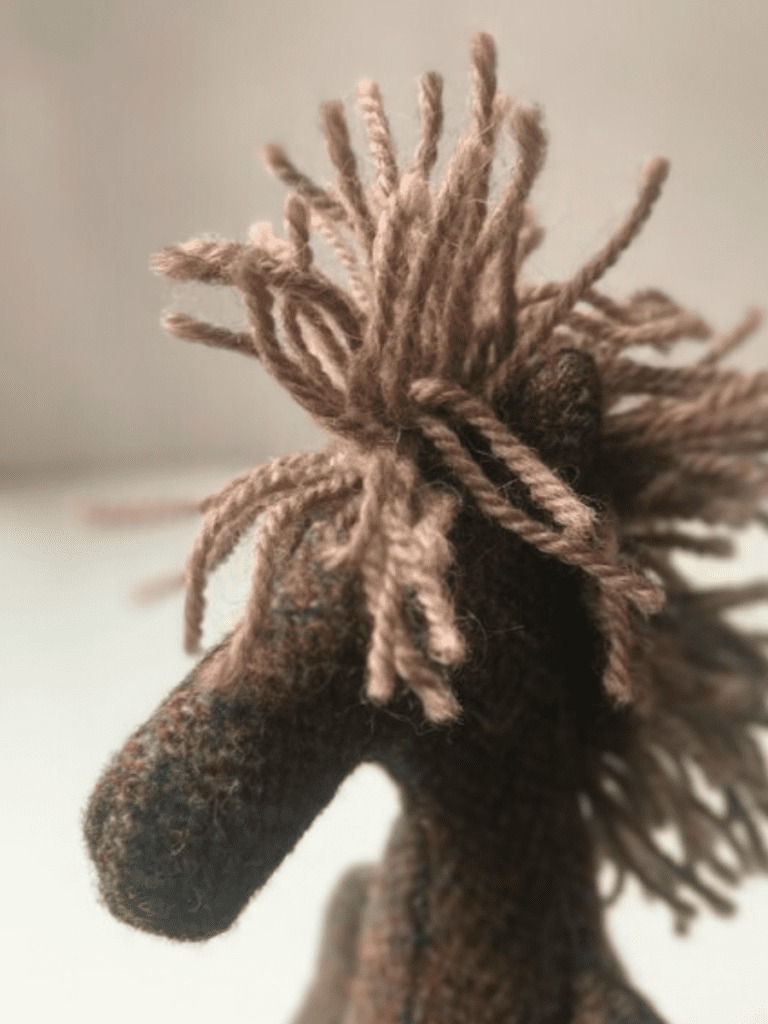
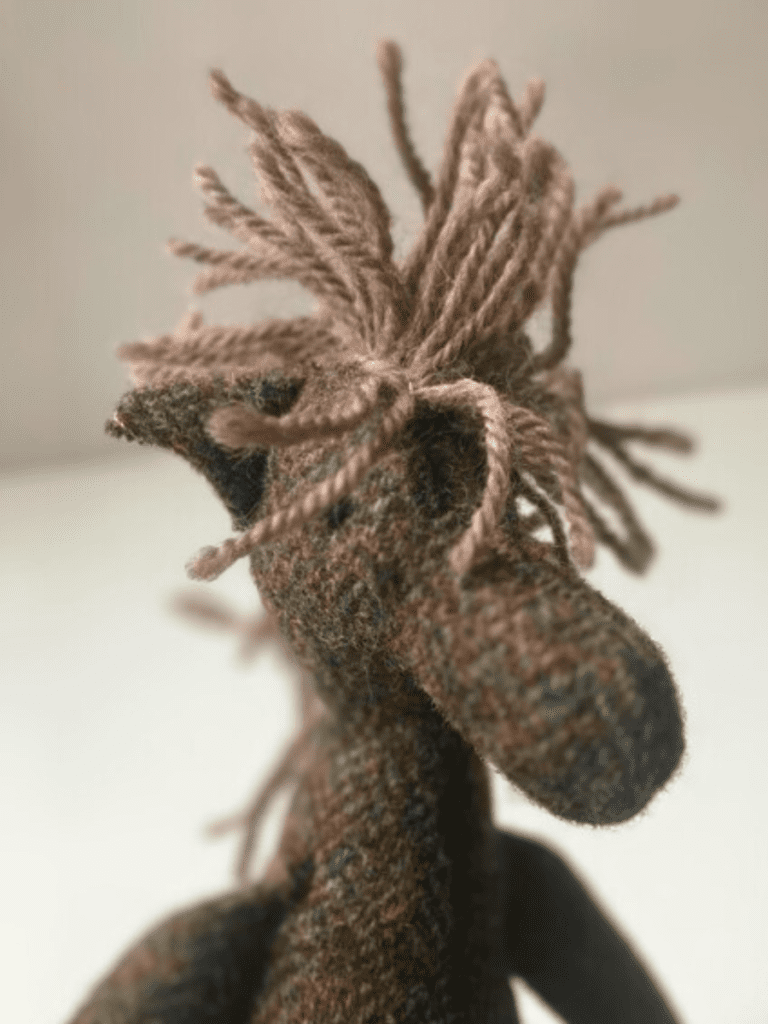
To complete your plush horse sewing pattern, embroider a face and attach a mane/tail to your horse!
Tip: For the eyes, I find it’s best to use a french knot.
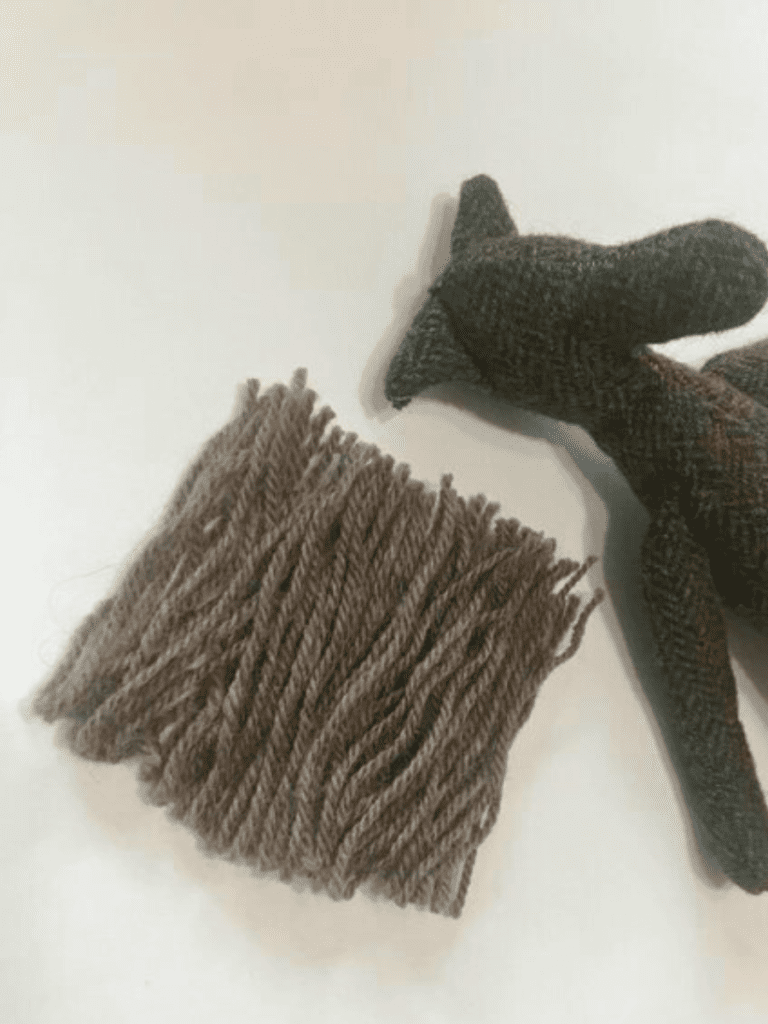
To make a fuzzy mane, take some yarn and cut it about 4-6″ long per piece. (you can choose whatever length you want, but no less than 4″. Also — each piece of yarn should be the same length.
Line up the pieces of yarn top to bottom, until the “thickness” of the mane is about 5″ long.
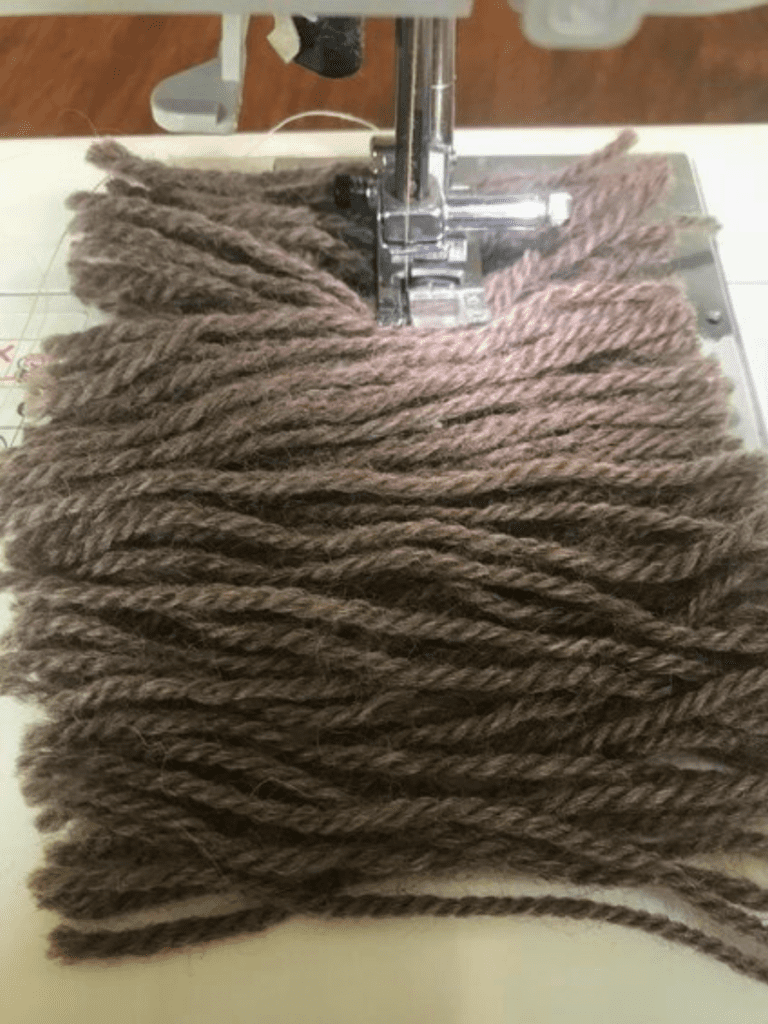
Then — very slowly so that you don’t prick your fingers — put the yarn through your sewing machine to attach the pieces together.
Repeat this three times so there are 3 rows of stitches right in the center of the mane.
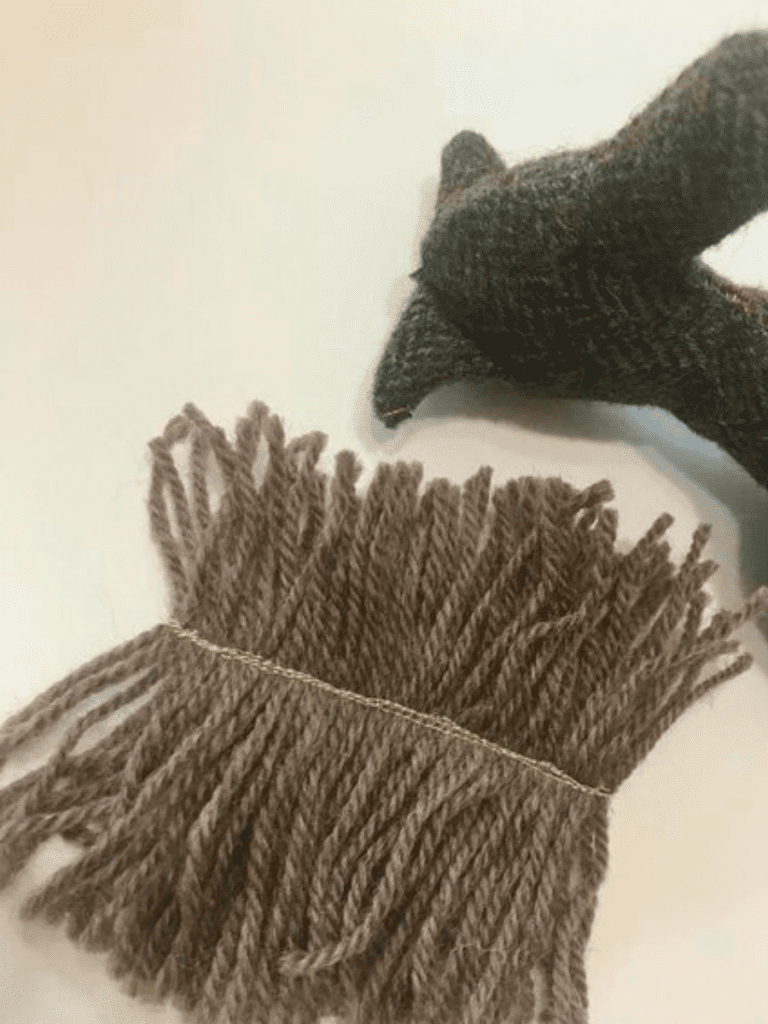
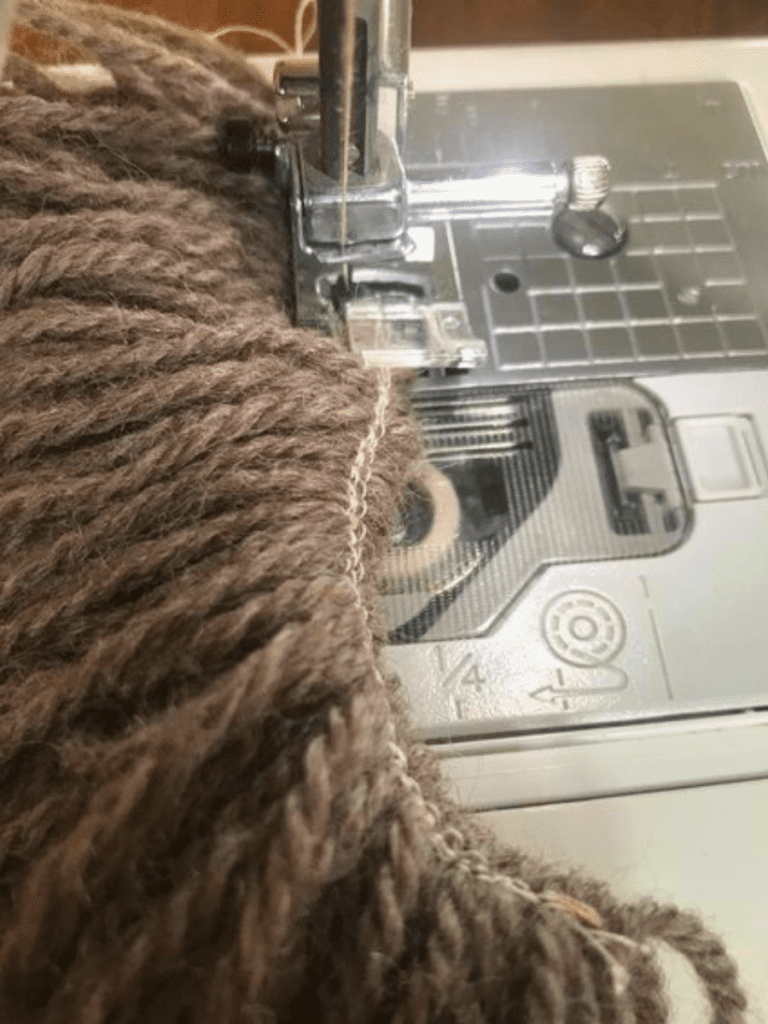
Then, fold the mane in half and sew right along the edge.
This makes the mane stand up a bit more — you know, gives it a little bit of “OOMPH.”
Hand sew your mane onto your horse.
I just used a brown yarn for the mane, but it would be so fun to use a more colorful yarn to give a pop of color and to give your horse its own special look!
I didn’t sew a tail for this horse (here’s why — I’m in the process of designing a complete wardrobe for this horse, including a darling removable dress pattern, a tail might be cumbersome for some of the clothes! Sign up for my emails if you want to stay in the loop when it’s released!), but here’s a quick walk through for how to make a tail!
To make a tail, cut several pieces of yarn at TWICE the length you actually want them to be.
Gather all your pieces of yarn, and fold them right in half.
Use another piece of yarn to tie a nice tight knot towards the top of the tail to hold the strands together.
Then, use the “loop” at the very top of the tail to sew it to your horse’s rump.
Leave a comment
I hope you enjoyed this free horse pattern!
Leave a comment below to let me know the equine lover you made it for!

I entered my email address to get the free PDF patterns, but have not received any yet, but recieved this message “Ip quarantine IP is quarantined” ??
Hi there! I reached out to my email hosting service with your issue and this is what they responded to me. I hope it helps! “When a subscriber sees an “IP is Quarantined” message, it means that our system has flagged their subscribe attempt for security reasons. A request is quarantined if it triggers any one of the following checks.
Cloudflare Bot Score. If their bot score is five or below, the system treats the request as suspicious and quarantines it.
IP submitting too frequently. If the same IP address submits more than ten times within one hour across any forms, it will be quarantined.
Email submitted to multiple accounts. If the same email address is used to sign up for multiple Kit accounts within a twelve hour period, the system flags it.
To resolve this, the subscriber simply needs to complete the captcha challenge that will appear. Once they pass the captcha, the quarantine is cleared and they will be added successfully.”