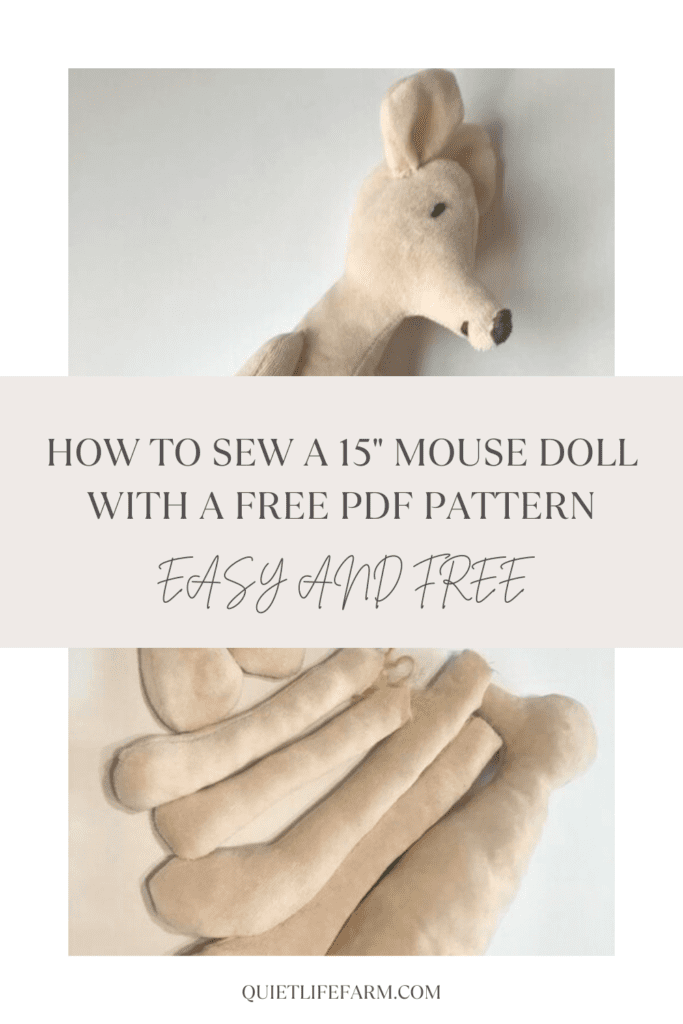
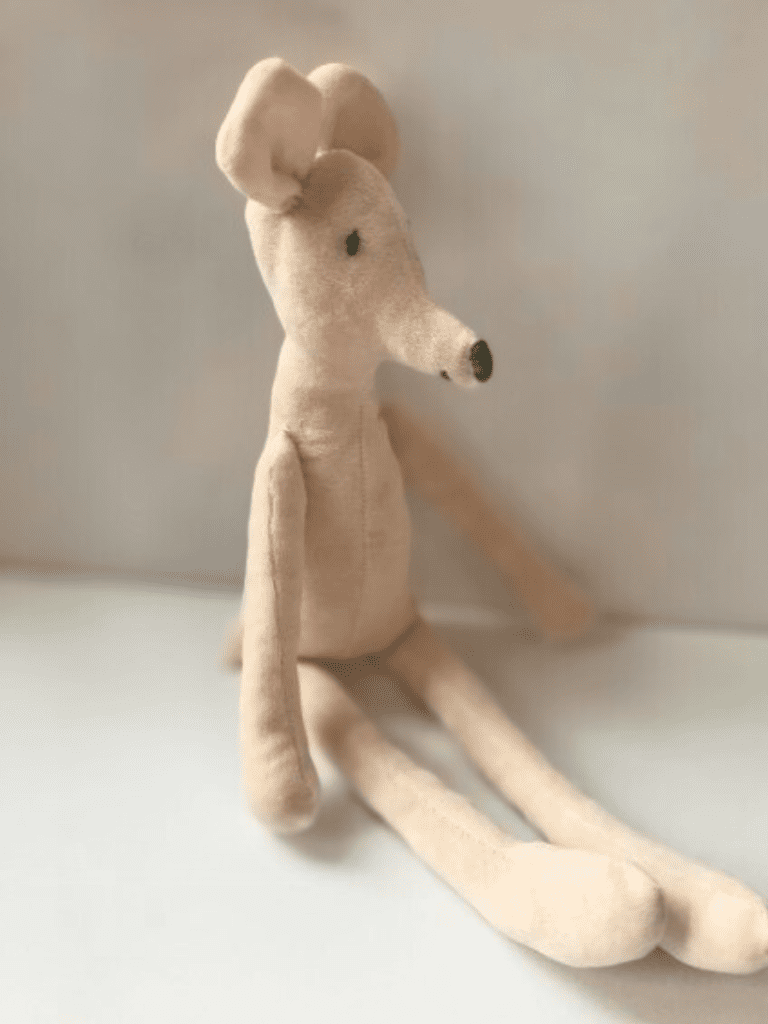
DIY FREE Mouse Sewing Pattern PDF and Tutorial
Free Sewing Pattern for a 15″ Mouse Plush Toy! This fun project has a step-by-step tutorial and free printable pattern. It’s so much fun!
If you’ve been following me for long, you know that I love to make handmade toys for my children!
I also love the look and quality of a certain high end toy company, but am on a shoestring budget.
“Wine tastes on a beer budget!” as my dear friend always jokes!
So when I wanted to gift my kid with a stylish toy mouse without spending an arm and a leg, I decided to make my own mouse pattern!
Handmade toys always make the perfect gift for children! Kids really appreciate that someone would take the time to get on their own creative, playful level to make something just for them! It’s a great way to show them that you love them!
He was so much fun to make, and I’m excited to now share it with you as a free sewing pattern (a PDF pattern, to be exact!)!!
Best of all, this is a really easy pattern that requires such a small amount of material that you probably already have everything on hand that you need to make this little mouse! (he’s 15″ tall)
So — grab your free printable pattern, then follow along on my step-by-step tutorial.
You’ll have your little mice done in no time!
Happy sewing!
Supply List:
- Fabric (cotton is best!)
- Fiberfill for the “stuffing” (I used wool)
- Hand needle and thread
- Optional sewing machine
- Embroidery thread for the eyes, nose, and mouth
- FREE printable pattern, below!
Fabric
You can choose nearly any fabric for this mouse!
Fleece fabrics, flannel fabrics, linen…. even an old piece of clothing (my specialty!) will work for this project!
1/2 yard fabric is more than plenty to complete this project. If you’re not using any patterned fabric that needs to have the design facing a certain direction, you can probably get away with 1/4 yard of fabric with some careful and strategic cuts.
The fabric I chose was a silky velvety fabric from a thrift store I had in my stash.
It was such an absolute pain to use as it kept slipping and sliding everywhere, so even if I had a link to share with you where I got it, I wouldn’t.
This is also why you see approximately 46,875 straight pins stabbing my mouse pattern pieces in every single direction.
It was the only way I could make this fabric work for the small pieces!
If you’re using a reasonable, cooperative fabric, you shouldn’t have to use the ridiculous amount of straight pins in your fabric like I did.
So just ignore the pin massacre on my mouse. You probably won’t need to do that.
FREE PATTERN
Without further ado, here is your free mouse sewing pattern. It’s in the form of a PDF file so it’s super easy to print!
Print it out by clicking below!
Then, cut out the shapes of each pattern piece.
I’ll show you what to do with those pieces next with some step-by-step instructions!
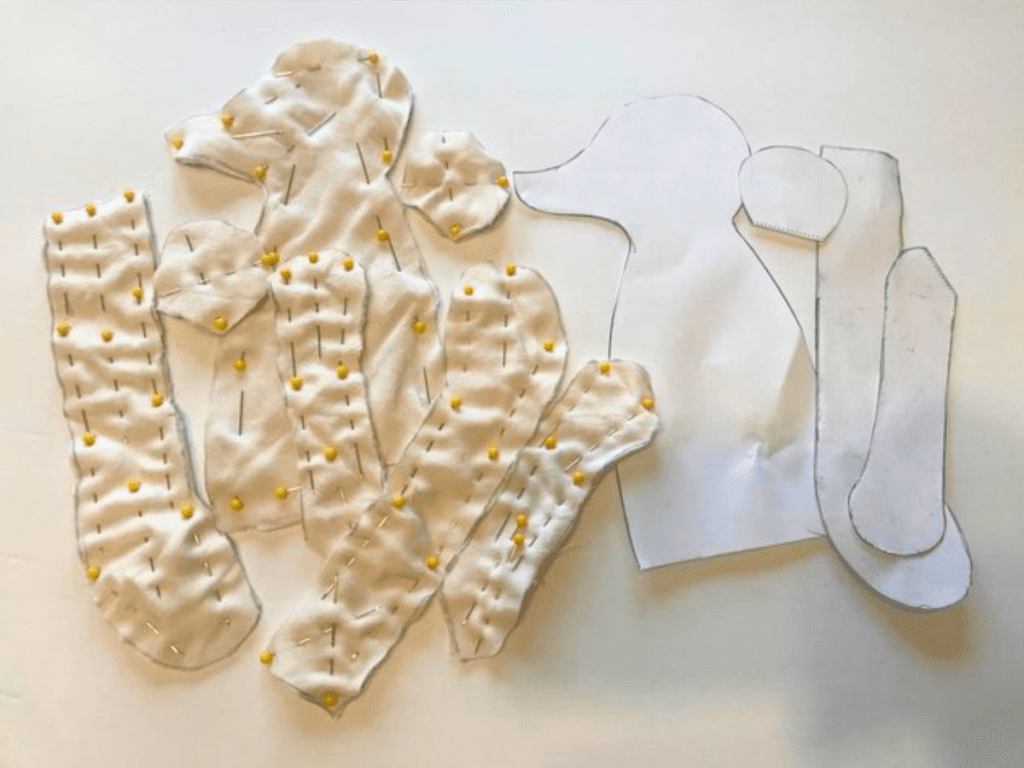
Cut Fabric
First, we’ll go ahead and cut out all the pieces we need.
Before tracing your pattern pieces onto your fabric, fold your fabric into half.
This will give you perfect “mirror images” of all of your pieces.
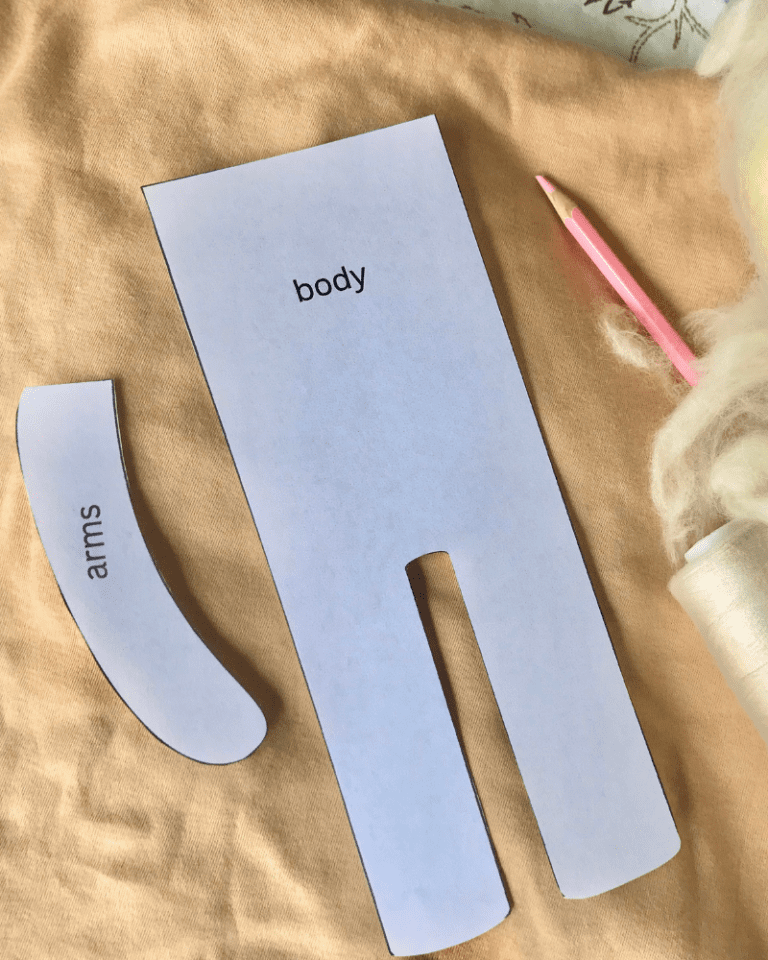
Trace and cut the following:
- 2 body pieces
- 4 ear pieces
- 4 arm pieces
- 4 leg pieces
I just used a regular old pencil to trace all my pieces onto my fabric.
You can be super fancy and use a proper fabric pencil for this part.
Sew the body piece
First we’ll sew the mouse body together.
It’s best to use a sewing machine for the initial sewing portion of this mouse, but if you don’t own a sewing machine, that’s okay, too. Just use a running stitch and make sure your stitches are both tiny and strong enough to stay together, and to not “leak” any stuffing when complete.
Use a 1/8″ seam allowance to sew around the body, with the right sides of the fabric together (wrong side will be showing).
Do NOT sew the bottom straight edge of your mouse. This portion is marked by dotted lines on your pattern. It’s where you’ll add stuffing and attach the legs.
Turn your mouse body right side out.
A pencil or old chopstick (even the blunt end of a knitting needle!) will help poke out the nose.
Fill your mouse body with wool
Tip: When stuffing toys, it’s helpful to
- Add small pieces of fluff at a time to avoid lumps
- Use your fingers to “fluff up” each bit of stuffing before adding it to your toy to keep it extra soft and fluffy
- Consider using wool to fill your toy — wool is a natural material (you won’t be filling your handmade toy with plastic), has a natural warmth to it, and adds a gentle weight to each toy, giving it a more life like feel!
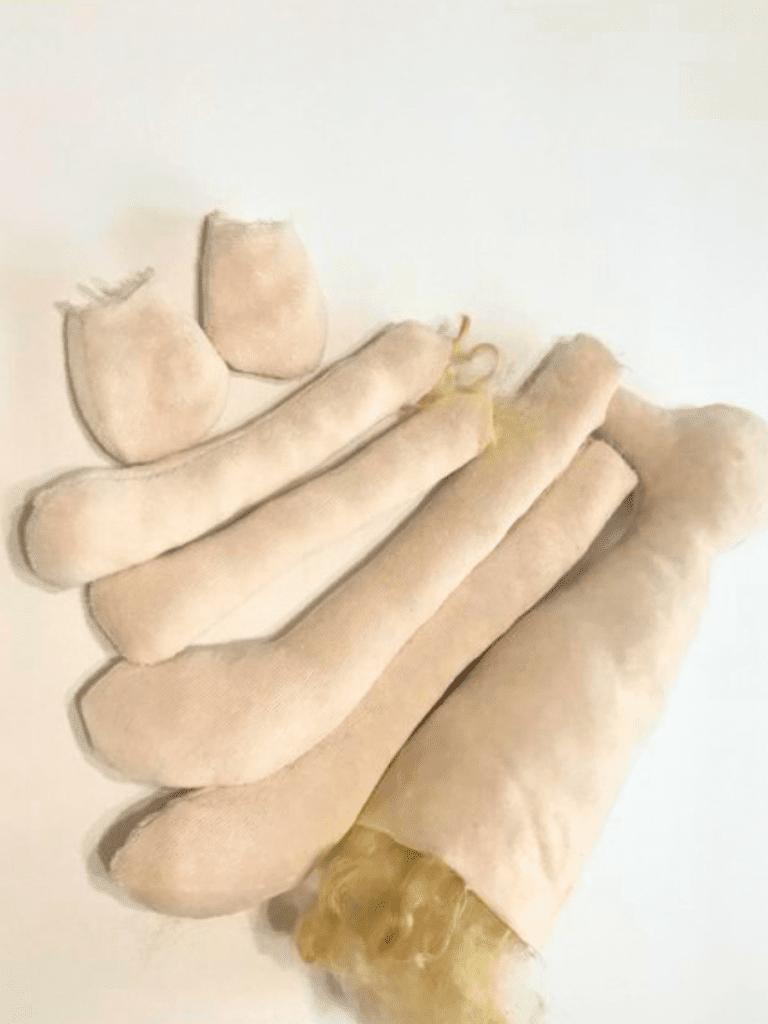
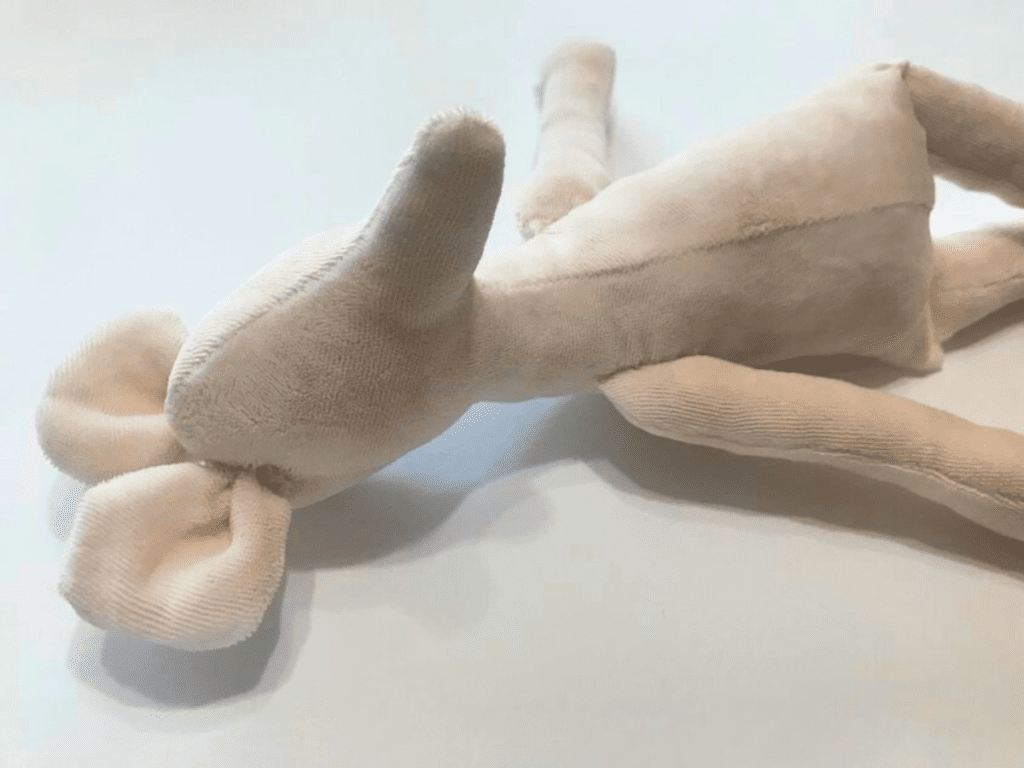
Sew the Arms and Legs
Next, we’ll sew the arms and legs.
I’m grouping these two steps together because they’re completed using the exact same process.
With right sides together, use a 1/8 inch seam allowance to sew around each set of pieces.
Make sure you leave the top straight edge (marked by dotted lines in your pattern) OPEN.
Turn the arms and legs right side out.
Again, a great way to do this is to use a pencil or something similar to turn these parts out.
Just be really careful if you use a pencil — you could so easily leave pencil marks on your cute toy accidentally!
Next, firmly stuff the arms and legs.
Leave the legs open, and don’t stuff the last 1/2″ of the legs.
Stuff the arms to the very top, but use a hand needle and thread to sew the tops of the arms closed.
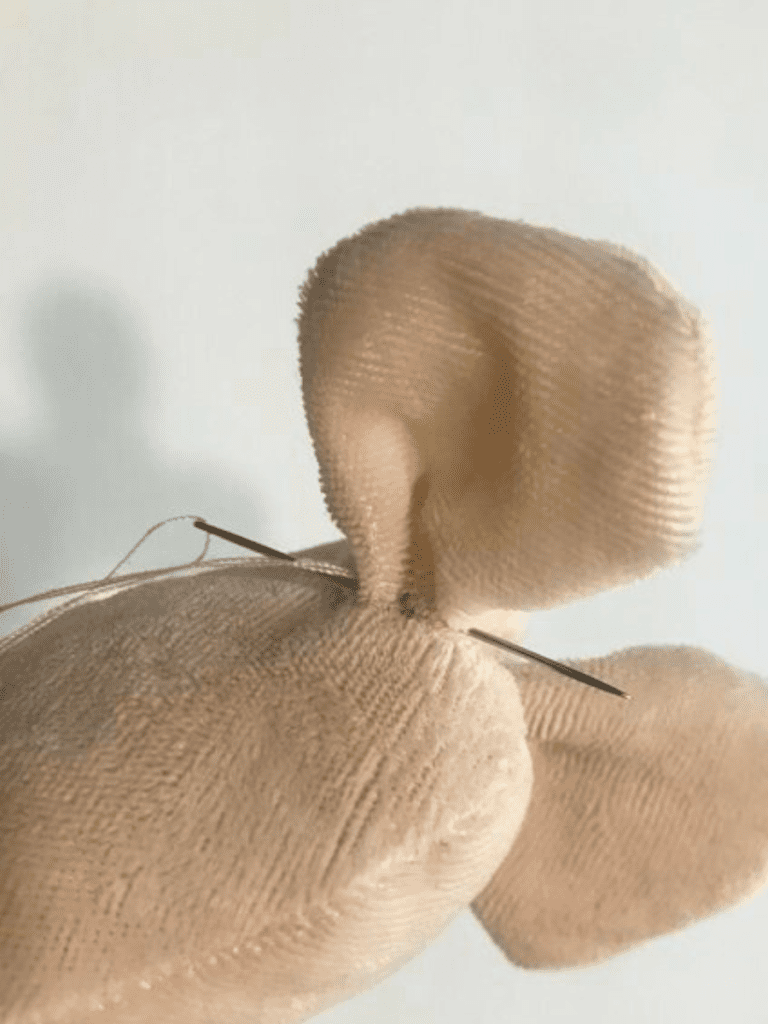
Sew the ears
Lastly, we’ll make the ears.
Note: Feel free to make the inner ear a different, contrasting color fabric! It’s a great way to add “a little extra something” to your mouse! Just be sure the outer ears are the same as your body fabric to make the mouse look cohesive.
With right sides together, sew around your ears with a 1/8″ seam allowance, leaving your bottom straight edge open.
Set them aside — no need to sew the bottom.
I chose not to stuff my ears. If you do decide to add a little bit of bulk to the ears, I suggest only adding the teeniest tiniest amount, or they won’t lay quite right. Better yet — just leave the ears empty.
Assemble all body parts
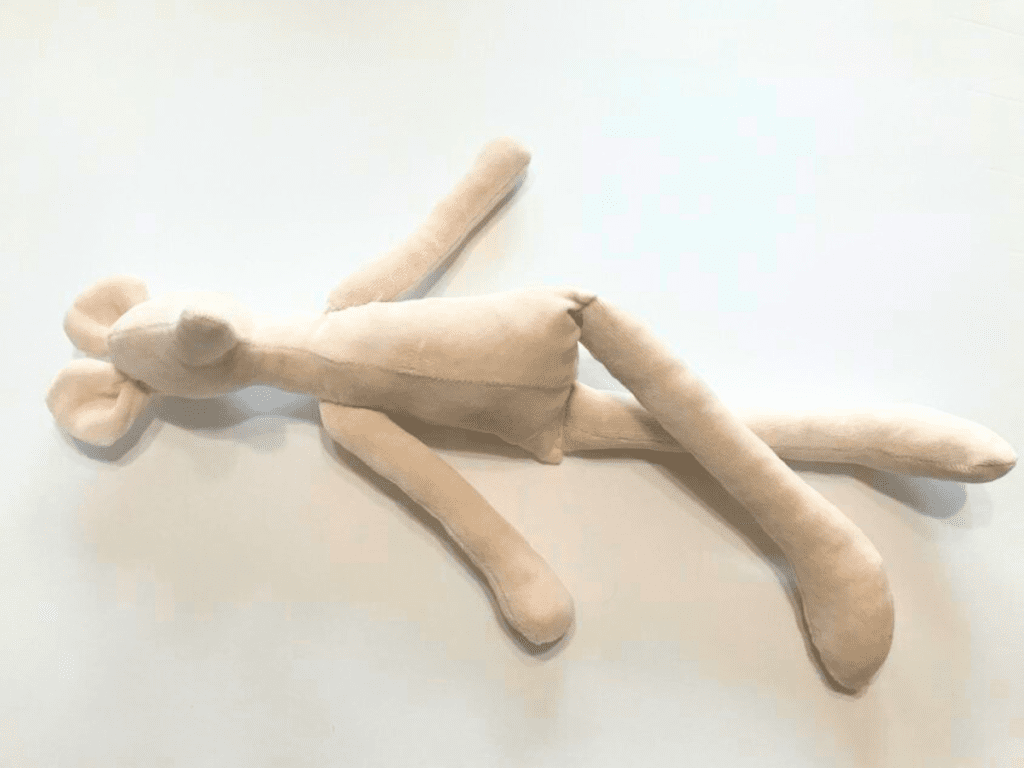
Now that we’ve done the initial assembly, it’s time to put this plush toy together!
You can use a hand sewing needle and sewing thread from here on out.
You can use a sewing machine when attaching the legs — but I’d still suggest using a basting stitch or at least some pins before you use a sewing machine for that portion.
I didn’t use a sewing machine for attaching the legs, though. I just did it by hand.
Use a ladder stitch to attach the arms to the body. A ladder stitch will leave your stitches looking virtually invisible! (especially if you use a matching thread that’s the same color of the fabric, as one does! …just don’t look too closely at mine!)
To attach the legs — put the legs INSIDE the bottom body, making sure the toes are pointing out the same direction that the nose is pointing!
The tops of the legs should be lined up with the outer hips of the body. Don’t keep those legs too close or you’ll have a mushroom body mouse!
Sew across with a hand needle – keeping your seam line close to the edge so there are no unseemly fabric flaps!
Again, you can use a machine for this portion, but you really should secure the legs into place first with pins or a basting stitch.
Sew the ears on top of the head. Then, as seen in the photo, use your needle to gather them up to give the ears a real “mousey” feel.
Final touches
Lastly, you’ll want to make some facial features for your mouse.
Use strands of embroidery floss for this portion.
I used french knots to create the eyes, and a whip stitch to create the nose.
For the mouth, I just used tiny lines.
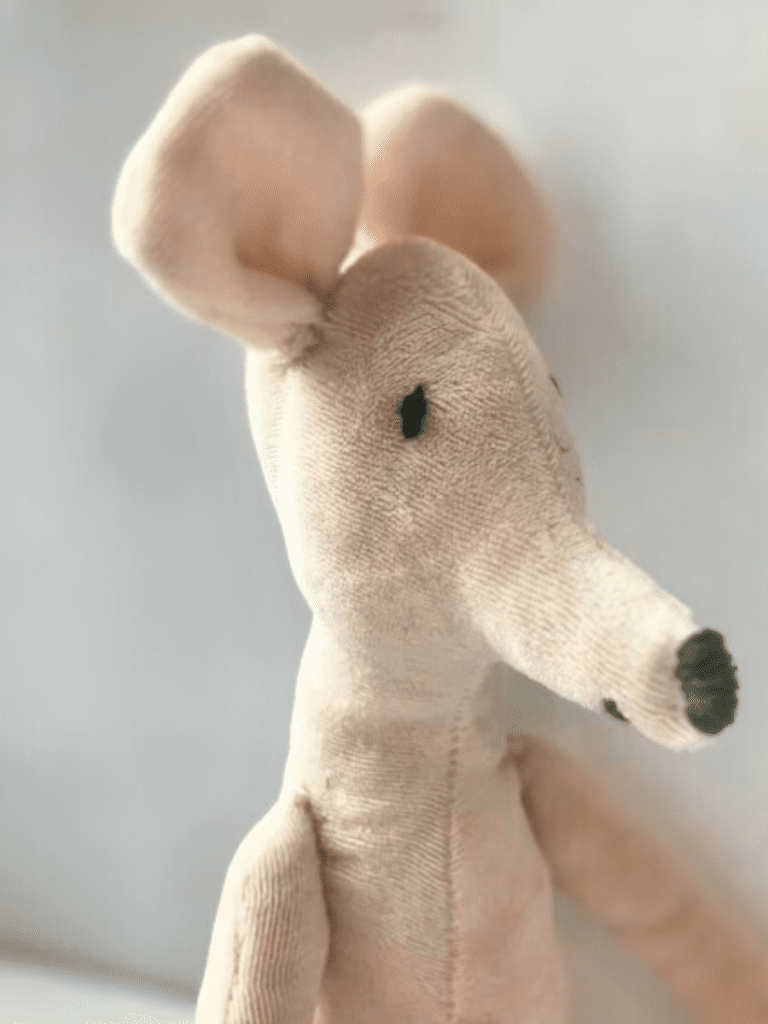
Note: When hand sewing or using embroidery floss, leave long tail ends. Then, rethread those tail ends with your hand sewing needle and weave them back into your toy’s body. Any thread that pops out the other end with your needle can then be cut short. This way, your knots all stay tight, and your threads are neat, tidy, and unseen.
A note on Safety: If you choose to use button eyes on this mouse, please use it for decorative purposes only. Buttons can so easily become a choking hazard for small children. Handmade toys need to be examined so carefully to be positive that they’re safe to give to little ones, and always supervise littles during play! Keep those babies safe!
That’s it! Your mouse is complete!
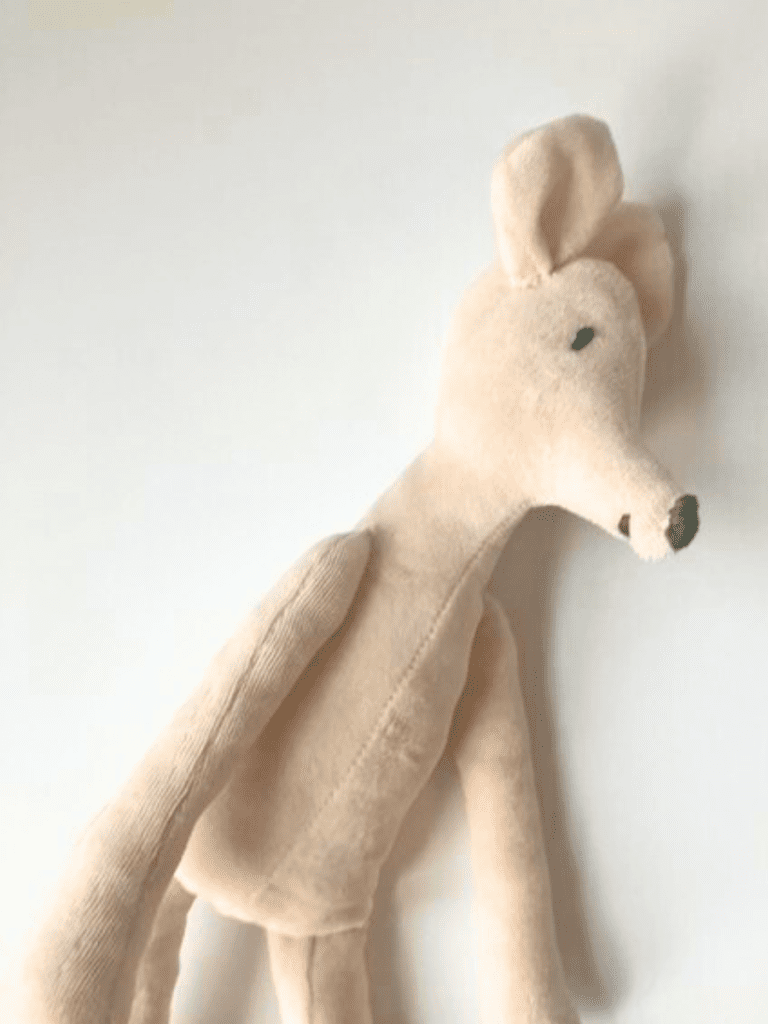
I hope you enjoyed this fun sewing project.
Let me know who you made this mouse for in the comments below!
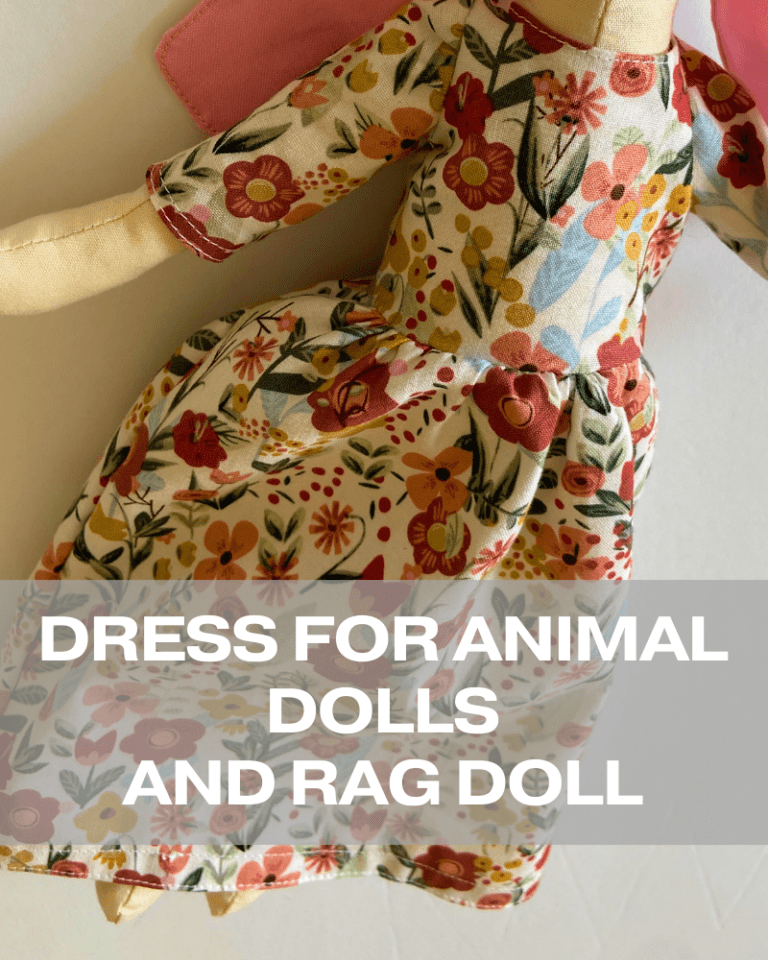
Be sure to check out the removable outfits I made to go with this mouse! Click here to see the whole set!
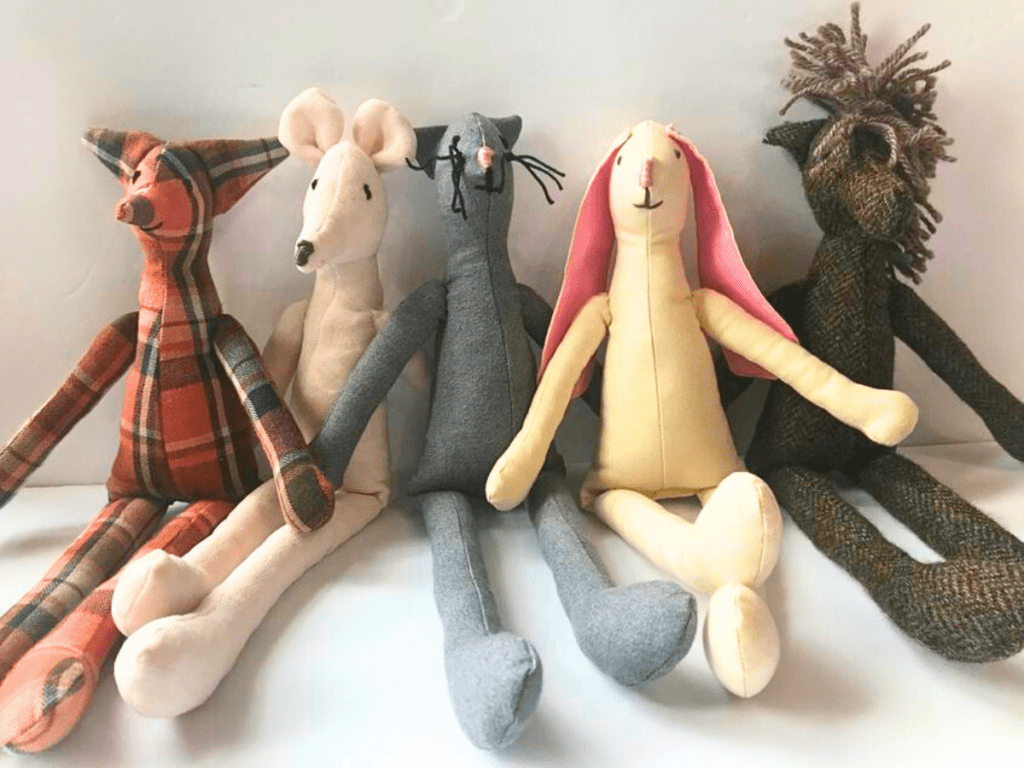
(Psst! Did you know this mouse is part of a complete animal friends set?? The friends are free patterns, too!)
If you’re interested in more free printable sewing patterns with some easy instructions, be sure to check out my other freebie projects! Here are some below!
And yes, these are all free, too!

Thank you
You’re so welcome!
Hi! Is this mouse 15 inches or 15 centimeters?
Hi, Mikayla! The mouse measures 15 Inches tall (or about 38 centimeters).
Hi Emeline,
Thank you for the Mouse pattern. I make one for my jongest grandson.
I would like to send you a picture, but I don’t know how.
Hi, Anet!
How sweet of you to make one for your grandson! He is so blessed to have a grandmother like you!
I would love to see the picture! Feel free to email it to me at [email protected] if you ever want to!
Happy Sewing!
Hi
Do you have free pdf printable mouse clothes patterns please?
Kind regards Kitty
Good morning, Kitty!
Yes — I have a 46 page free PDF filled with patterns for clothes and other animal friends on my blog! You can get it using this link!
Happy sewing!
Emeline