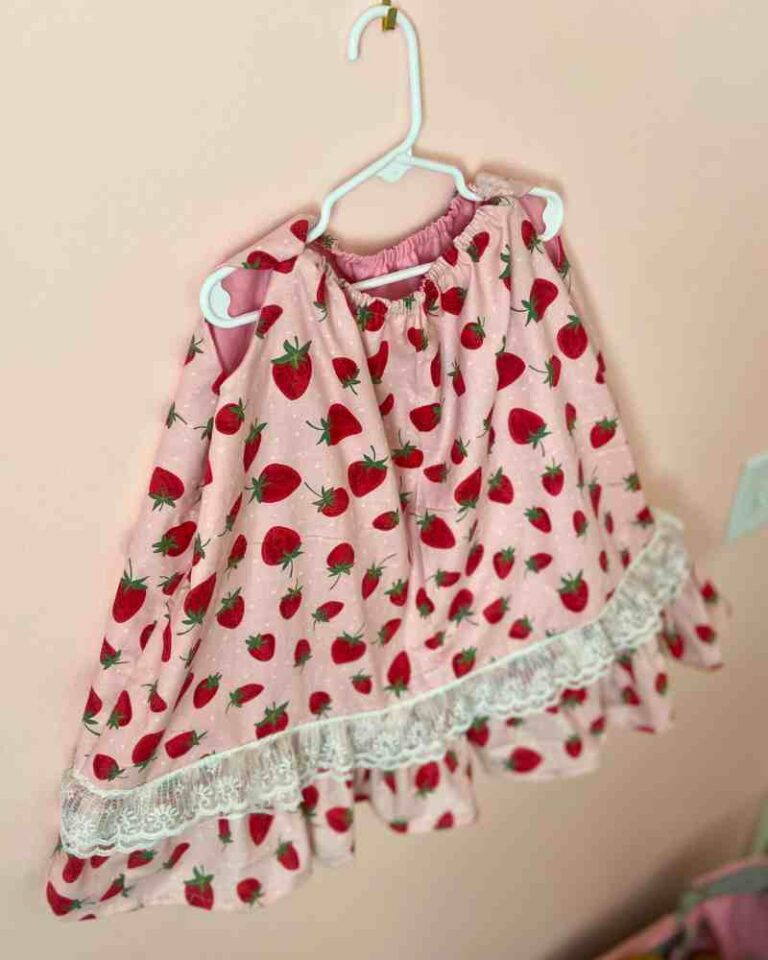
Doll Dress for Fashion Friends Series
Keep reading for a free PDF doll dress pattern and tutorial that fits all the dolls in the Fashion Friends series!

If you’re here, it’s probably because you’ve completed either the rag doll, cat, mouse, fox, horse, or rabbit doll and are ready to dress them up in this cute removable dress!
(Links to each doll can be found in the paragraph above — just click on the animal and it’ll redirect you to the pattern!)
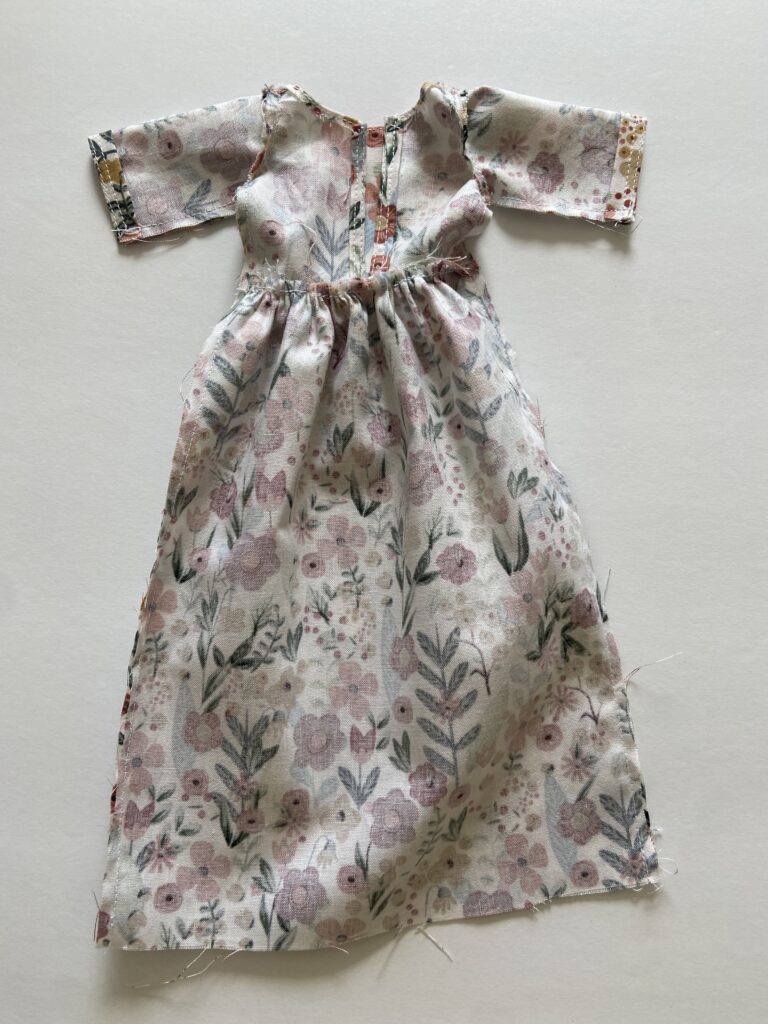
With a darling gathered skirt and bodice that can be unsnapped (or unbuttoned, or verlcroed…) for easy removal and dress up, this outfit will take your dolls to the next level!
Truly, this makes the sweetest gift for a little one in your life. Handmade gifts for children will be treasured forever! They’re instant heirlooms!
Let’s get started!
Disclaimer: As an Amazon Associate, I earn a small commission from qualifying purchases. I share what I actually buy and use, and using my link helps support me in sharing more free patterns with you! Thank you!
Supply List:
- Cotton (woven) fabric. Light to medium weight recommended
- Sewing Machine (recommended but not necessary)
- Thread/scissors
- Pattern, found below
- Snaps (or a button or velcro)
Free PDF Pattern
If you do not already have the dress pattern for these dolls, you can print it below.
(If you’re coming here from the rag doll pattern and tutorial, then you already have this pattern printed and ready!)
Get your pattern below!
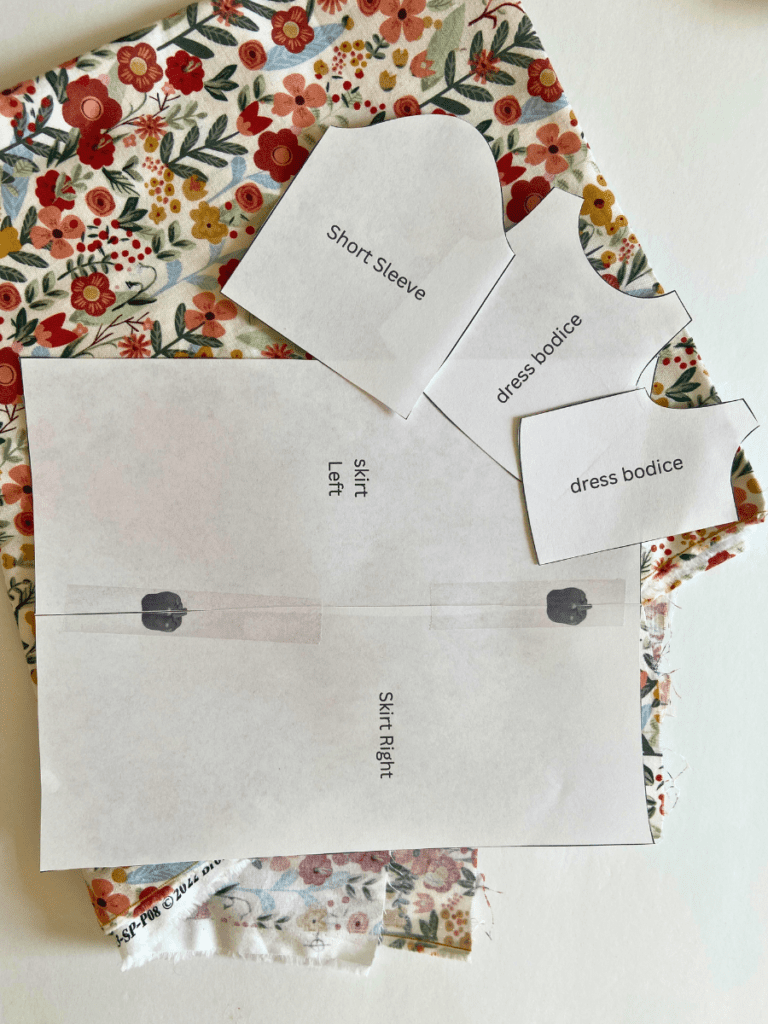
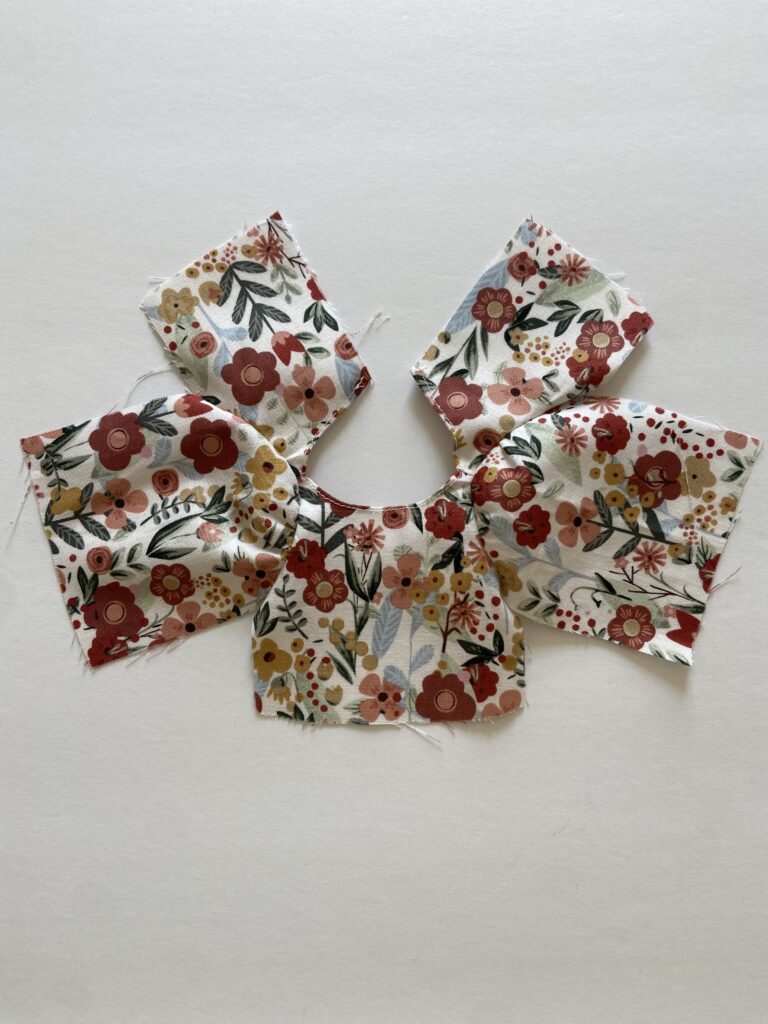
Step 1: Assemble your pattern pieces and cut your fabric
First, cut out all of your printed pattern pieces.
You’ll notice the skirt portion of this pattern comes in two pieces — a left side and right side.
Just line up the bell peppers and tape the two pieces together, then you’ll be good to go!

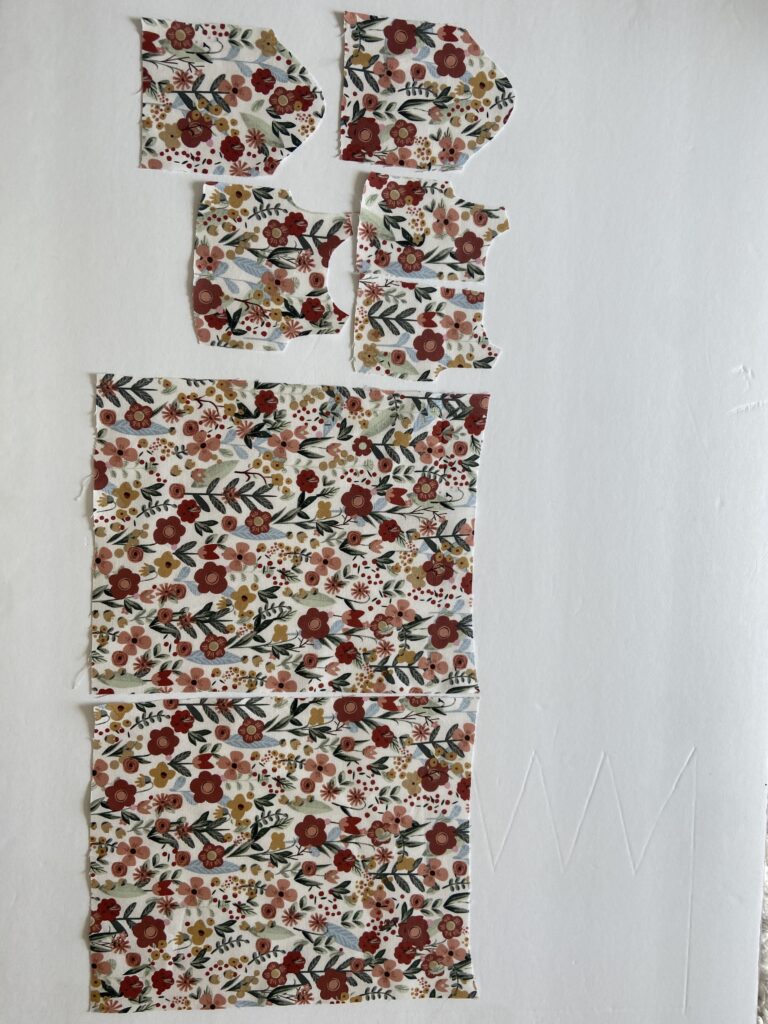
Fold your fabric in half before cutting your fabric pieces, and cut as many pieces as each pattern piece instructs.
(You’ll want:
- 1 Front bodice piece
- 2 back bodice pieces
- 2 skirt pattern pieces
- 2 sleeve pattern pieces)
I like to use this disappearing pen that my dear friend recently gave me. The ink disappears under a hot iron! It’s really nifty!
Iron all of your fabric pieces flat.
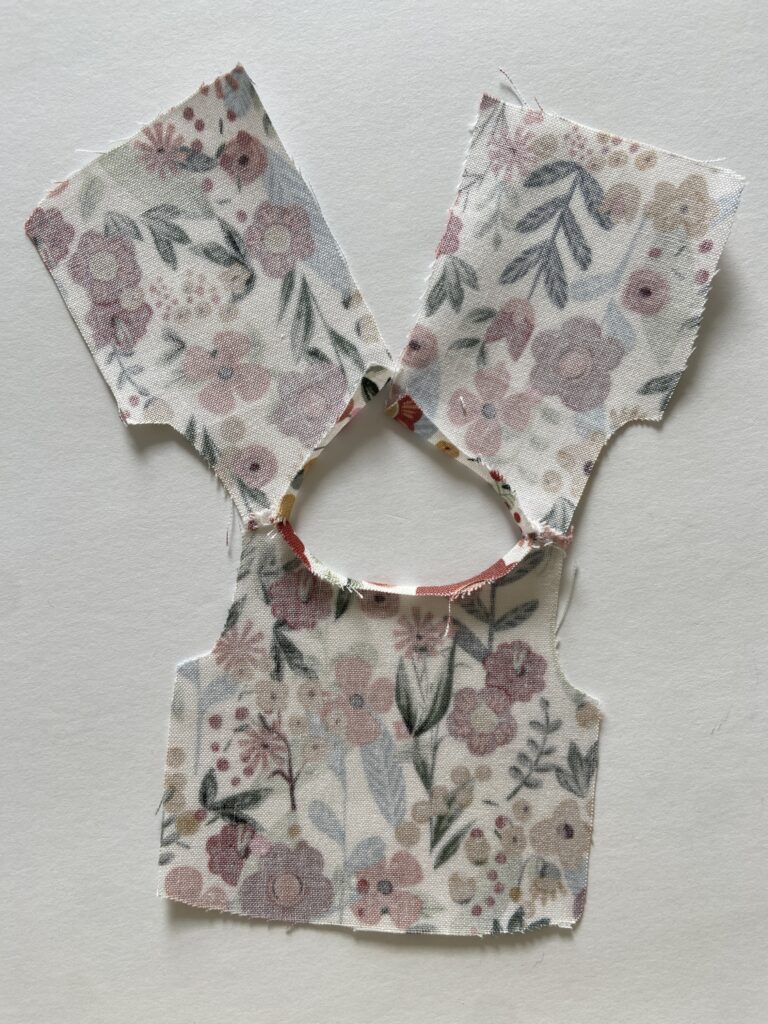
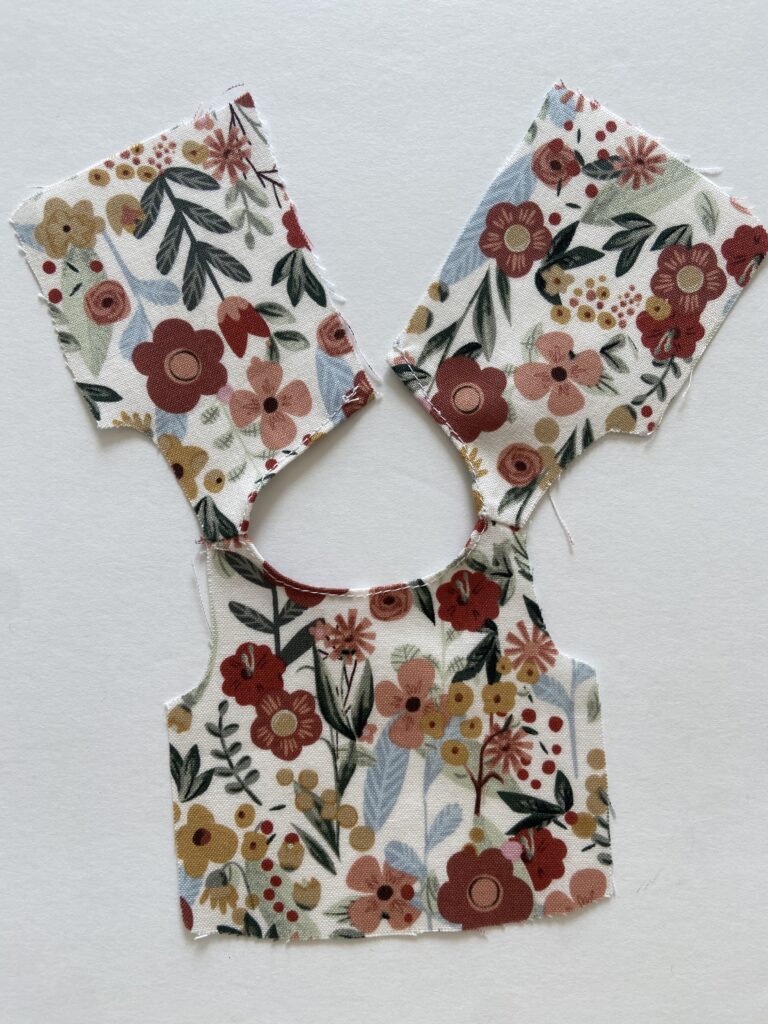
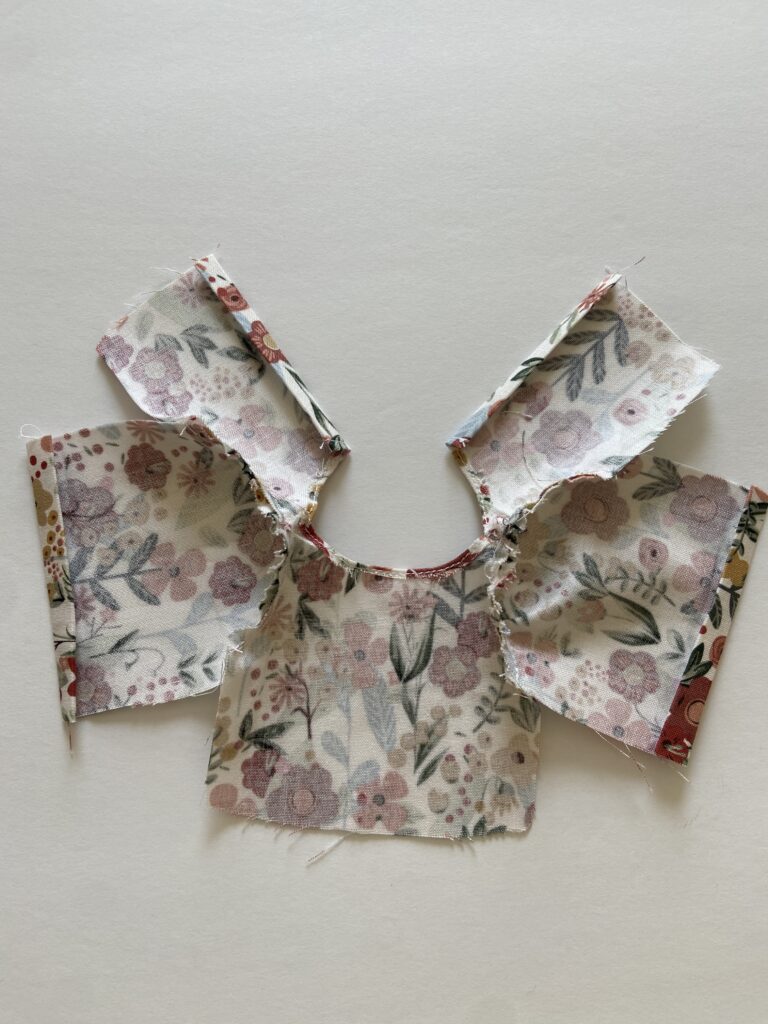
Step 2: Sew the Bodice
To sew your bodice together, line up the shoulders, as shown in the photo below.

Sew across the shoulders, using a 1/4″ seam allowance.
A 1/4″ seam allowance is pretty close to the edge — the middle notch in your pressure foot on most sewing machines.
It’s important to pay attention to your seam allowances — if you sew too far, it’ll make the dress too tight to fit your dolls!
After sewing the shoulders together, iron your seams out FLAT, then fold and iron down a tiny hem across the neckline.
Sew a scant edge around the neckline to keep it down.
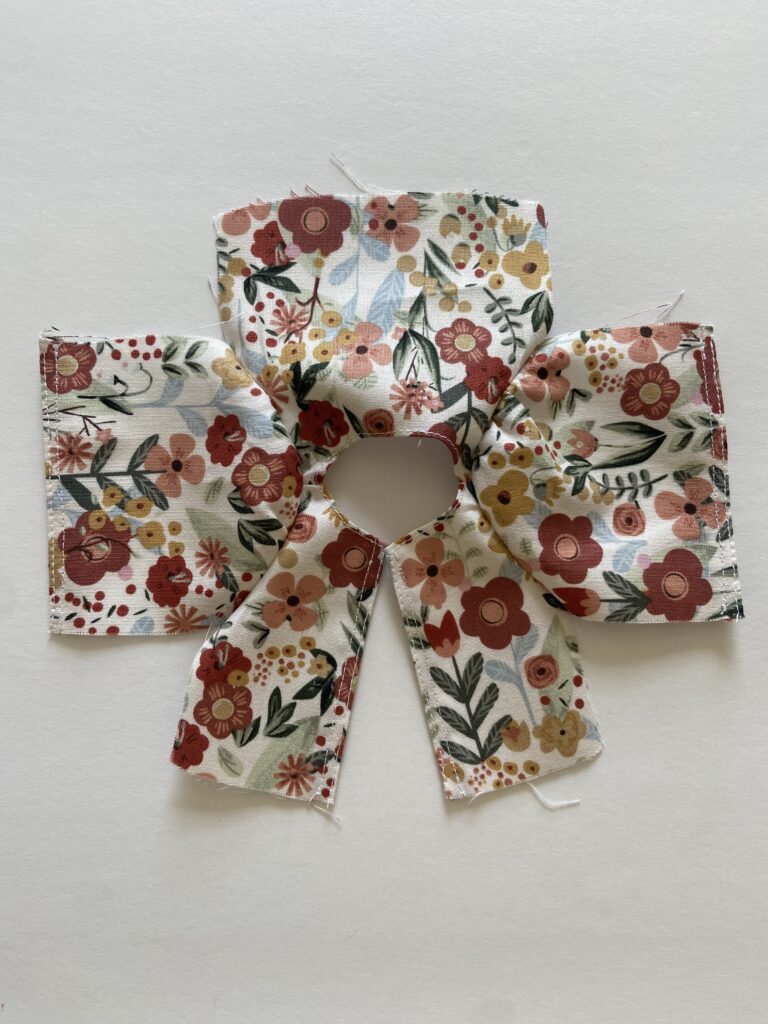
Gather the Tops of the sleeves
Next you’ll want to use the longest stitch size on your sewing machine (mine goes up to a 5.00mm) to create a basting stitch, and sew two lines of stitches around the CURVED end of your sleeve.
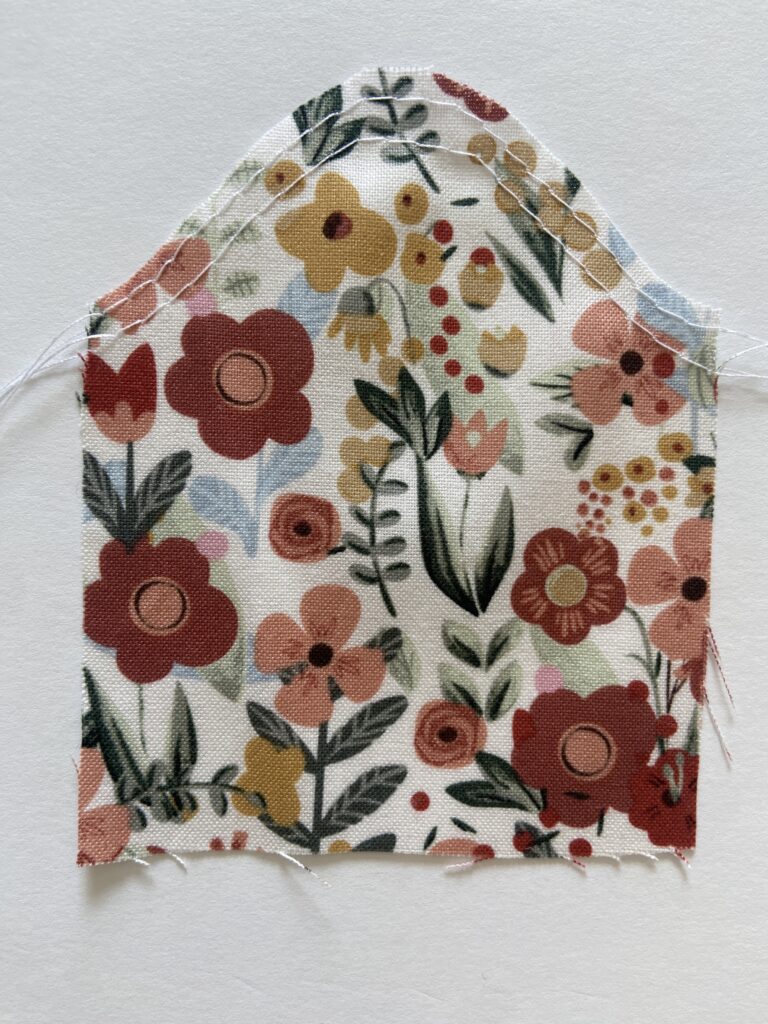
Don’t create any knots/back stitches!
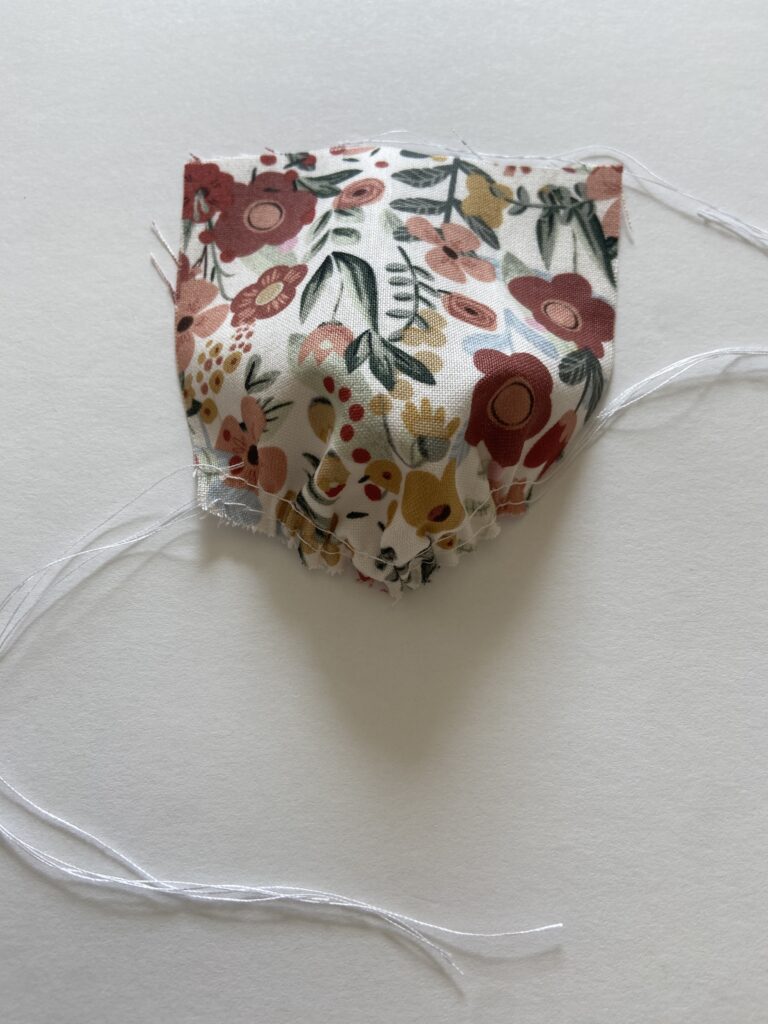
Pull the threads SLIGHTLY to gather the fabric.
Push all the gathered part towards the center of the sleeve, and let out the gathered portion until it matches the armhole on the bodice EXACTLY.
Reset your sewing machine to a normal stitch length (mine is a 2.50mm stitch length).
With right sides together, sew the sleeves to the bodice, sewing right between the two rows of your gathered basting stitch. Pull out your basting stitches.
Next, iron down tiny hems around the sleeves and the back edges.
Sew those hems down right along the edge. You’ll want to sew two lines of stitches — one that’s roughly 1/8″, the second a 1/4″ seam allowance.
Step 3: The skirt
Next, you’ll need to gather the top of each skirt piece.
In the same way we gathered the sleeves, use your largest stitch length and create two rows of basting stitch, across the top of each skirt piece.
Gather the front skirt piece (it doesn’t matter which piece this is; they are both the same) so that it is the same width as the bottom of the front bodice.
Gather the back skirt piece so that it is the same width as the bottom of the back bodice. Note: you will line up each back bodice piece side by side in a “closed” position to determine the proper width.
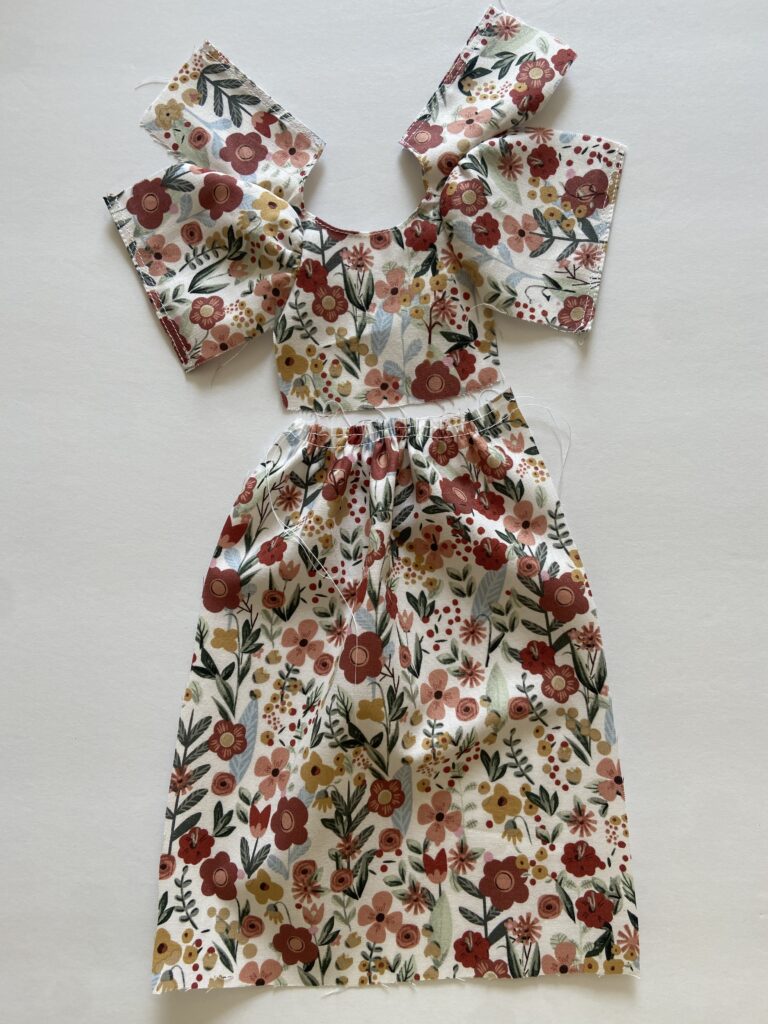
With right sides together, sew each skirt piece to the front and to the back bodice. Sew in between the two lines of basting stitches.
Remove your basting stitches.
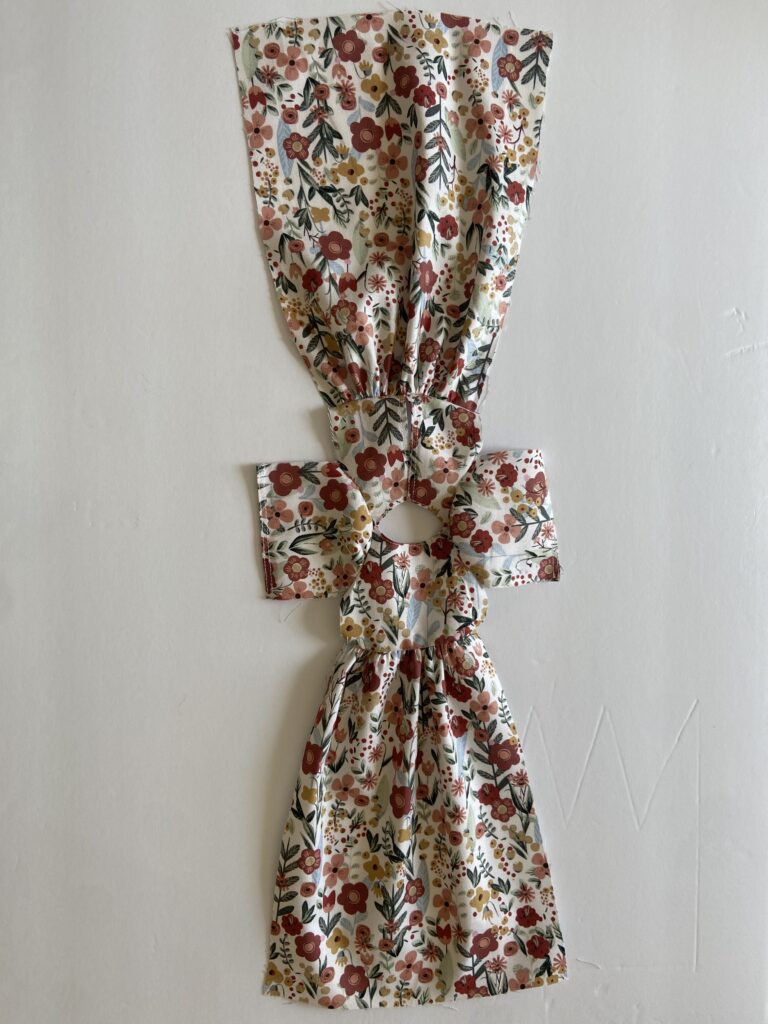
Step 4: Finishing the dress
Sew together the side seams of the dress.
Fold the dress in half at the top, right sides together.
Start at the end of each sleeve, and sew a line of stitches to the bottom.
Repeat for each side.
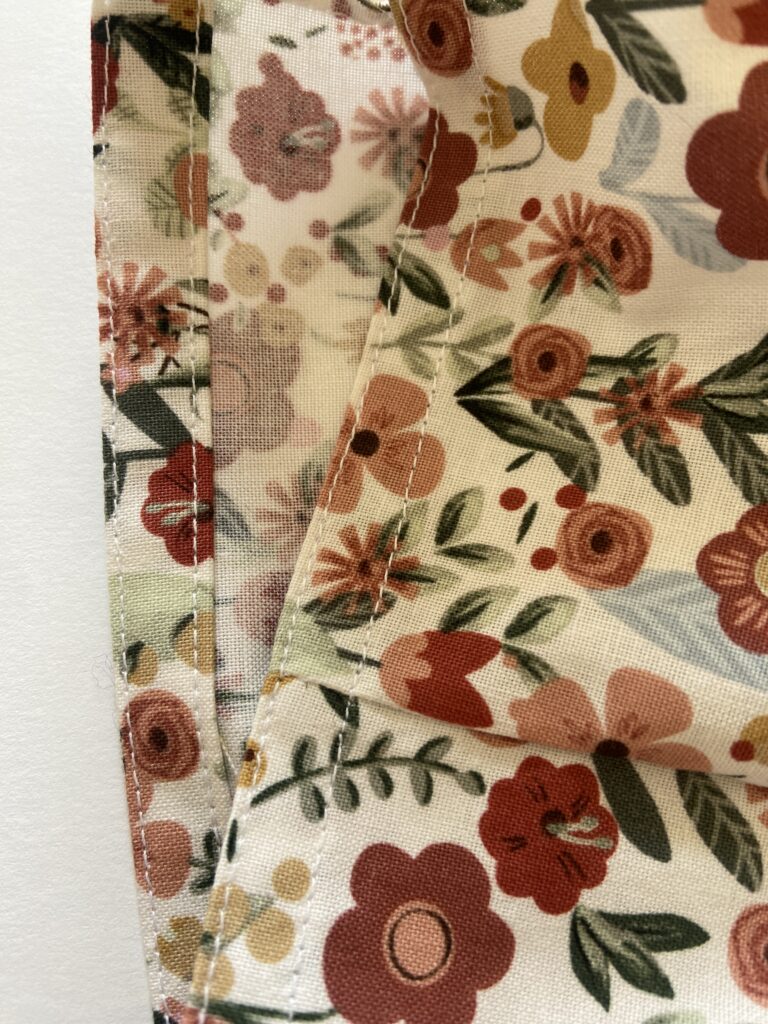
Fold the bottom of the dress over TWICE to conceal the raw edges in a hem. Sew a line of stitches to hold the hem in place.
Sew a second line of stitches with roughly a 3/8″ seam allowance.
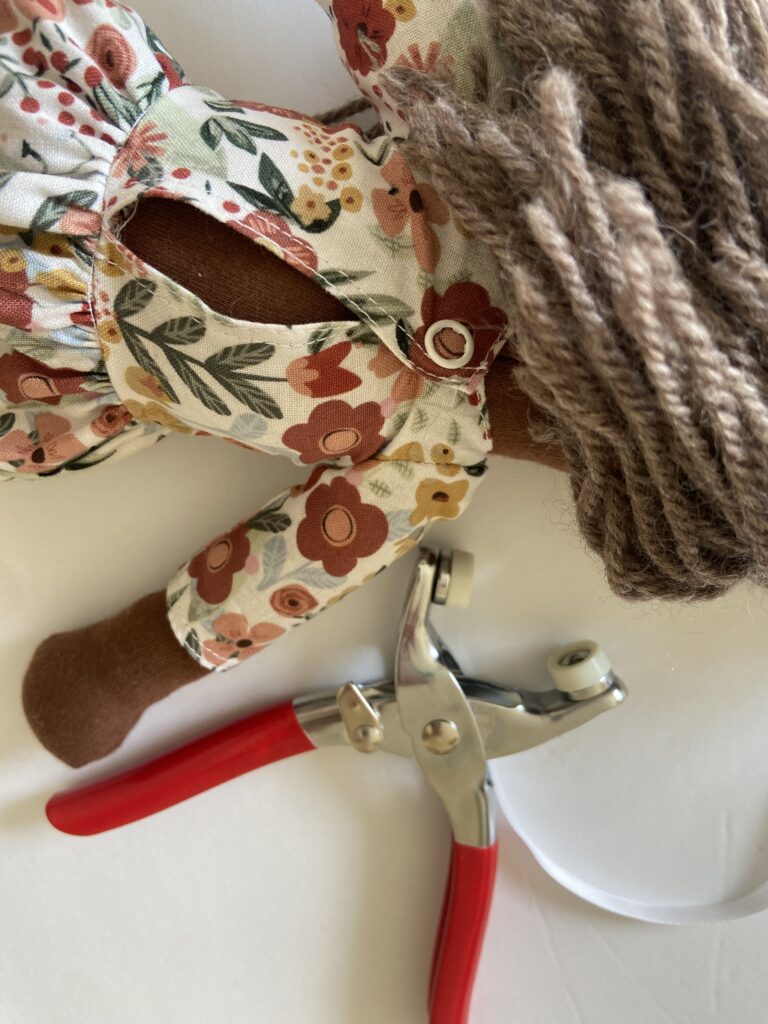
On the top back of the dress, create some kind of closure.
I chose to use a snap.
You can use buttons, velcro…whatever you choose!
Here’s the snap kit I own and used for this project!
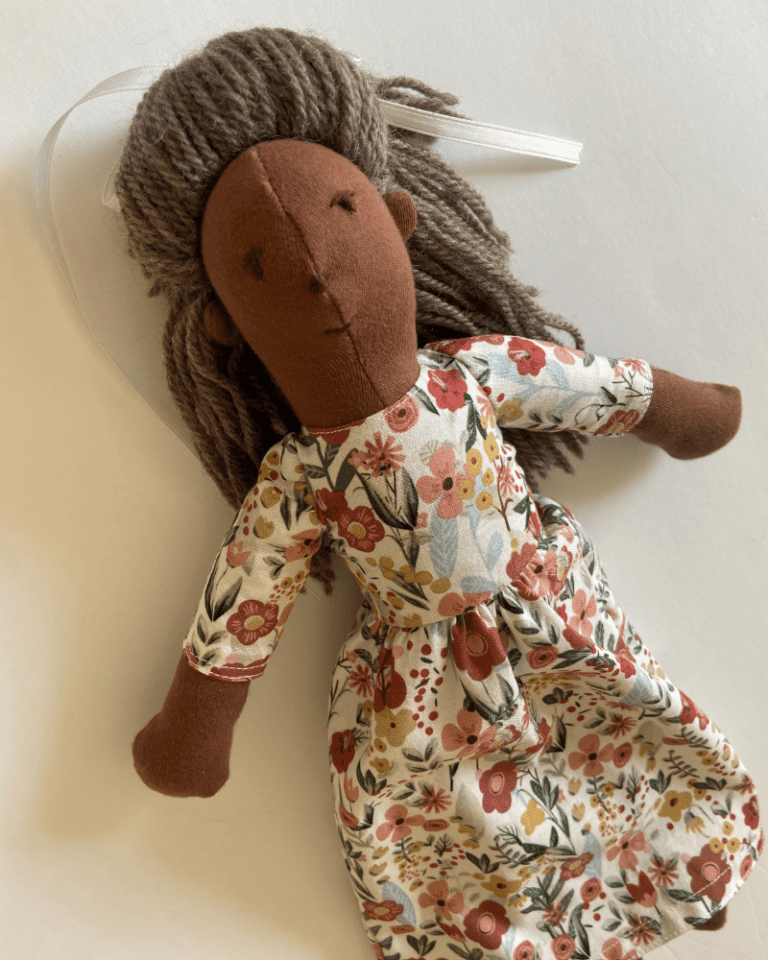
There you have it!
This dress fits my rag doll pattern, fox, mouse, horse, cat, and rabbit patterns.
Be sure to make them all!!