Reusable Birthday Banner Decoration: Free Printable Sewing Pattern
Here’s a free pattern you can print for a Happy Birthday Banner! Then, follow along as I show you how to make a reusable decoration that will quickly become a family heirloom!
Have you, too, been smitten by a birthday banner seen all over Pinterest and Instagram?
Did you, like me, look up the price of purchasing one, and about fall over??
Say no more — you’ve come to the right place!
Today, I’m giving you a FREE PRINTABLE PATTERN so you can sew your very own darling reusable birthday banner decorations!
AND, I’ve included extra letters, numbers, and symbols in my printable pattern, so you can make it say whatever you want!
Personalize it however you’d like!!
Disclaimer: As an Amazon Associate, I earn from qualifying purchases at no cost to you! Thank you for your support!
Supply List for the Birthday Banner
For this project, you will need:
- Felt, wool or synthetic for the letters. I chose white to make the letters pop! 1/2 yard will be more than enough! If you’re using felt sheets, you shouldn’t need more than 4 for this project.
- Cotton fabric for the banner. You will need at least 2 yards for this project! I just used an old sheet for the back of the banner pieces, and left the fun, colorful pieces for the front! This is a great project to use up some scrap fabric!
- Ribbon to hang all the pieces off of (10 yards, I used 1/4″)
- A chopstick to poke out your corners
- A needle and thread, and/or a sewing machine
Print your pattern for your Birthday Banner
First, print your pattern.
I have a free pattern you can print!
Or, if you’d rather — you can just trace out your pieces you need. The biggest thing to consider if you’re tracing your own pattern is to make sure the banner portion is nice and even on all sides. This will become important when cutting and sewing the banner pieces!
I’ve included additional letters, numbers, and symbols so you can make this banner say anything you want it to!
Print your pattern HERE:
Once you’ve printed out your pattern, cut out all your pattern pieces.
Cut out the insides of each of your “Happy Birthday” letters, too!
Take your time cutting out the inside of the letters, this part can be a bit obnoxious. It won’t hurt your end project if you fold each letter to help you cut out the middle of the letters more neatly.
Cut your Birthday Banner Fabric

Next you’ll need to cut out all of your fabric pieces.
Use your cotton fabric for your banner pieces (the “background” to your letters).
For the banner, you’ll need 13 front banner pieces, and 13 back banner pieces. (26 pieces total for the banner)
Use the felt for the letters on your banner.
The felt allows for awkward shapes without having to hem your fabric.
For the letters, flip each letter upside down on the felt, and trace the outer and inner lines. Cut out each letter. You will need:
- H — 2 H’s
- A — 2 A’s
- P — 2 P’s
- Y — 2 Y’s
- B — 1 B
- I — 1 I
- R — 1 R
- T — 1 T
- D — 1 D
Again, you should have traced your letters upside down onto the felt. This way, and pencil/pen that might bleed through won’t show through on the right side.
Carefully cut out your felt letters and set them aside.
Remember to cut out the centers of A, P, B, R, and D, too!
Sew the Birthday Banner Pieces
Next you’ll be sewing the banner pieces.
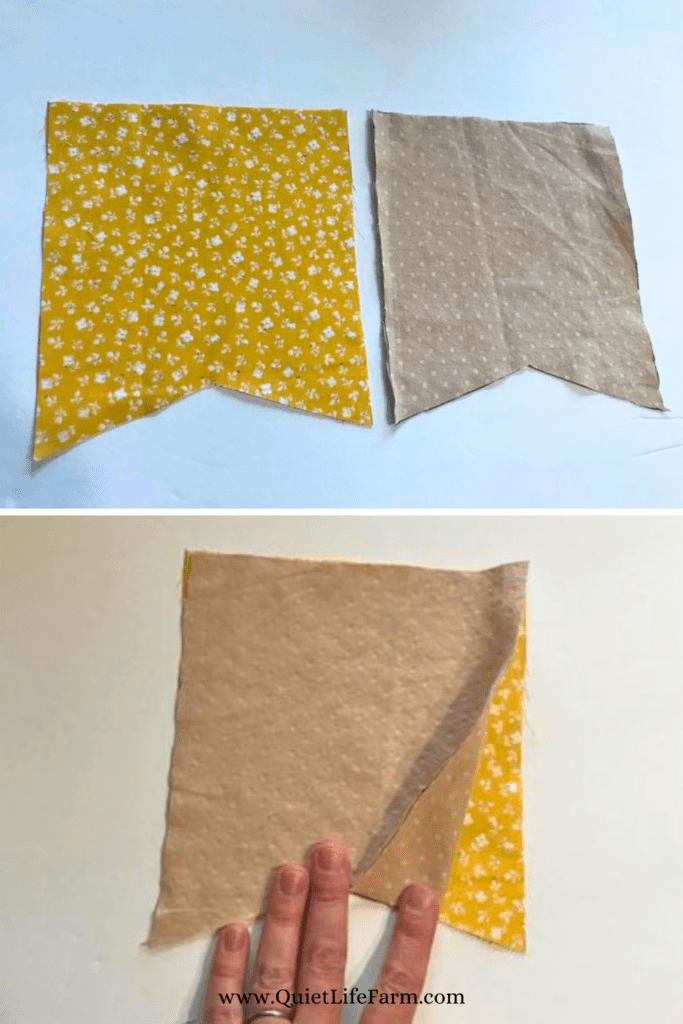
Take a front piece and a back piece and put them right side together.
Stitch along the edges, leaving the straight edge on the top open.
Make nice, sharp corners at the bottom!
Flip your piece over, and make a second line of stitches on the same edges you just finished sewing, if needed. This just makes everything nice and strong, and if you cut your pieces slightly uneven, it ensures that the edges won’t “pop open” in certain places when you turn them right side out!
Continue this process for all the pieces of your banner.
My sister in law gave me the great idea that this banner can be reversible! Consider using one side colors and patterns that would reflect one child, and the other side of your banner to honor and reflect another child!
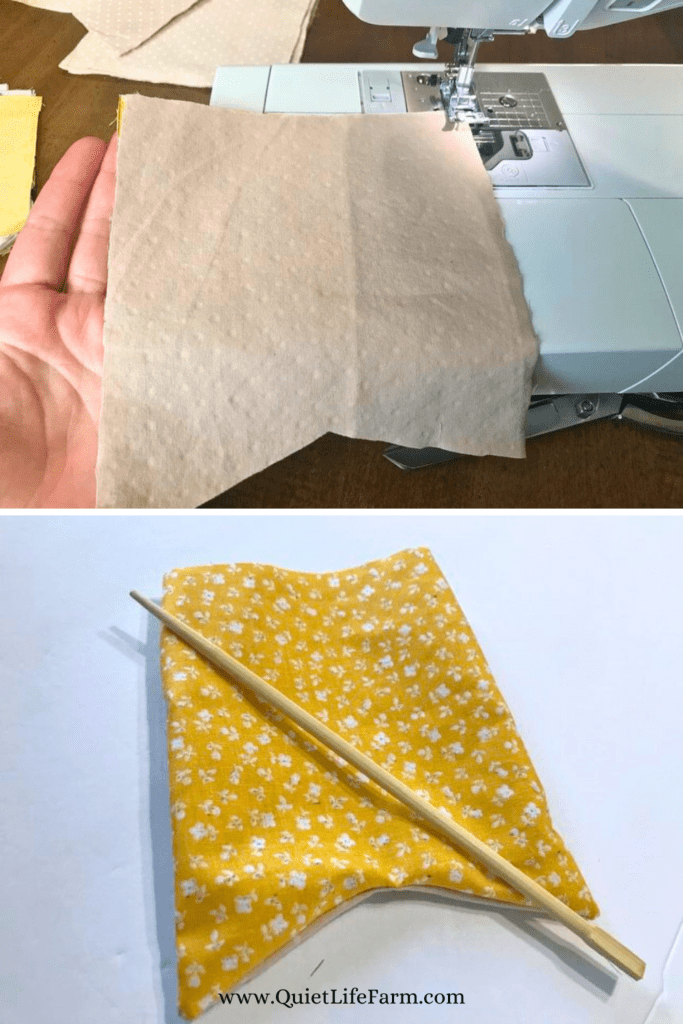
Turn your pieces right side out.
Use a chopstick to carefully poke out your corners.
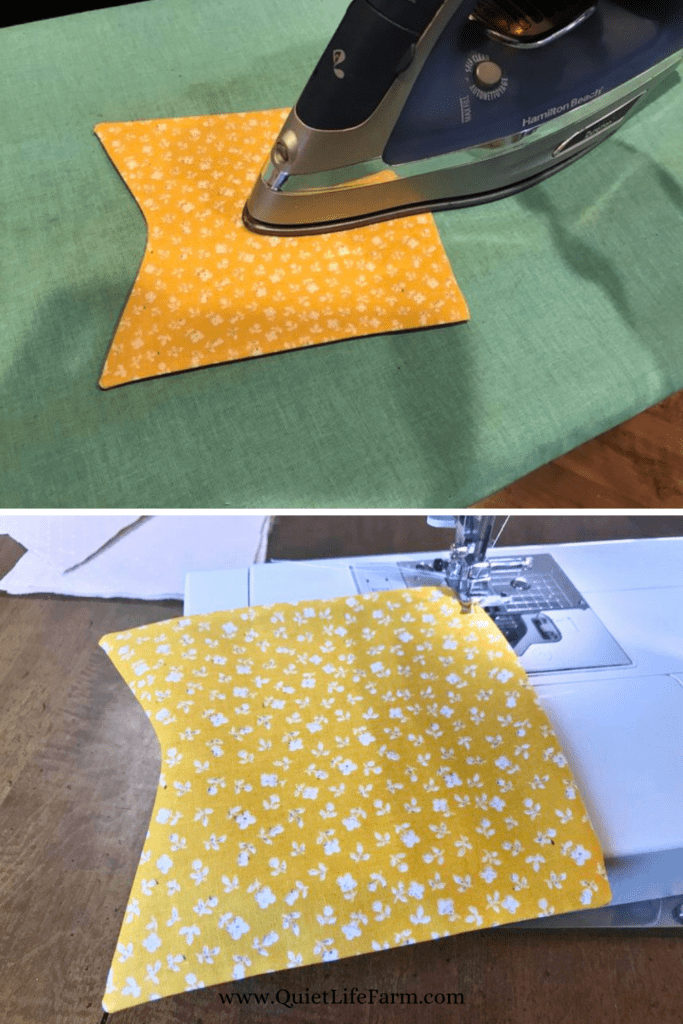
Next, iron all your banner pieces so that they’re flat.
Fold the opening at the top so the raw edges are hidden inside the “pocket.”
Sew around the entire banner piece again, closing the top portion, and permanently flattening the rest of your banner piece. Stay close to the edge!
Sew the Letters onto the Banner
Once you are finished with all of your banner pieces, line them up with 5 pieces on the top row, and 8 on the bottom.
Play around with the order until you’re happy with whatever pattern you come up with!
Then, lay each letter of “HAPPY BIRTHDAY” onto your banner pieces.
Check again if you still like the order of your banner pieces (there may be some letters that block out certain fun prints too much! Switch it up until it’s perfect in your eyes!).
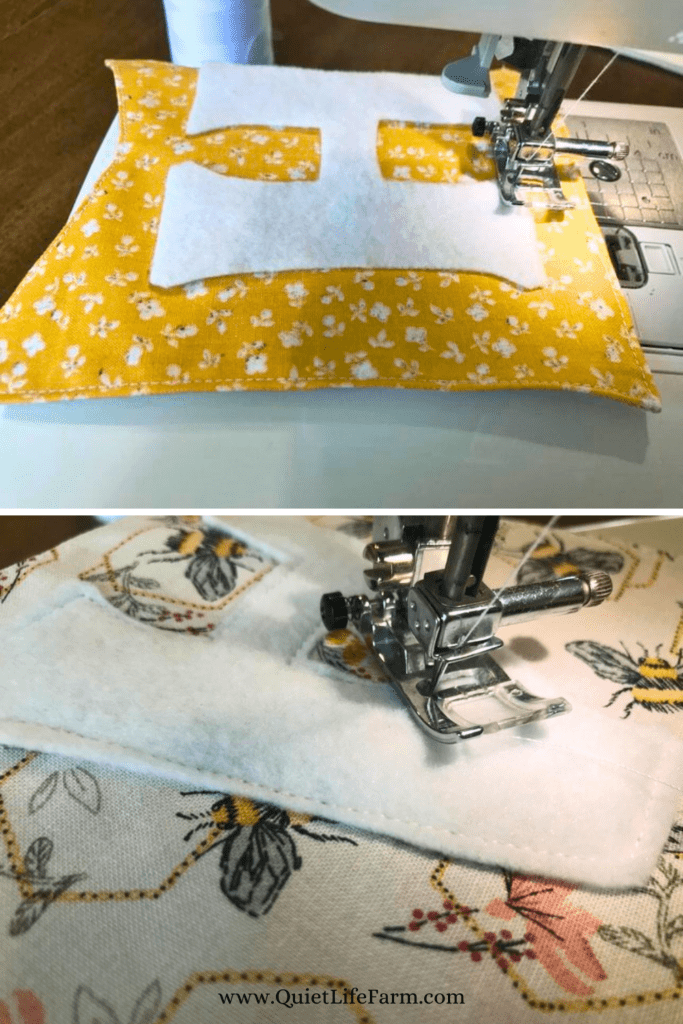
Then, start sewing on your felt letters!
Use a thread color that matches the color of your felt letters — unless you want some fun, colorful stitches to pop through!
Go around the edges of all of your letters — slowly. There are some funky curves to sew!
Don’t forget to do the edges of the inside of your letters (such as “B” or “A”), too. You want everything to lay nice and flat!
Make knots/backstitches, and snip the ends of your thread short.
Attaching the Birthday Banner to Ribbon
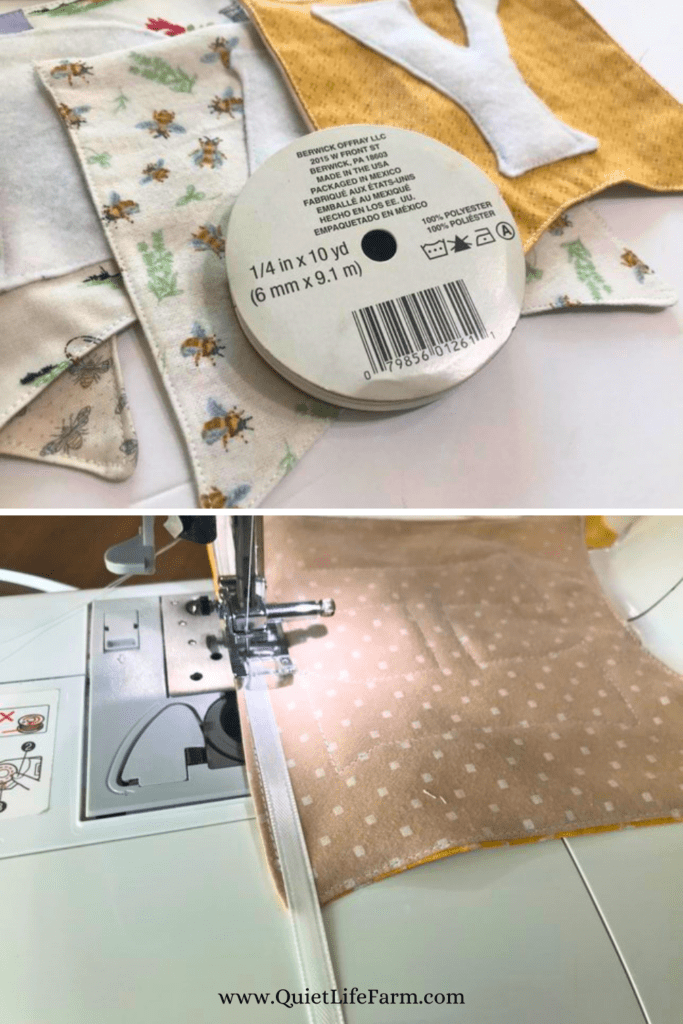
Lastly, you’ll want to attach the banner to some sort of ribbon.
I used a 10 yard spool of 1/4″ ribbon, as seen in the picture.
First, make sure you have plenty of ribbon pulled out before you attach your first letter — don’t forget you’ll want to be able to actually tie this banner to something!
I suggest leaving a little more ribbon at the beginning and end of the banner than you think you’ll need. It’s good to have the flexibility of hanging it in different places that you may have not thought of yet!
Attach each piece of the banner to the ribbon by laying the ribbon across the top straight line on the BACK of the banner, and sewing all the way across each banner piece.
Lay out each banner piece individually on the ribbon before you sew it on, to make sure it’s an even distance from the other pieces already attached to the ribbon.
Careful not to twist your ribbon as you go along!
Once you reach your last banner piece, pull a nice long end piece of ribbon to match the length of the beginning tie. Remember, you want it to be long enough to actually hang it!
I chose to make “Happy” and “Birthday” on two separate strings. I was concerned it might be too heavy (and too long!) if I put it all on one ribbon. It’s your preference what you’d like to do!
Just one roll of 1/4″ ribbon is plenty of ribbon to complete this project.
Check out my other posts!
If you like nurturing your family through all things handmade, please check out the other corners of my website!
I have many free patterns to share with you!
Lastly, please leave a comment below.
I always enjoy hearing from you!
Could you use fat quarters for the patterned side?
Yes! Standard 18×22″ fat quarters would be a great material to use for this project!
thank you!
You are so welcome!
Is there any reason flannel wouldn’t work for the banners rather than cotton?
Flannel will work well for this project! I wouldn’t use anything too thick or your sewing machine may struggle to sew through the layers, but one of the bee fabrics I used for this project is actually a flannel fabric, and it worked well!
Thank you so much for sharing, and the free pattern. You are awesome!