Different Types of Scissors for SEWING: All you need to know
Let’s talk about the different types of scissors used in sewing, and go into some detail on each one! Using the right tools will make your sewing project go much more smoothly!
There’s a cutting tool for every project!
Having the right tool for each sewing project will make your life much easier!
Below, we will talk about:
- Fabric Scissors
- Pinking Shears
- Thread Snips
- Rotary Cutters
- Buttonhole Scissors
- Applique (Duckbill) Scissors
- Embroidery Scissors
- Plus, answers to all your questions such as scissors vs shears, and the care/sharpening of scissors!
Disclaimer: As an Amazon Associate, I earn from qualifying purchases.
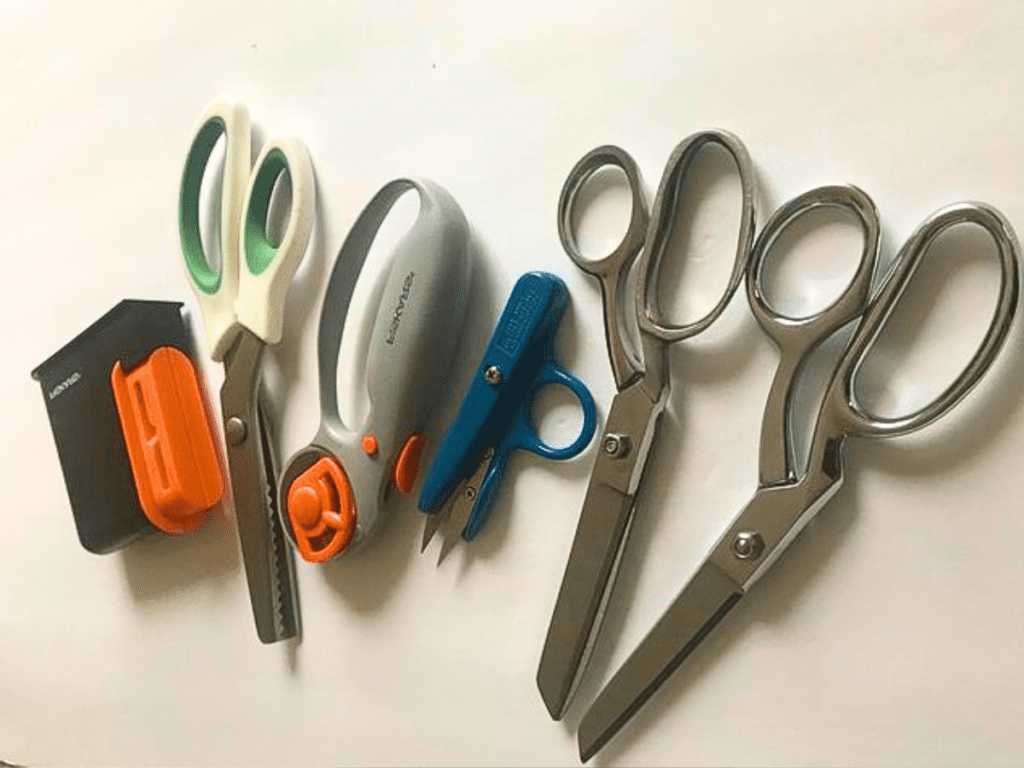
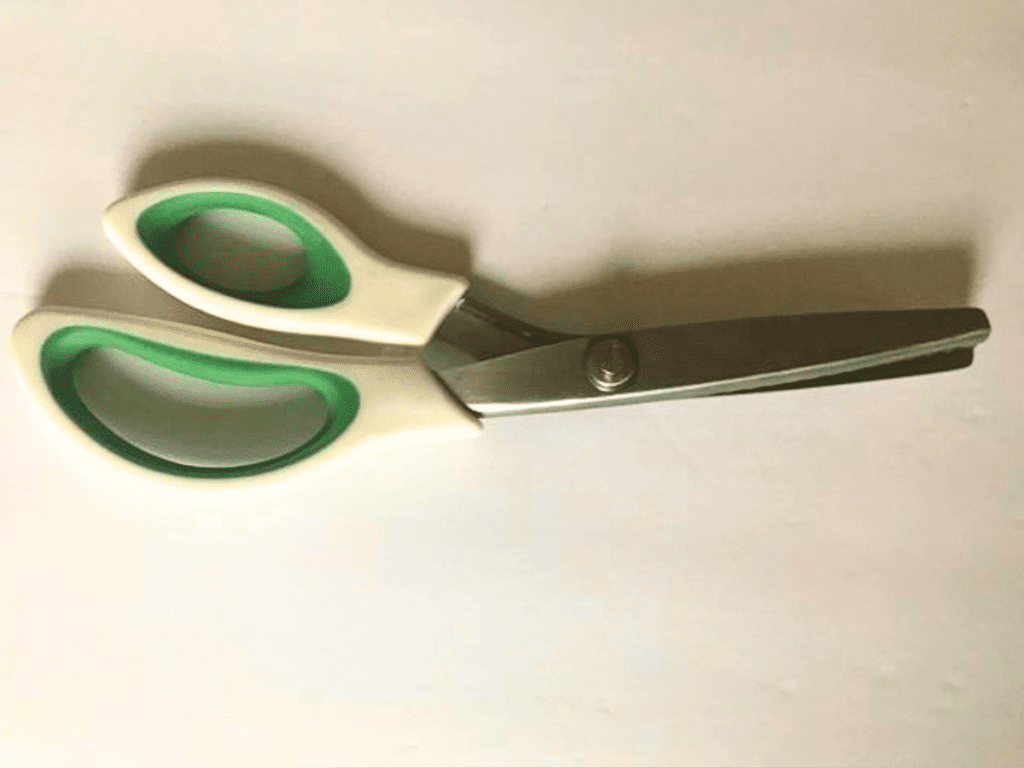
Fabric Scissors
After a needle and thread, fabric scissors are perhaps the most essential tool for sewing.
For this reason, it’s best if you can get a good quality pair of fabric scissors. Especially if it’s a pair of stainless steel high-quality scissors, they are likely to last you a lifetime. There are plenty of pairs of scissors with plastic handles, but I really prefer even the handles to be made of stainless steel, just to ensure longevity.
Regular scissors won’t “cut it” when it comes to fabric and sewing (unless you’re just using them to cut paper sewing patterns out). You really want a pair of scissors that will cut through even thick fabrics.
I actually own two pairs of standard sewing scissors. One pair to constantly misplace, and the other pair to be able to be able to easily find when my other pair is misplaced.
This is my favorite pair of scissors I have, if you’re interested!
Whatever you choose, always aim for stainless steel blades as they won’t rust! (most modern scissors are made from stainless steel — vintage scissors were usually made of regular scissors which WILL rust!)
Note: To care for your scissors, keep them clean, dry, and sharp! (more on that below!) You can also oil the screw/pivot point. I keep a bottle of liquid bearings on hand for all my oily sewing needs! This stuff lasts literally forever since you really only need a drop or two each time you use it. When I went to find a link to share with you, it didn’t even show up on my Amazon search history, which means I’ve had my tiny bottle for longer than I’ve had Amazon… that means my bottle is OLD but still working perfectly!
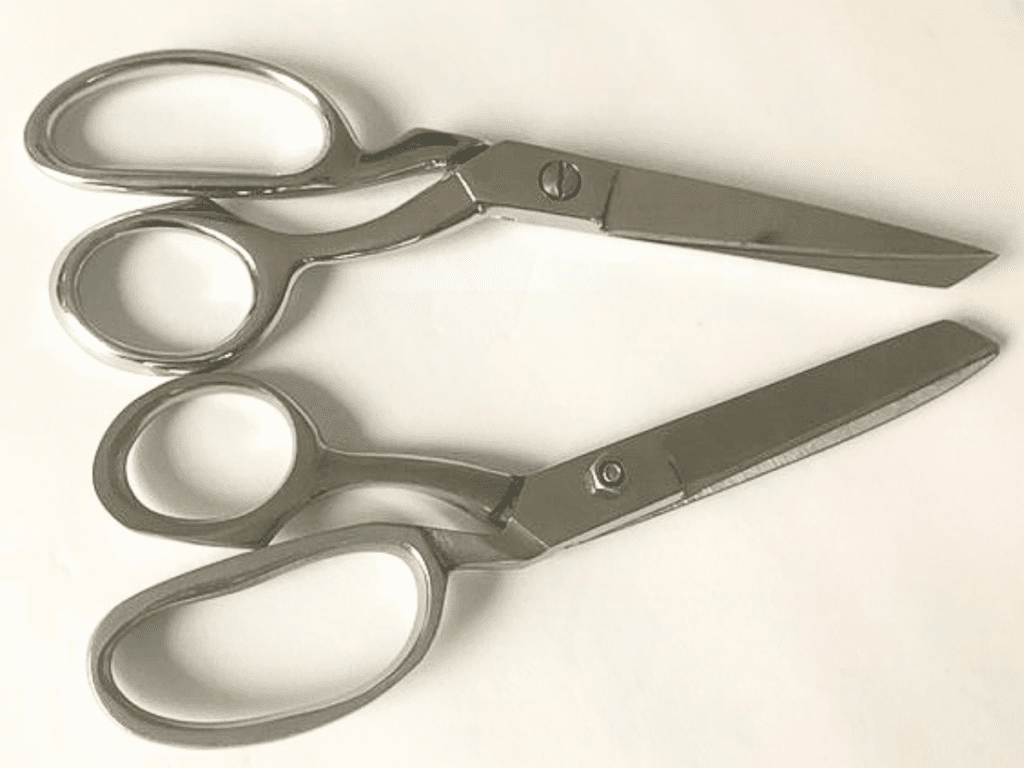
Above Photo: The top shears are my Gingher sewing scissors I’ve owned for 6 years now, mentioned above. The bottom sewing shears are ones I purchased as a kid. I worked hard to save up twenty whole dollars and purchased them from the sewing store all by myself! And — they still get regular use by me today! I love both pairs!
Pinking Shears
Pinking shears are your “zig zag” scissors!
They have a serrated edge on each blade which creates little triangles with each cut.
This prevents fabric from fraying. It’s a great tool to have if you don’t have a serger (I don’t, pinking shears work just fine for this home sewist!).
Pinking shears can also just make a fun decorative edge!
This is the pair I own. They have nice soft-grip handles!
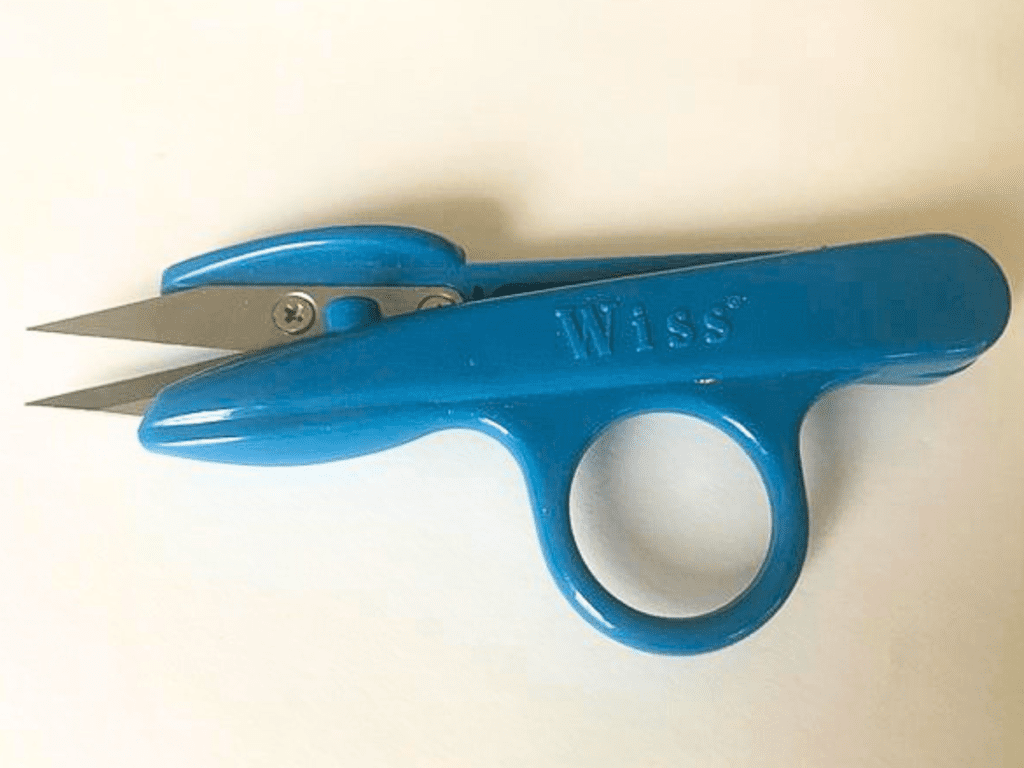
Thread Snips
Your “thread snipper” is a pair of small scissors with a spring-action design that keeps them popping back open, enabling you to very quickly snip off your thread tails while sewing!
They’re a great sewing tool to keep on hand. They’re super pointy on the tips (at least mine are!), so keep that in mind when blindly digging for them at the bottom of your sewing box!
These are the ones I’ve had for years! I still haven’t had to sharpen them!
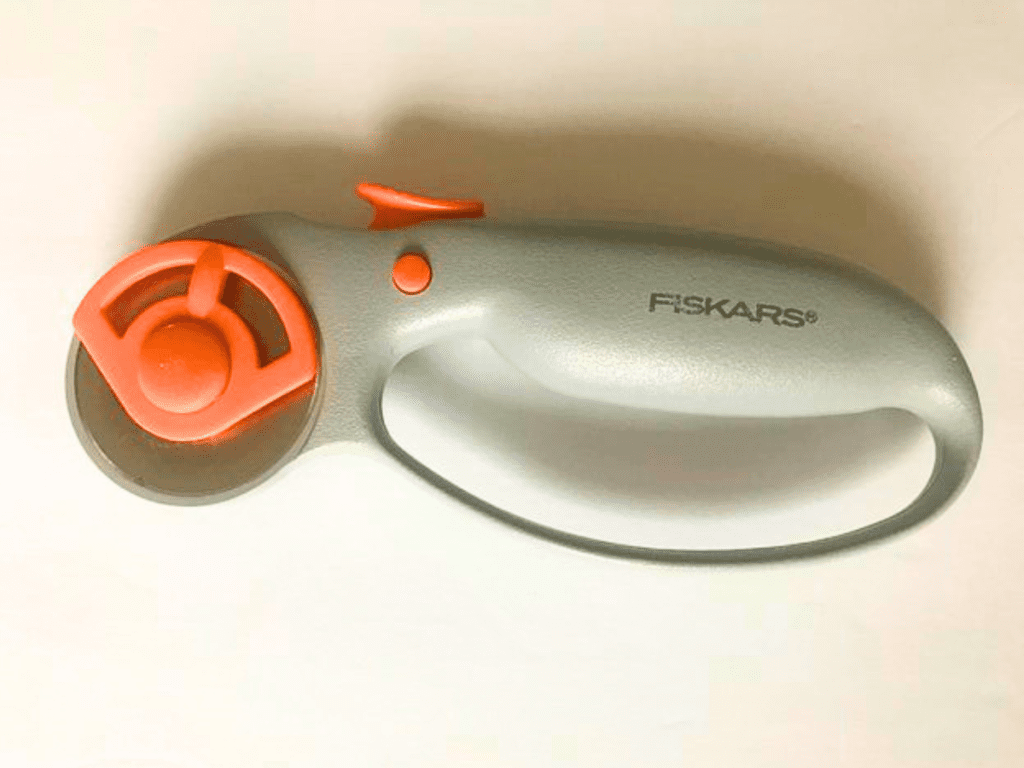
Rotary Cutter
What’s a rotary cutter? It’s the pizza cutting scissor!
Rotary cutters are perfect for QUICKLY cutting straight edges. I even use mine to cut through several layers of fabric at once!
Rotary cutters are mostly used in quilting. They’re paired with acrylic quilting rulers and self healing cutting mats.
When using a rotary cutter, your fabric is placed on a self healing cutting mat, and the rotary cutter is guided by a thick plastic ruler (your quilting ruler).
Keep in mind that a rotary cutter is EXTREMELY sharp. All scissors need to be kept far out of reach of children, but a rotary cutter needs to be guarded like fort knox.
Note about self healing cutting mats: It is of utmost importance to store your cutting mat FLAT. Totally flat. Not a chance of it being not-flat. And don’t store anything on top of it that could inhibit its flatness. I made this mistake once, and I thought I was going to have to get rid of it and buy a new one. The rescue involved lots of damp towels, a hot iron, and way too much of my time. For those of us living in small spaces — I personally now store mine on top of my top loading washing machine. That way, it’s out of the way, but forever lying flat.
Buttonhole Scissors
Buttonhold scissors, or buttonhole cutters are for opening up your button holes.
To use, put the blade right in the center of your button hole and tap with a hammer. (keep something such as a thick towel or cutting board underneath it so you don’t damage your table!)
An alternative for buttonhole scissors is to use a seam ripper with a pin to stop the seam ripper from tearing your buttonhole stitching.
You can see an example of what this tool looks like HERE.
Applique Scissors
Applique scissors are sometimes called “duckbill scissors” because of the curved edge they have on one side that resembles the bill on a duck.
They have a short blade and are small, perfect for small areas in applique work.
The “bill” is designed to protect your applique work.
To use, keep the bill side of the scissors on the inside of your applique piece, and the flat sharp blade on the outside. Hold the outside piece of the fabric UP while trimming it off.
This way you will be able to cut very close to your stitches without cutting them, and without damaging your applique piece.
You can see an example of these scissors HERE.
Embroidery Scissors
If you’re doing embroidery work or cross stitch, you’ll want a pair of embroidery scissors.
These tiny and often decorative scissors are used for snipping thread and embroidery floss close to the fabric.
Their tiny size allows you to have good control over your craft project, and is perfect for precision work.
You can see an example of them HERE.
What’s the difference between “scissors” and “shears?”
Believe it or not, there’s actually a difference between “scissors” and “shears.” It’s not just a word preference.
Scissors have shorter blades, and equally sized finger holes.
Scissors are typically used as paper scissors.
Shears have longer blades, and a larger hole for your fingers, with a smaller hole for your thumb.
Dressmaker’s shears are also sharper than all purpose scissors, as they’re designed to make clean cuts through layers of fabric.
So, if you’re getting a true pair of dressmaking shears, look for the long blade and uneven hole sizes!
How can I sharpen my scissors?
Sharp blades are crucial for making precise cuts and the secret to preventing hand fatigue!
If you have a pair of dull scissors, there are simple ways to sharpen them!
Here are some things you can use to sharpen your scissors
- Sharpening Stone
- Knife block (if the openings are wide enough for scissors)
- Scissors sharpeners, designed exactly for scissors
Here are somethings you can NOT use to sharpen your scissors (despite what the internet tells you)
- Sandpaper
- Tinfoil
The above things will NOT actually sharpen your scissors. In fact, they’ll just do the opposite.
Cutting through sandpaper or tinfoil will dull your blades and could ruin a good pair of scissors.
It’s a really good idea to just keep a pair of scissor sharpeners on hand. A good brand starts at like $6 on Amazon. It’s definitely worth the price! You can even use them on your normal paper scissors!
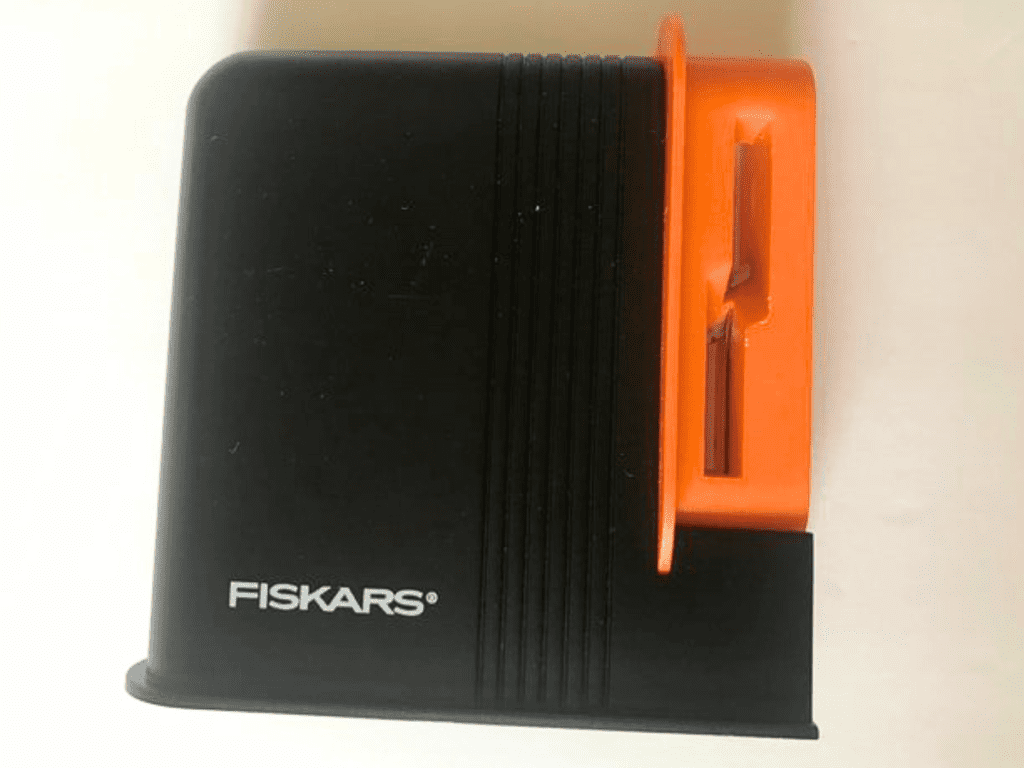
Above: This is the pair of scissor shapeners I have. I have had them for well over a decade, and I don’t expect to ever have to buy another one in my lifetime!
I really love the sharpener I have because there is a place for your hand to keep everything steady while sharpening scissors. They also fit neatly in my sewing box so I always have them easily accessible! That easy accessibility is really important — if you’re regularly sharpening your scissors, they’ll always be performing at peak function! If you’ve been following my blog for long, you’ll know I’m all for saving money, sometimes in the silliest of ways. But to me, it’s the best choice and was worth the extra money to have a scissor sharpening tool that makes it much less likely for me to slice my hand open while sharpening my scissors. You can find it on Amazon HERE.
However, it’s a great sewing brand in general, so if you want a less expensive option from the same brand, this one is currently selling for only $6 on Amazon.
Sharpening Pinking Shears and Rotary Blades
Pinking shears aren’t so straight forward to sharpen since there are so many tiny grooves on them.
Think about all the individual sharp edges on pinking shears. Sharpening them is a very tedious task — you might even consider just replacing them occasionally.
It is possible to sharpen them if you’re careful — consider using a sharping tool such as this that can sharpen the individual tiny blades.
As far as sharpening your rotary cutter — you won’t. You’ll just need to CAREFULLY unscrew your blade and replace it with a new one. Keep an eye out for kinks/bends in your rotary blade — this is another sign that it’s time to replace it!
Leave a comment with your questions
Have any questions?
Leave a comment below and I’ll be happy to answer them!