How to Make Doll Hair
In this post, we will cover how to make doll hair using all natural materials. Perfect for use in making waldorf dolls, or any kind of doll!
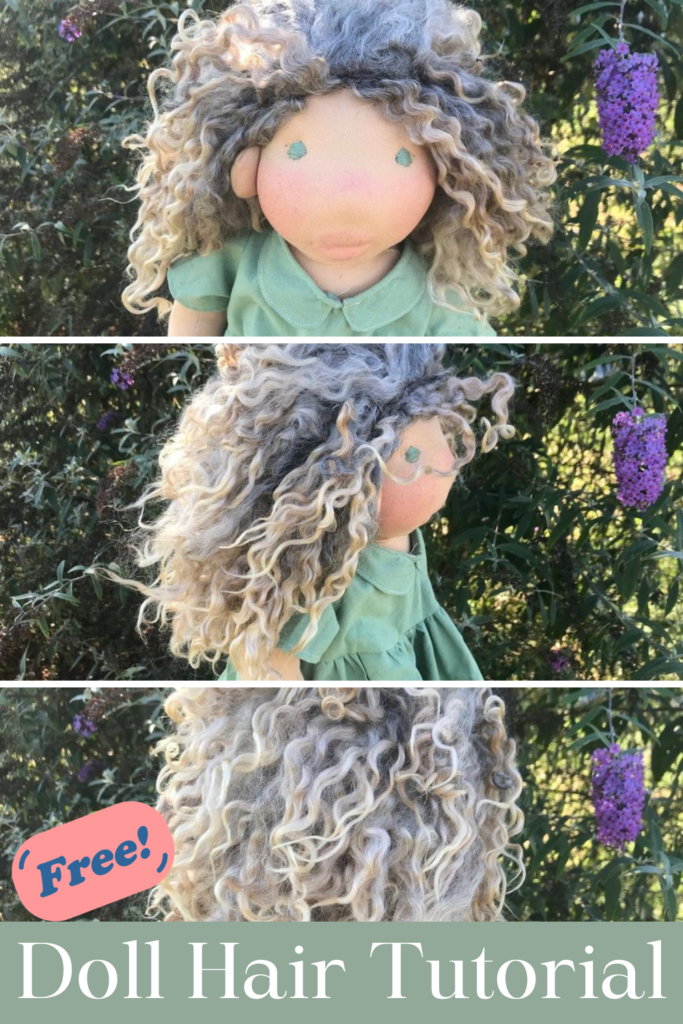
Want to put some GORGEOUS locks of hair onto your doll?
Look no further, today we are doing just that!
Disclaimer: As an Amazon Associate, I earn from qualifying purchases.
In this tutorial, we will cover:
- Selecting raw wool
- How to wash your raw wool
- How to create your doll hair
- Attaching your doll hair to your doll
Let’s get started!
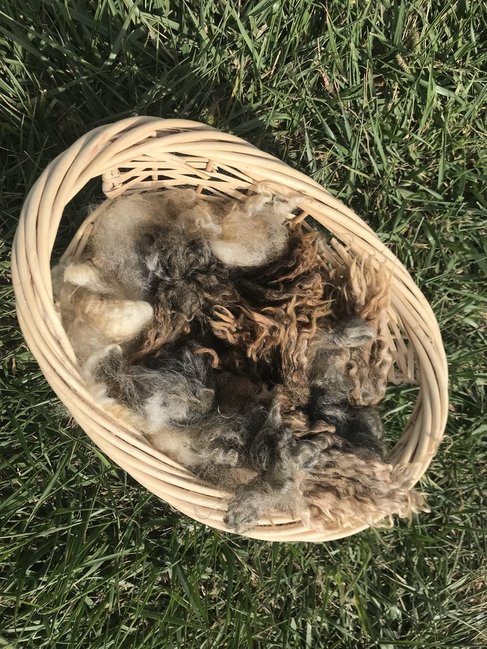
Selecting Raw Wool
To make this style hair, you will need a raw fleece.
There are many sources to purchase a fleece.
You could ask around locally, or head onto etsy.
Amazon also offers some beautiful raw mohair locks in various colors for less than $20!
Personally, I used a fleece from my very own sheep here on the farm.
If you’re picking wool from a larger quantity, be sure to choose the prettiest locks.
Also consider if you want straight or curly hair for your doll.
If you want straight hair — grab the straight locks. Going for a Shirley Temple look? Gather the ones that will look best for your Curly Top!
Washing wool for doll hair
Once you have your locks, it’s time to wash them!
First, pick out any large pieces of debris you immediately see in your fleece.
You’ll find bits of hay, little twigs, and perhaps less pleasurable things in the wool.
After all, sheep are too busy living their best life out on pasture to consider keeping their fleece spotless.
After getting the debris out, you’ll want to wash away the dirt and lanolin.
Once you’ve picked out the chunky bits from your wool, wrap small sections of the locks with these little rubber bands.
Your locks should look like this:

You want to be very careful when washing your locks.
- Never throw them in the washing machine!
- Never throw them in the dryer!
- Never use hot or boiling water!
- Never scrub or agitate your wool!
- Never use harsh detergents!
- Never stretch or wring out your locks!
- Never rub your wool with a towel to dry!
Doing any of the above will result in felted, shrunken, or damaged locks!
Instead, here’s what you SHOULD do:
- DO use lukewarm or cool water!
- DO rinse the wool before adding soap!
- DO use a mild soap: here’s what I used!
- DO pick out any additional debris that comes to the surface!
- DO use very gentle and slow motion while washing!
- DO make sure all your soap is rinsed out well!
- DO lay your locks flat on a towel to dry!
- DO use the sun to sanitize away any potential bacteria, if you wish! (24 hours in the sun is plenty!)
After you’ve laid out your freshly washed locks on a towel to dry, carefully remove the little rubber bands from them. I just cut mine off.
Leaving the rubber bands on can create unwanted creases in your locks, and will also increase drying time.
Depending on the conditions of your home, it will take a bit of time for your locks to dry.
I waited a full 24 hours before resuming work on my weft.
Next up: creating your doll hair!
Here comes the fun part! Creating your doll hair!
Grab your sewing machine and DRY wool locks, and some thread that is close to the same color as your wool!

Select the most similar colors and group them into piles, if necessary.
I separated my wool into two piles and made two wefts behind the scenes. This darker golden one seen in the photo above, and a lighter colored one as well.

Carefully pull the individual locks out of your fleece.
Pull from the bottom of the curl UP.
When separating the locks, it will create a little “fluff” at the end of the pull when sectioning out the locks, so it’s best to have that “fluff” at the top of the curl where it won’t be noticed.
So, again, be sure to pick out your curls with your fingers holding onto the bottom/end of each lock!
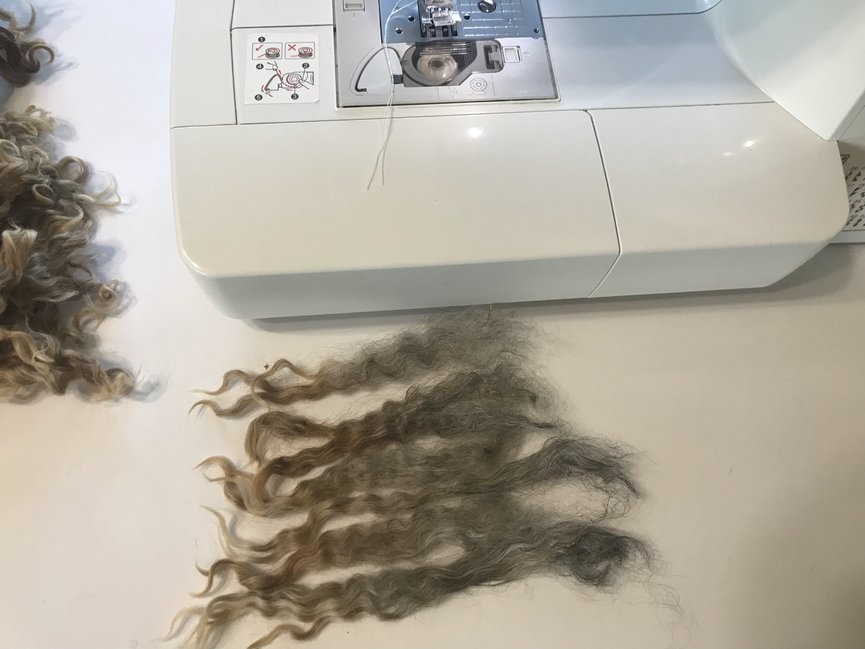
Begin gathering your locks, lining them up neatly as seen in the picture above.
It’s more important to have the bottom of the hair the same level/length than the top.
Don’t worry about the top being varying lengths. Just get the ends of the hair even.
Being sure to keep the ends of your doll hair even, place the lined up locks under your pressure foot and begin sewing.
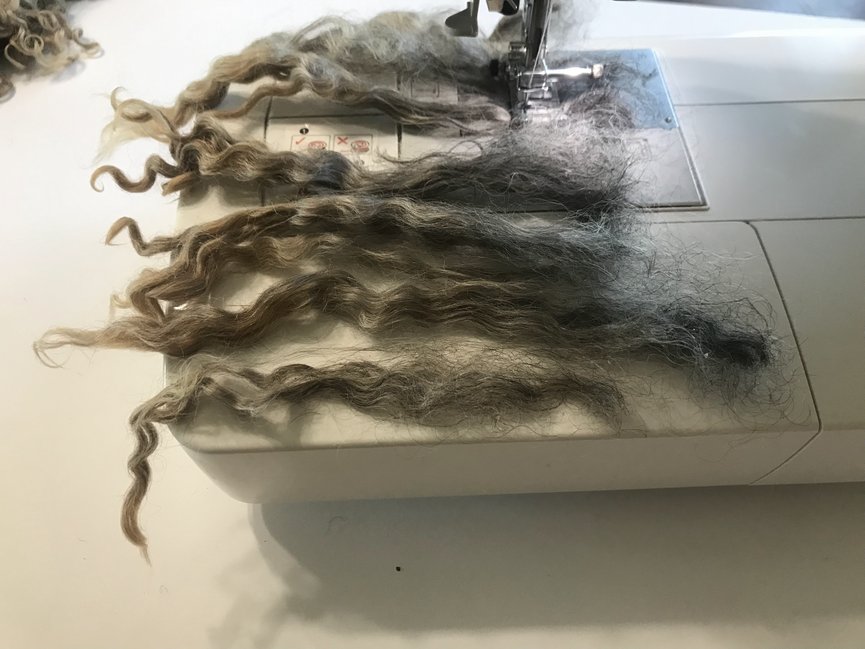
Continue adding more locks as you go along.
You should be able to just feed the locks into your machine. Occasionally, you may have to pause and lift your pressure foot to stick a lock underneath it.
Keep pulling your finished weft out from behind your machine so it doesn’t get caught into anything.
It’s relatively easy for the wool to get caught in your machine, but as long as you keep an eye on it you’ll be fine.
When pulling out your finished weft from the back of the machine, keep it laying straight, being careful not to twist it, and definitely not bunching it into a ball.
For the reason above, it’s best to do this project on a long kitchen table or something similar.

Your doll hair will look something like this once you’ve finished sewing your locks!
Double check that there are no twisted bits, and then put it through your sewing machine a second time.
Put your second line of stitches roughly 1/4″ above your first line of stitches.
You can also use a universal twin sewing needle so you sew two perfectly straight lines simultaneously — then you could skip this step!

Note the two lines of stitches in the photo above.
Lastly, you are going to want to trim off the wool above your two lines of stitches.
Be careful not to get too close to your stitches or you’ll risk your locks falling out!
Even if you do everything perfectly and have been making doll hair for decades, it’s still perfectly normal and fine for a couple locks to fall out while making your doll.
Just be careful when cutting the excess off — you wouldn’t want ALL of your hair falling out. 🙂
Attaching your doll hair to your doll
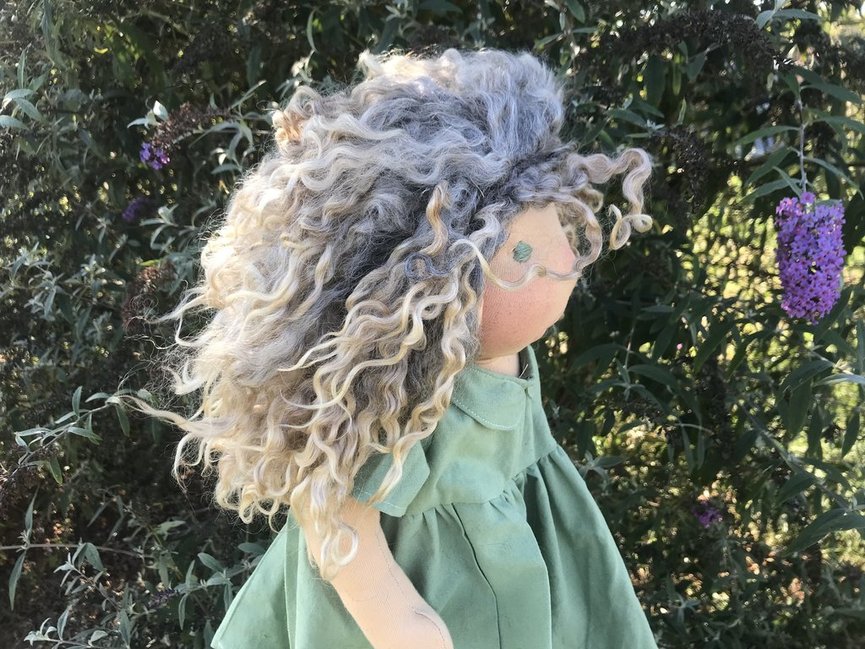
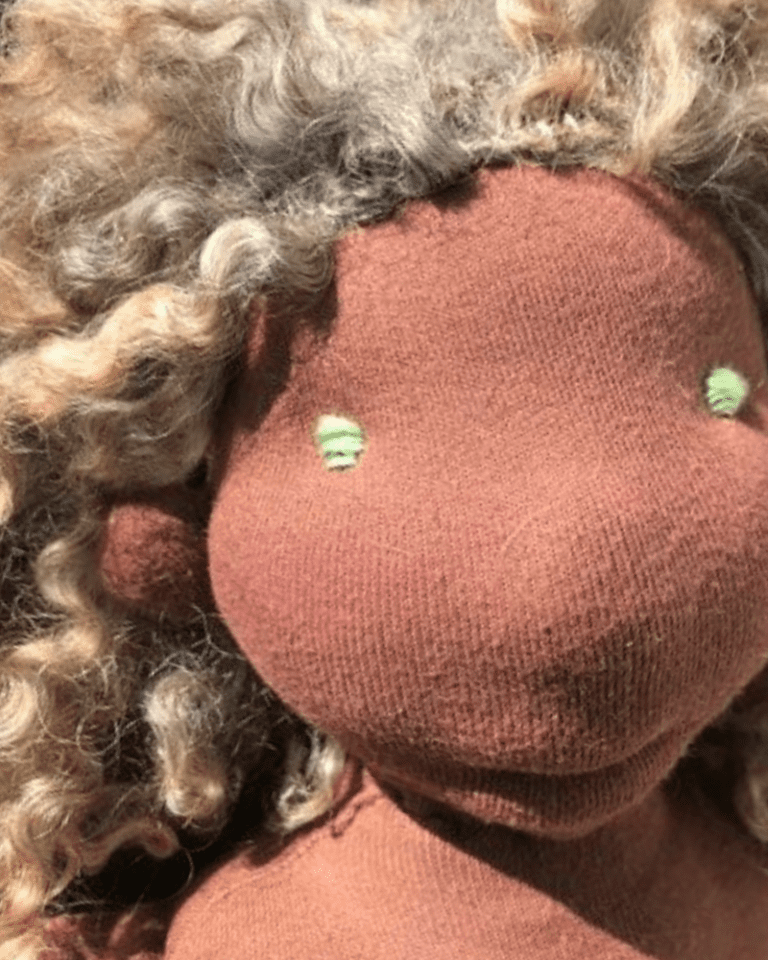
I think the most fun part of making a doll is putting on the hair.
Especially when the hair is as beautiful as these locks!
Your doll is sure to have a good hair day EVERY day with locks like these!
To attach the hair, you’ll want to first create a crocheted cap for your doll.
I have a free pattern for one HERE that you may use! I teach you how to easily adjust the pattern for a doll of any size. Just skip the part of attaching yarn hair to the cap, since you want to use your newly made weft instead.
When sewing on your weft, you’ll go in circles around the cap.
I like to start at the back of the neck so any imperfections made while initially attaching the weft are completely invisible.
Do your first trip around the head with the weft between the head and the crocheted cap.
Again, that’s on top of the head, but UNDER the crocheted cap!
I like to then pause here and take the time to strongly sew the rest of the crocheted cap onto the doll head.
From here, you’ll continue going around in a circle to attach the hair to the crocheted cap. From here until the end, you’ll just be sewing the hair onto the crochet cap.
You’ll end your circular hair journey in the center top of the head.
Weave all your ends into your doll’s head so they’re unseen.

More Free Waldorf Content from my website:
Waldorf Doll Head for the beginner dollmaker

Beautiful Hair! Any approximate on how long the finished weft is? I have no clue how long to make it!! Thank you!
Thank you! It depends how long you want it to be — whatever your preference is! For this doll, I made the hair the entire length that the wool locks would allow. I would say it’s around 6″ in length, perhaps a bit longer if you pull each “curl” straight.