Free knitting pattern for Cat Sweater
This Cat Sweater comes in toddler and child sizes 2 – 8. It’s an easy sweater pattern using mostly straight needles, and is purrfect for the little cat lover in your life!

How fun — a cat sweater!
Here’s a knitting pattern to keep a little one in your life cozy warm!
Cats are a common love of little ones, and with good reason! This sweater is sure to be loved by the child in your life!
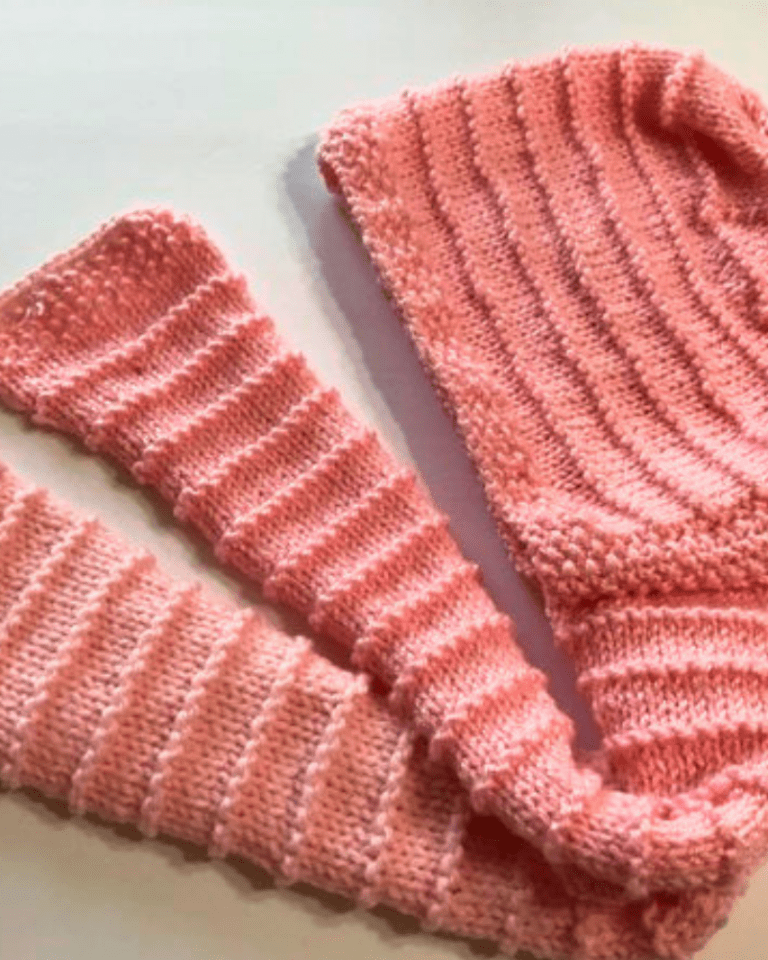
Use their favorite color as the base of the sweater — and they’ll love it even more!
I knit this pattern in a size 4. The pattern below is for size 4, but I have sizes 2 – 8 available to print. Print any additional sizes you need below!
The tutorial/instructions below will work for all of the patterns.
Disclaimer: As an Amazon Associate, I earn from qualifying purchases.
Supply List:
To make this sweater, you will need
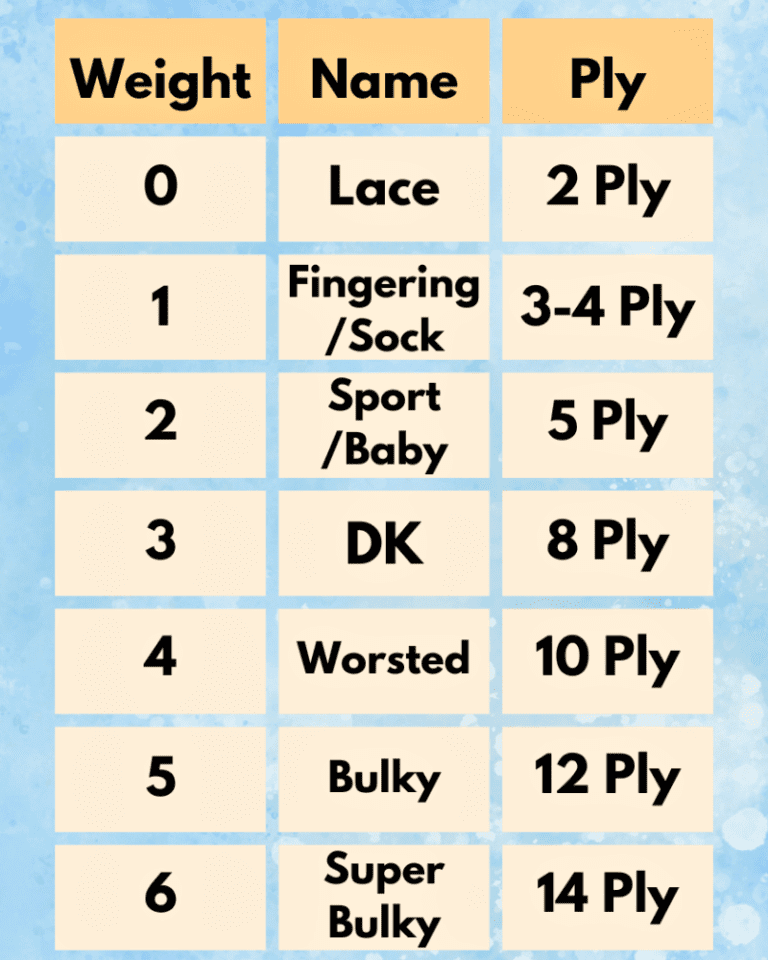
- Knit Picks Wool of the Andes Worsted Weight Yarn (for size 4, I used five 110 yard skeins in my base color, and 1 skein in my contrast color) (worsted weight yarn = “weight 4”)
- 4.5 mm knitting needles — both straight and circular, in the same size (4.5 mm = US 7)
- A tapestry needle for sewing
- Free printable pattern (Below!)
- Two Stitch Holders
Let’s get right to it!
Knit the Front and Back of Sweater
First , you’ll want to knit the front and back pieces of your sweater.
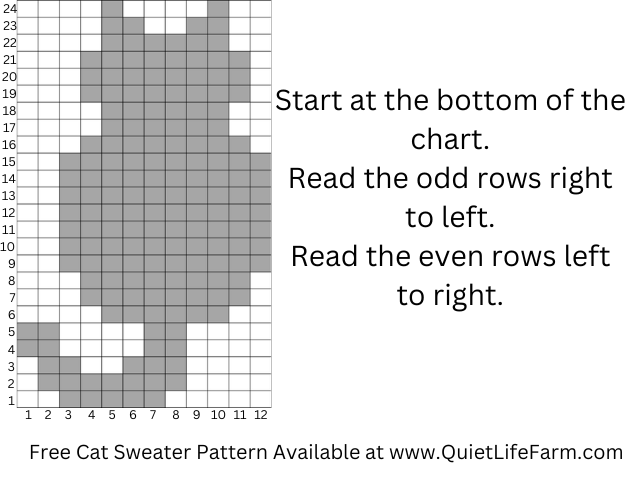
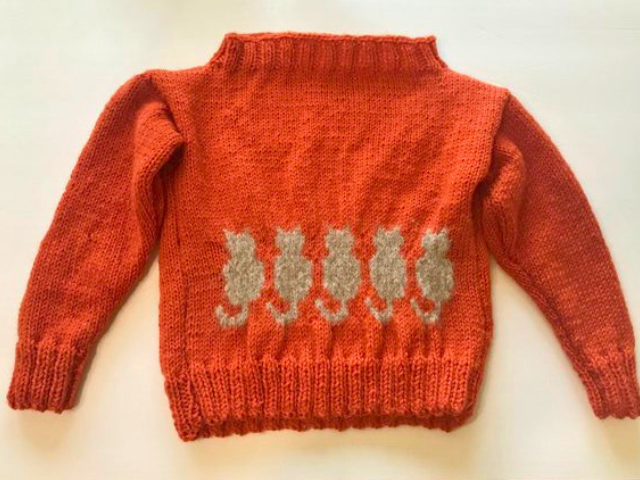
The front piece of the sweater has a sweet kitty cat pattern going across the bottom of the sweater.
You may choose to knit the same kitty cat pattern on the back side of the sweater, letting the kitties wrap around your child’s body in a big kitty cat hug, or you may wish to omit the cat pattern on the sweater back. It’s up to you!
If you omit the cat pattern on the back of the sweater, just skip the cat part of the pattern, and instead work in stockinette stitch until you have reached your desired length.
With 4.5mm needles, cast on 72 stitches. Use worsted weight (weight 4) yarn in your “background”/”base” color of your sweater. I used orange.
(K2, P2), repeat to end. Continue on in this ribbing pattern until your piece measures 2″ long.
Next: Work in stockinette stitch for 1″. Garment should measure 3″ total.
Next: Work the next 24 rows in the cat pattern (seen below), continuing to work in stockinette stitch.
Next: Work in stockinette stitch until piece measures 11 1/2″ long, ending with a wrong side row.
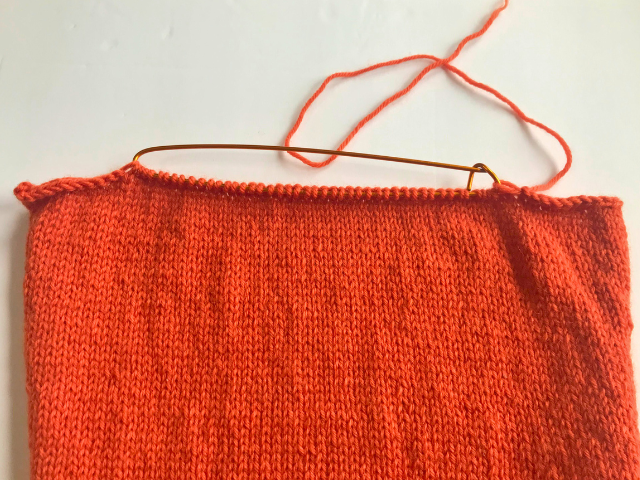
Shaping the Shoulders:
Next: Cast off 26 stitches (13 stitches at the beginning of each row) at the beginning of the next two rows. Leave the remaining stitches on a holder.
Make 2. (again, you can omit the cat pattern on your back piece, if you’d like)
Sleeves (make 2)
Use the same straight needles and worsted yarn to make the sleeves.
First: Cast on 30 stitches to start at wrist of sleeve.
Next: Work in (K2 P2) ribbing until piece measures 2″ long.
Next: Continue in stockinette stitch, increasing 1 stitch at each end of every 4th row until there are 50 stitches on your needles.
Then: continue without shaping until sleeves are 11 1/2 inches long.
Cast off. Make 2 sleeves.
Assembly and Neckline for cat sweater
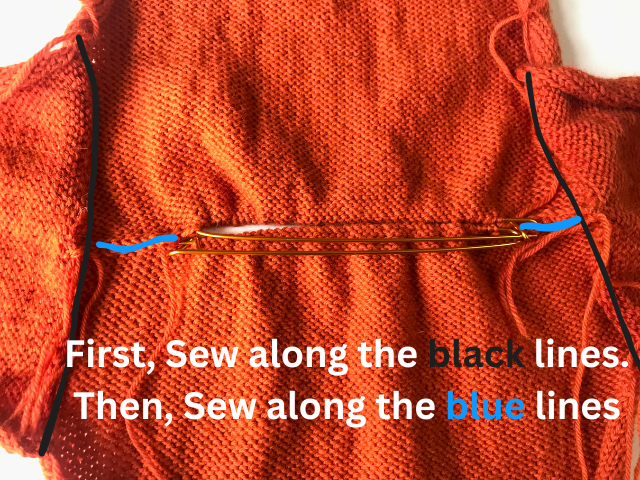
Sew sleeves on to front and back of sweater.
Sew the shoulders of the sweater, right sides together.
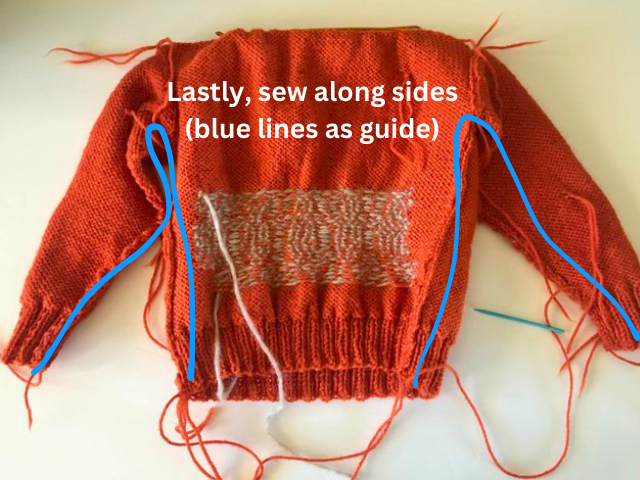
Sew up sides of sweater, including the underarms of the sleeves.
Next: Transfer your needles along the neckline of the sweater onto 4.5mm circular needles, and work in a K2P2 rib stitch until the ribbing along the neckline measures 2″ long.
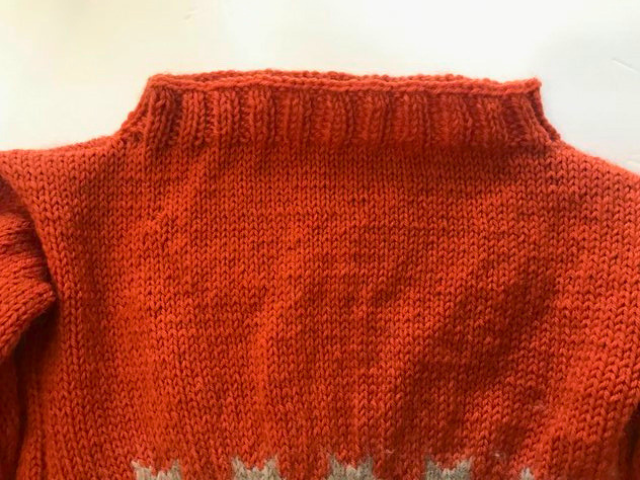
Cast off. Use a tapestry needle to weave in your ends.
I hope you enjoyed this free knitting pattern! Remember — you can print out sizes 2 – 8 for this pattern at the top of this page!

If you’d like to check out my other free knitting patterns, please check out these other posts on my blog:
I have plenty of other patterns, and am always working on a new design to add to my page soon!
Please subscribe to my email list to receive updates on new free patterns added to my site!