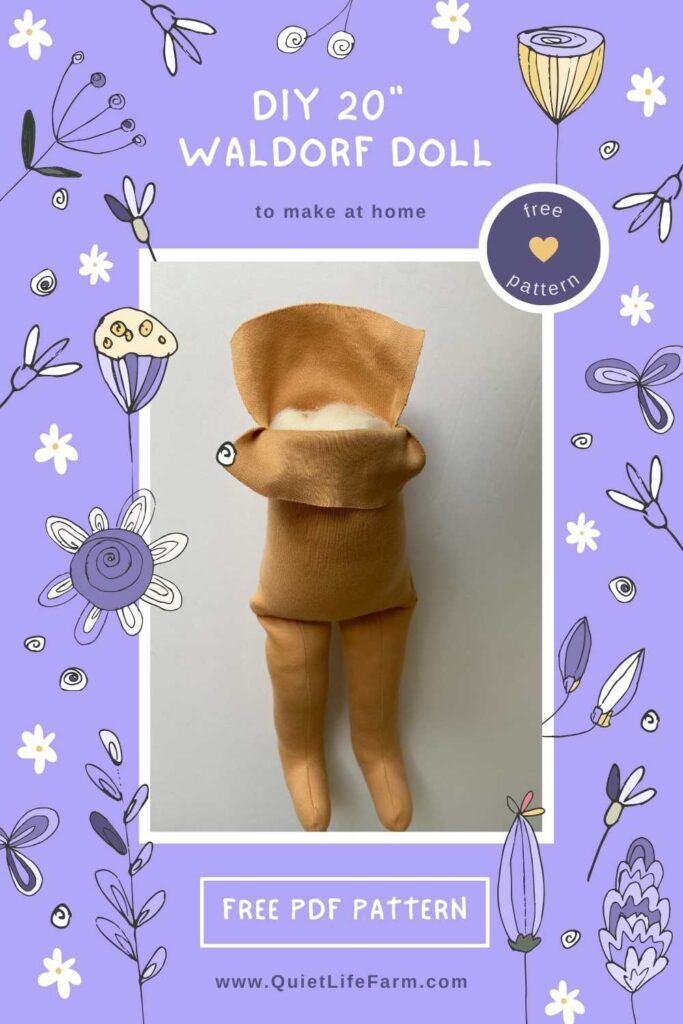
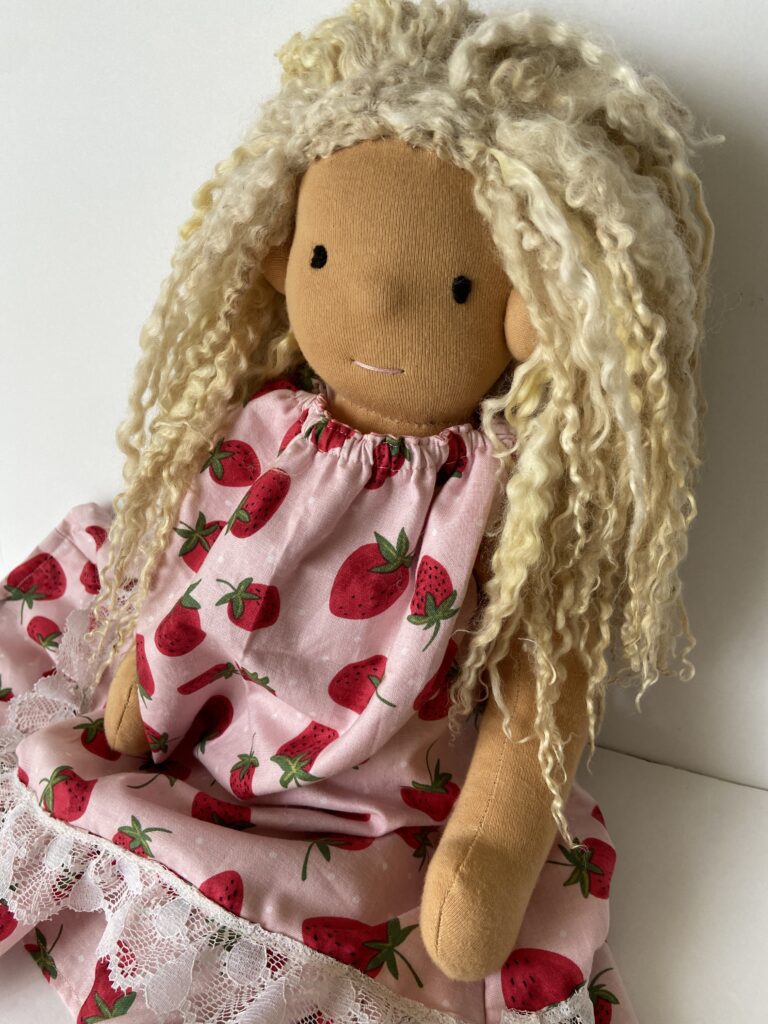
Extra Large Waldorf Doll Pattern
Here’s a free pattern and tutorial for a 20″ tall authentic Waldorf Doll!
Disclaimer: As an Amazon Associate, I earn from qualifying purchases.
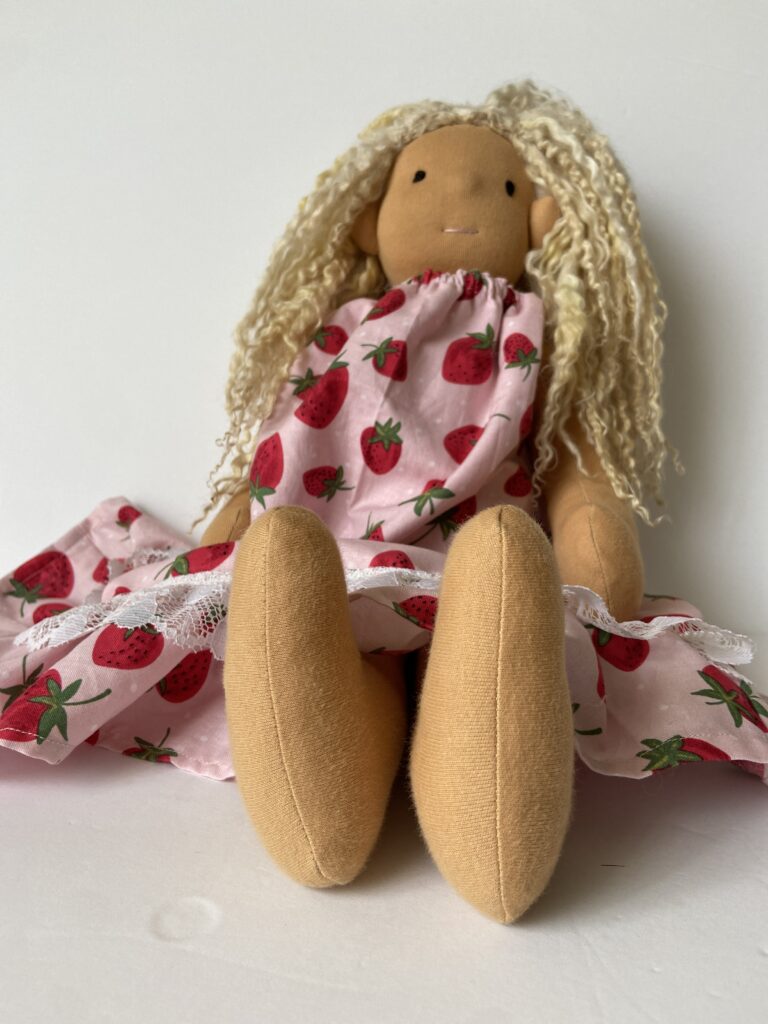
Keep scrolling to print your free pattern for this extra large, extra huggable 20″ Waldorf Doll!
An outfit and full tutorial are included for this project!
Looking for the pattern for this doll’s dress? Find it HERE! A matching 3T-4T dress is also included!
Supply List:
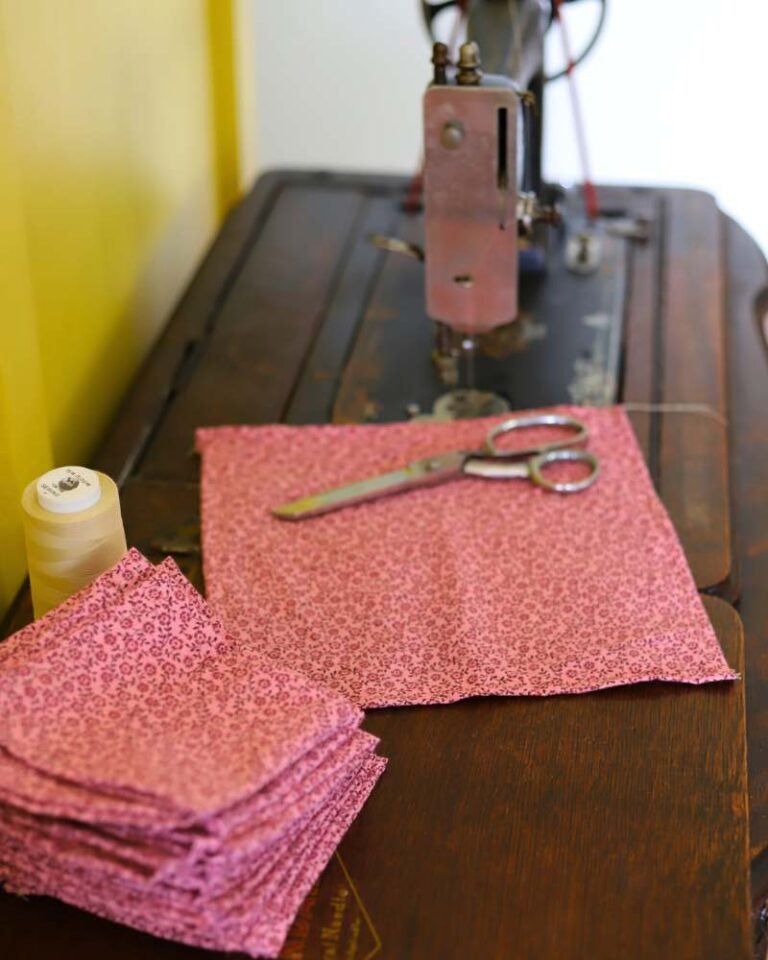
- 1 Yard of Cotton Interlock Fabric (My favorite is from Weir Crafts)
- Unwaxed Dental Floss
- 1 Sock (I used a men’s sock)
- Wool, clean and carded
- Needle and thread for hand sewing (Dollmaking needles are really helpful)
- Sewing Machine
- Some embroidery floss for embroidering eyes and a mouth
- Yarn or wool locks, whatever you are planning to use for the hair (plus a crochet hook!)
Print your Pattern
To print out your pattern for free, send it to your email below.
Your pattern will be sent instantly to open up as a PDF pattern, ready for you to print!
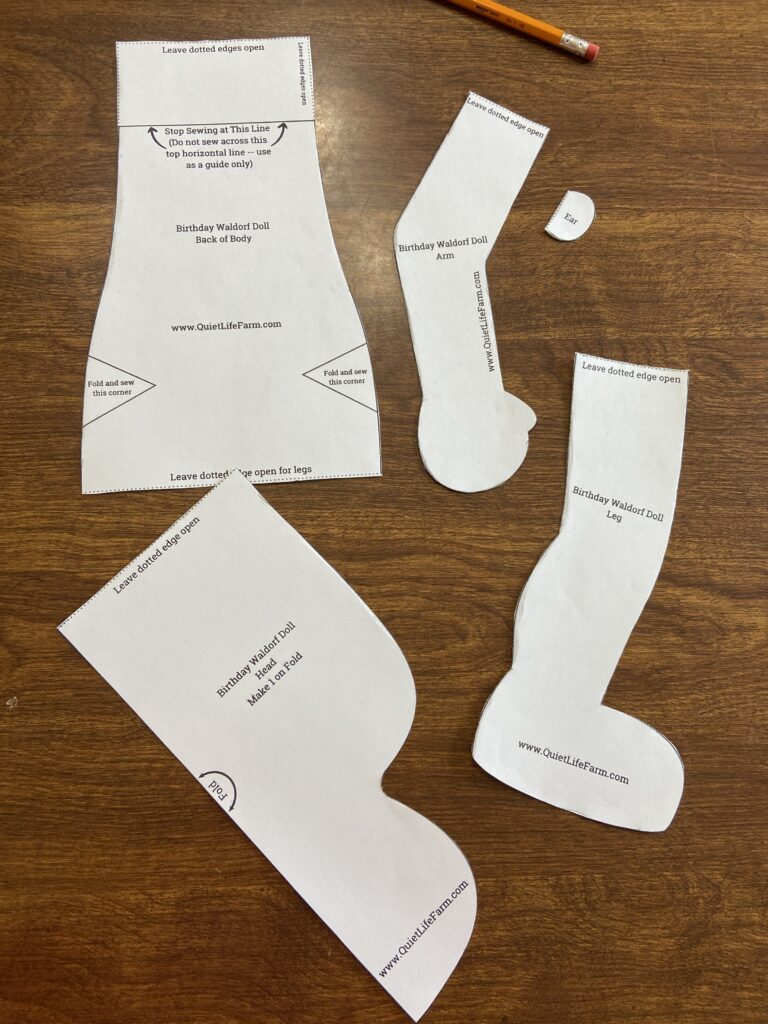
Once you’ve printed your pattern, you’ll need to cut it out.
When cutting your pattern around any portions that have dotted lines, you’ll want to cut just outside the dotted lines so that you can still see where the dotted portion is on your pattern.

Assembly Instructions
Just like with all Waldorf dolls, there is no seam allowance included on the patterns.
Instead, you will trace the pattern directly onto your fabric, then sew directly on your traced lines.
After your pattern shapes are sewn, then you will cut them out.
Make sure you mark any special instructions on the margins of the fabric — since you don’t have a seam allowance, you won’t be seeing these markings.
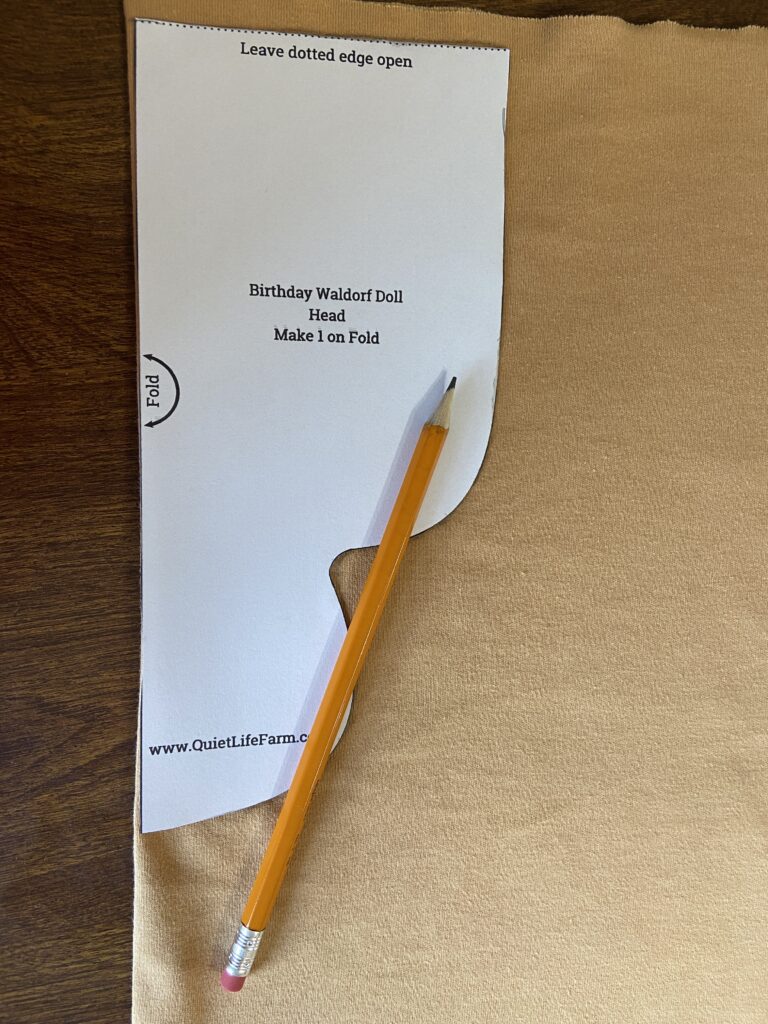
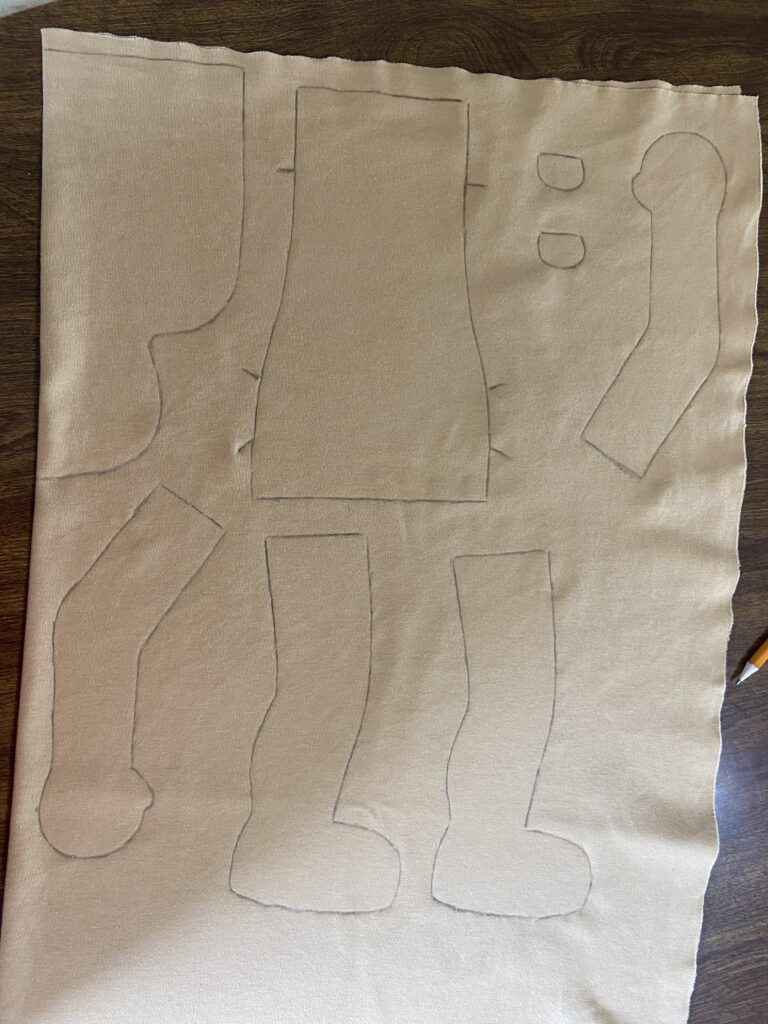
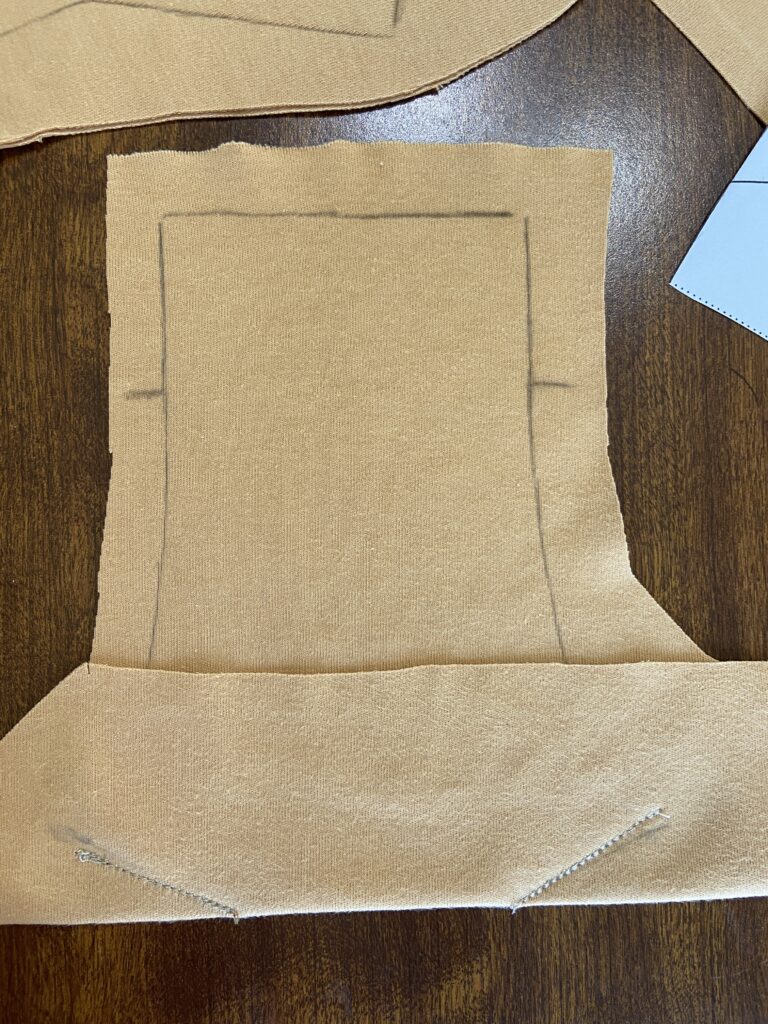
Trace the head on the FOLD of the fabric. (See photo above.)
Sewing and Cutting the Body of the doll
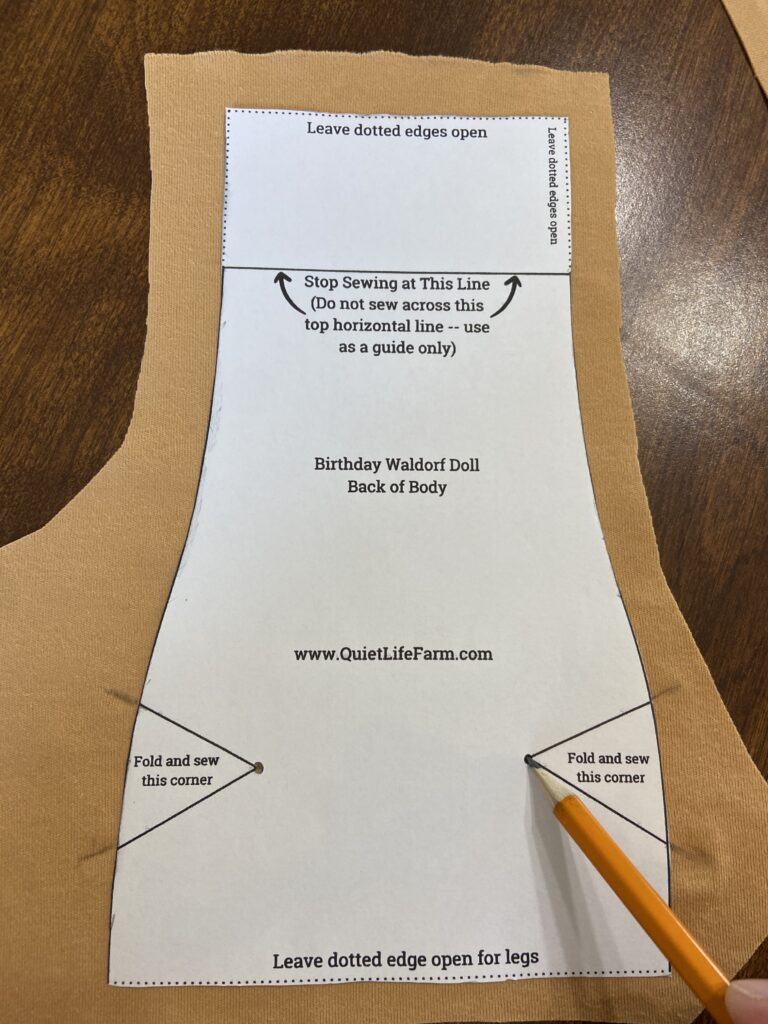
You’ll notice that the body piece for your doll pattern is only for the BACK of the body.
Trace the body pattern onto your fabric, making sure you mark the corners marked “Fold and sew this corner.”
I did this by pressing my pencil through right at the corner of the fold, made some notches where each line came off the fabric, then finished drawing the folds onto the body piece. (See photo above)
Then, I sewed these folds down.
These folds create the “seat” of your doll.
From there, you’ll place a second piece of fabric on your back piece of fabric, and sew around your lines as instructed, leaving edges open as instructed on your pattern piece.
When sewing the body, make sure that you lay your pieces on one another so that the “seat of your doll will have the “fabric flaps” on the INSIDE of the body and not the outside.
Leave roughly a 1/2″ seam allowance around your body, including the portions that you did not sew.
On the top of the body, the shorter straight edge where your head will go, it’s better to even leave closer to a 1″ seam allowance, as this will give you plenty of room to work with as you’ll see later on.
Note: For all sewn portions of your doll, it’s best to go over your stitches 2-3 times with your sewing machine, right on top of the same seams. This will add strength and longevity to your doll.
Sewing and stuffing your other body parts
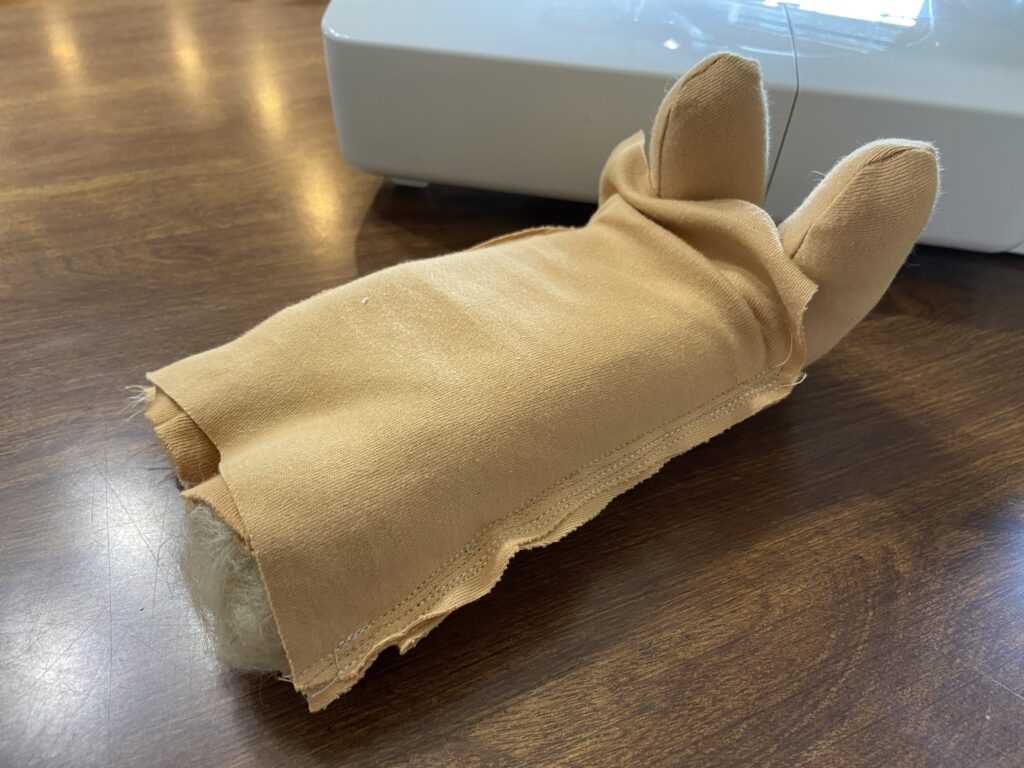
Sew on your traced pattern line (with two layers of fabric) your arms, legs, and ears.
When cutting out your ears, cut a good sized square of fabric around them, leaving the ears in the center. This will prevent you from losing such tiny ears until you’re ready to use them!
Again, with the arms and legs, you’ll want to make sure you cut out a hefty seam allowance around them so that your stitches do not come undone over time.
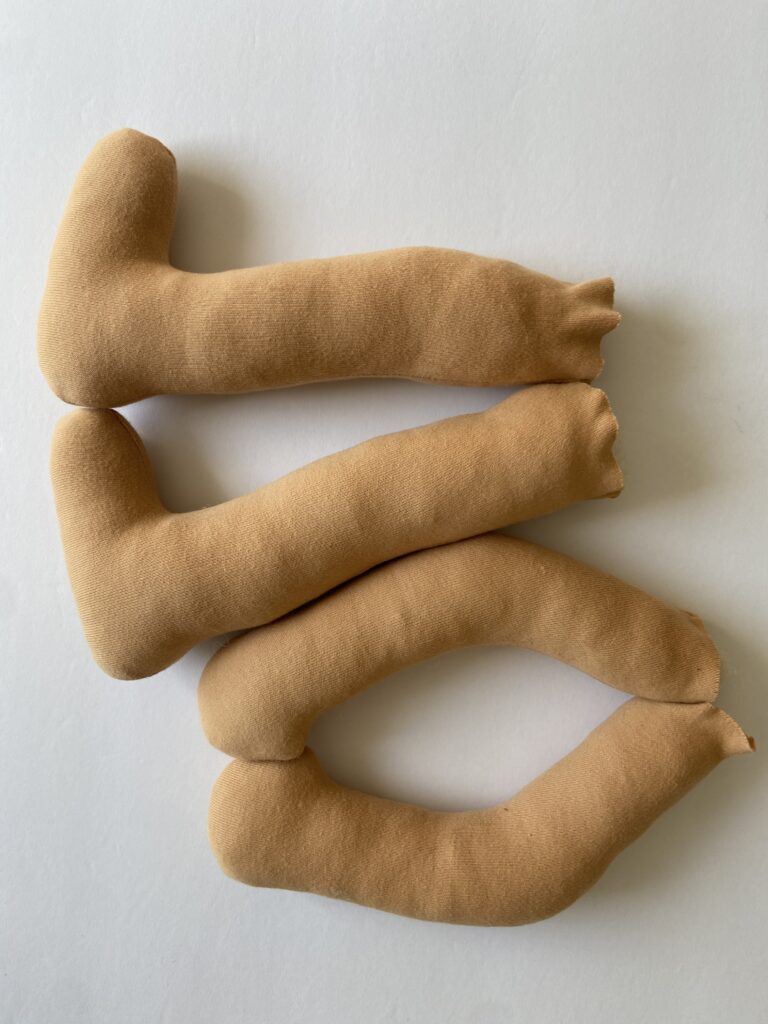
Turn your arms and legs right side out.
Stuff your arms and legs very firmly. You will want your Waldorf doll to feel VERY stiff, not at all squishy!
Use small bits of wool, fluffing each bit before you stuff your doll.
Sew around your traced ears over two layers of fabric, but set aside your fabric square (as explained above) until your ears are ready to be used. When your ears are ready to be used, you’ll cut them out with a hefty seam allowance and stuff them firmly with wool before sewing them closed with a hand needle right along the edge. (I like to fold the open raw edges of the ears INSIDE each ear.)
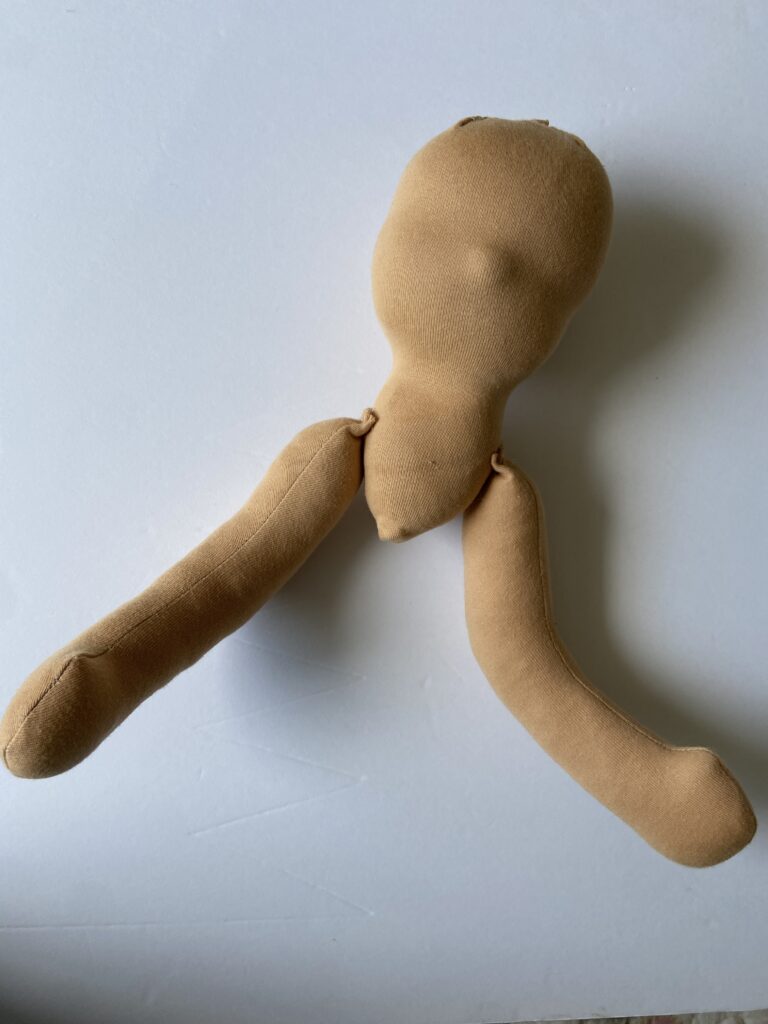
Attaching the legs to the body
To attach the legs to the body, lay your legs down on a table with the toes straight up, and the folded corner seat facing the back down towards your table. The neck should be farthest away from the legs. Basically, you want to lay down your doll pieces the way you want your doll to look when sewn together. (see photo below)
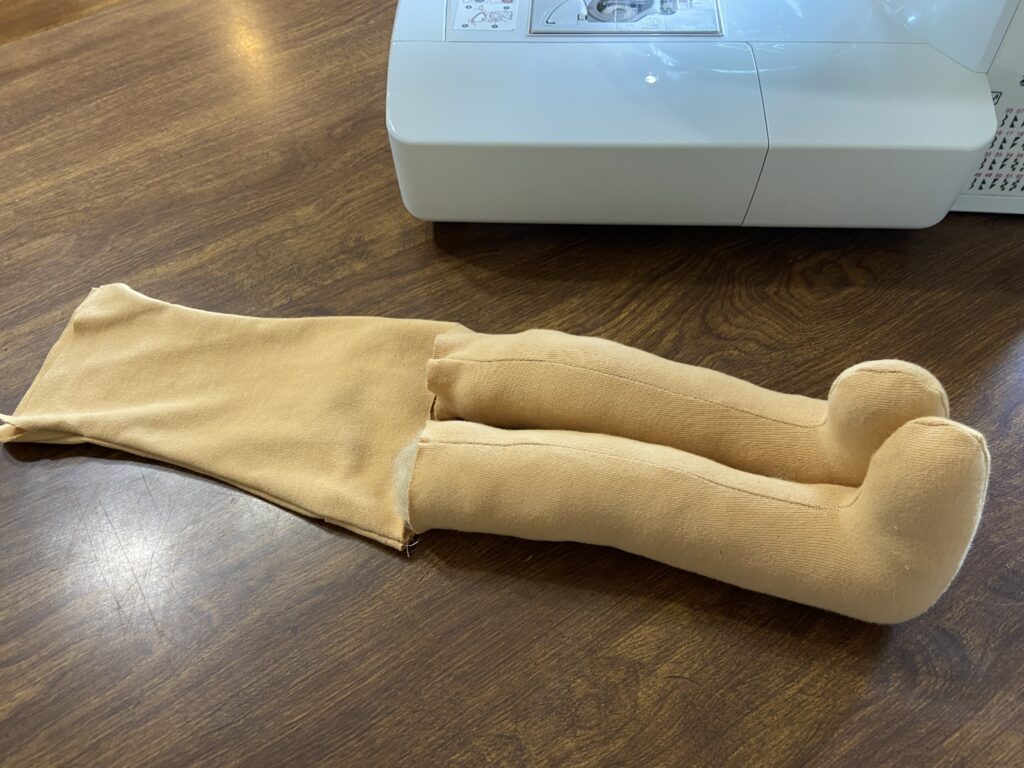
Slip the body down over the legs as seen in the photo above. The neck should now be down by the ankles. The seat should be on the back of the legs. Your raw edges and seams should be showing.
Sew the bottom of the body to the tops of the legs. Again, sew a few times across to create a very strong doll!
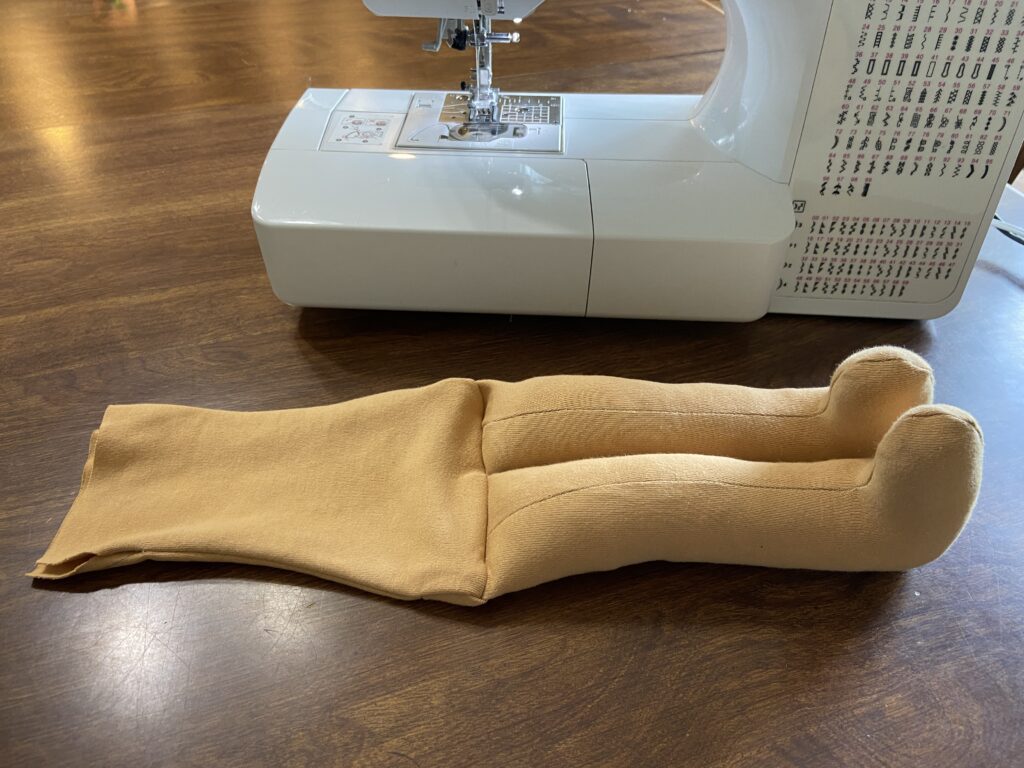
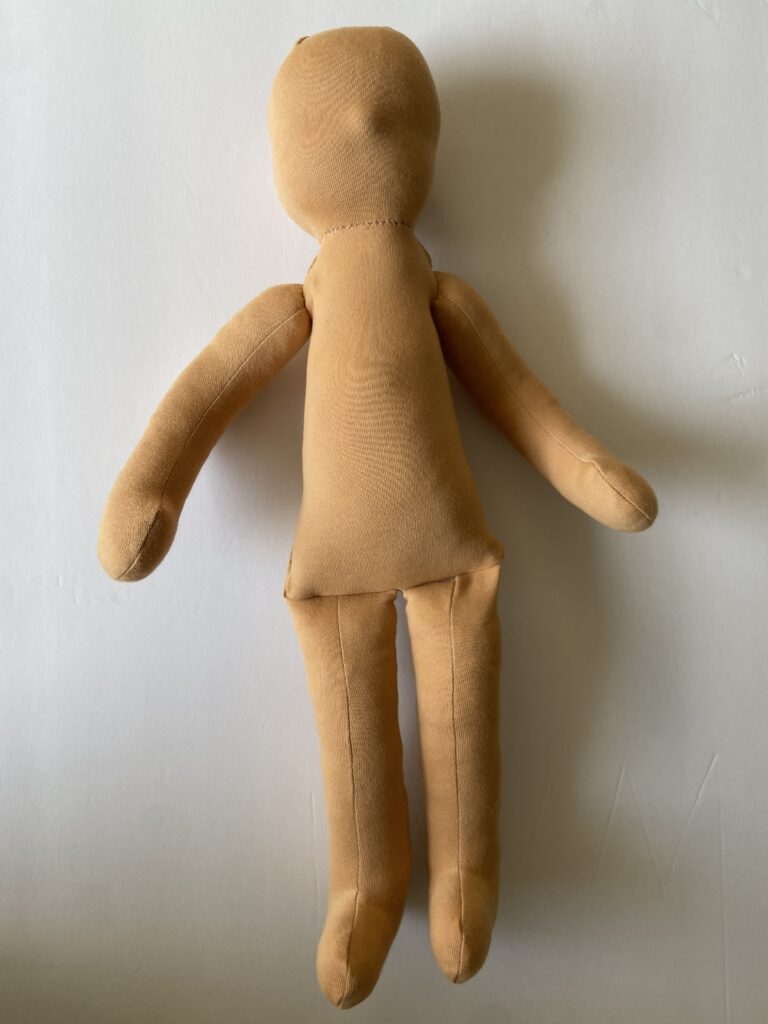
Put your body right side out again. The photo above shows you what your legs should look like once attached to your doll’s body.
Creating The Inner Head: Grab your sock!
Next we’ll get to work making the inner head of your Waldorf doll.
The inner head is what will create the nice, round shape of your doll head. The head will be shaped in a way that shows an eye line and a nose.
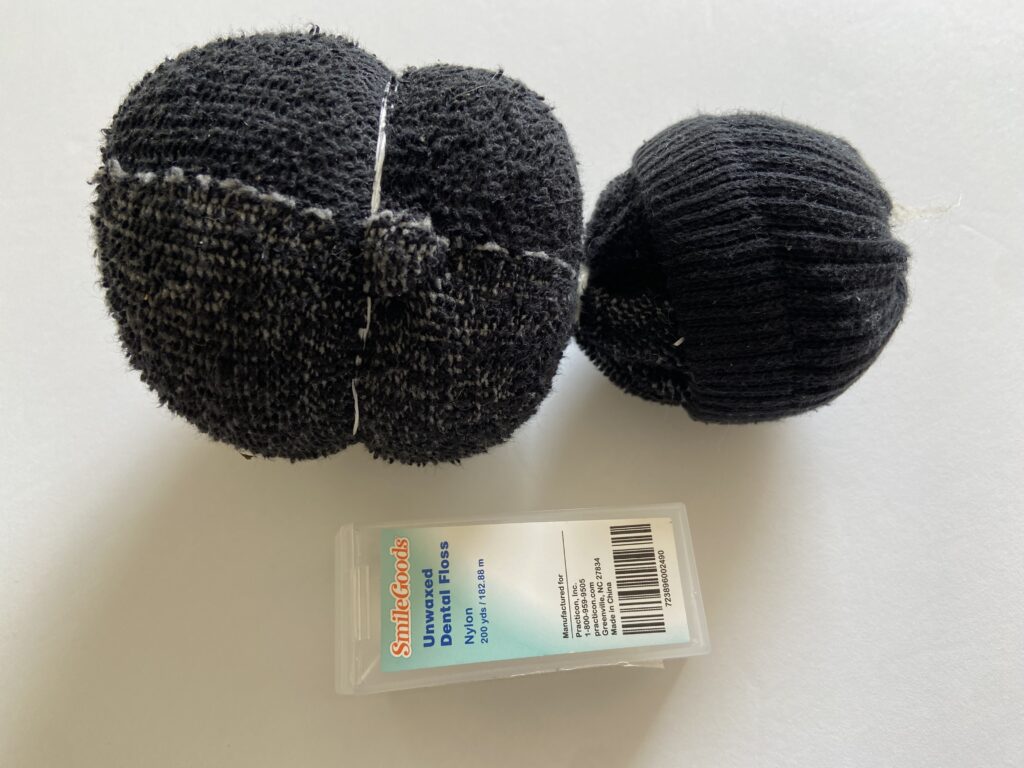
We’ll use a sock, wool, some unwaxed dental floss, and a needle to make the doll’s inner head.
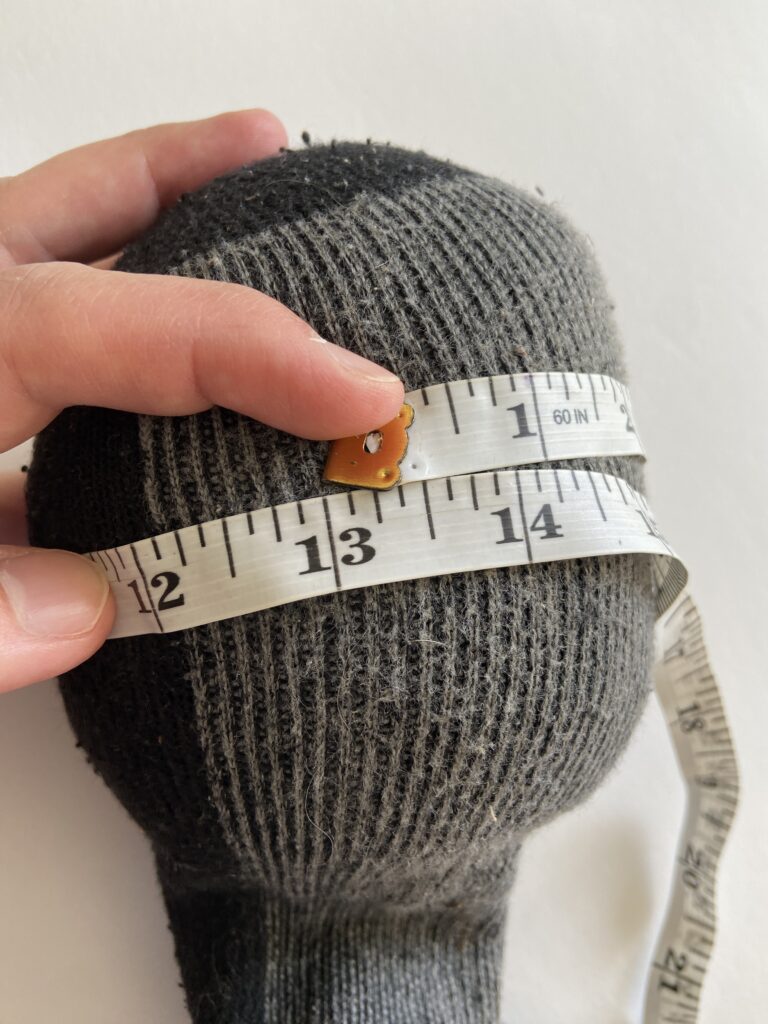
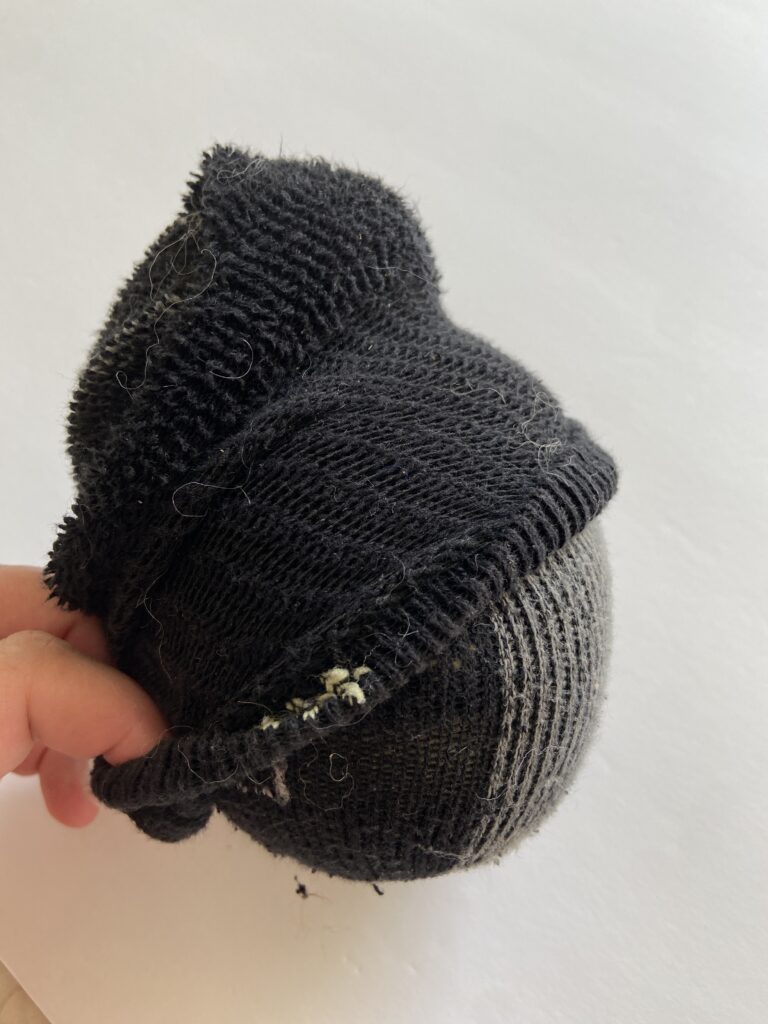
First, stuff wool into the bottom of your sock. You’ll want it to be quite hard so that it doesn’t lose its shape over years of play.
The head should be about 13″ around. (see photo above)
Twist your sock around TWICE to keep the head’s rounded shape. (above)
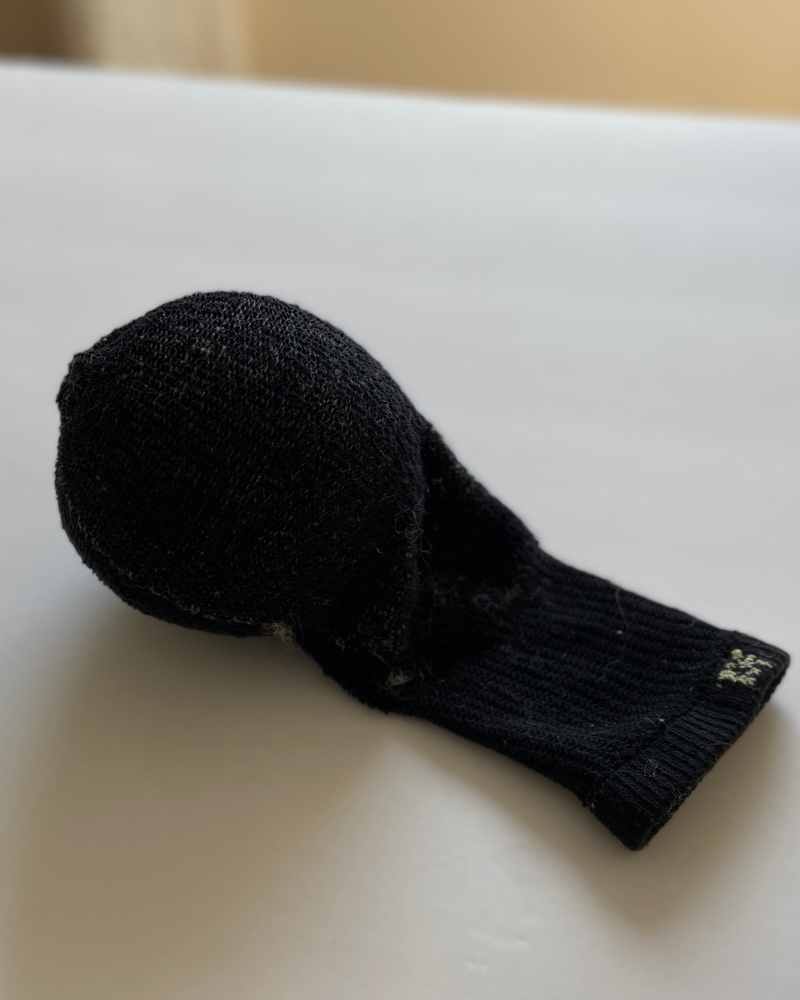
Next, pull your sock down over the “head” all the way down.
(The “inside out” part of the sock will now be showing.)

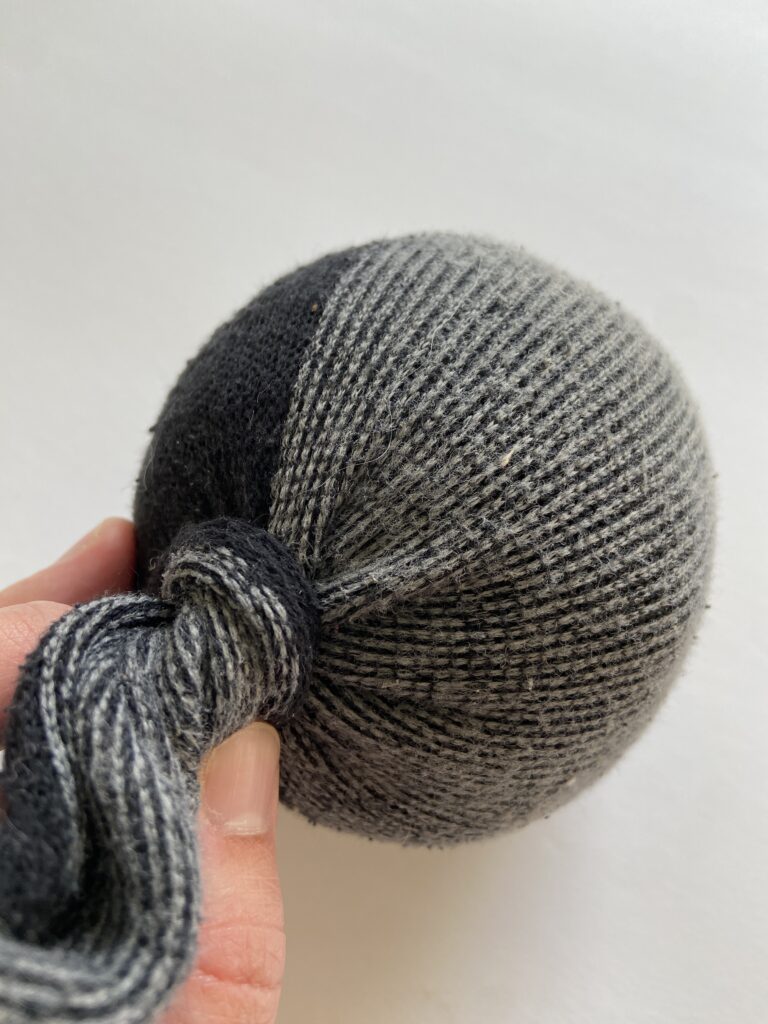
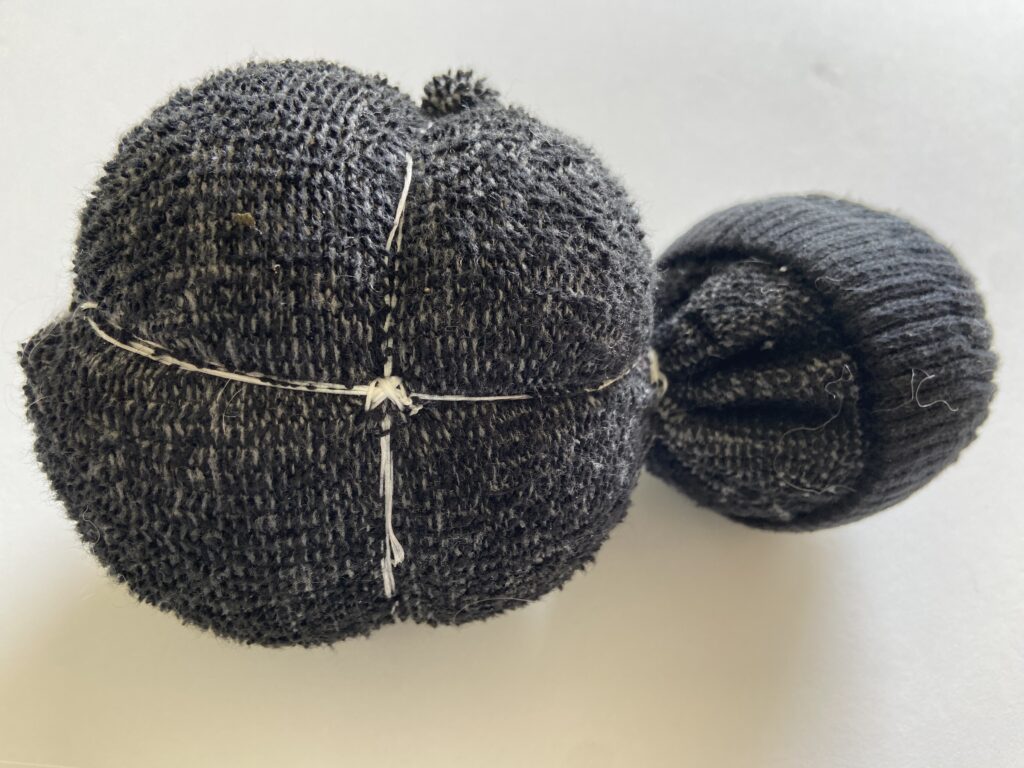
Use some unwaxed dental floss to tightly tie a “neck” at the base of your twisted stuffed sock.
You want this knot to be tied very tightly, several times.
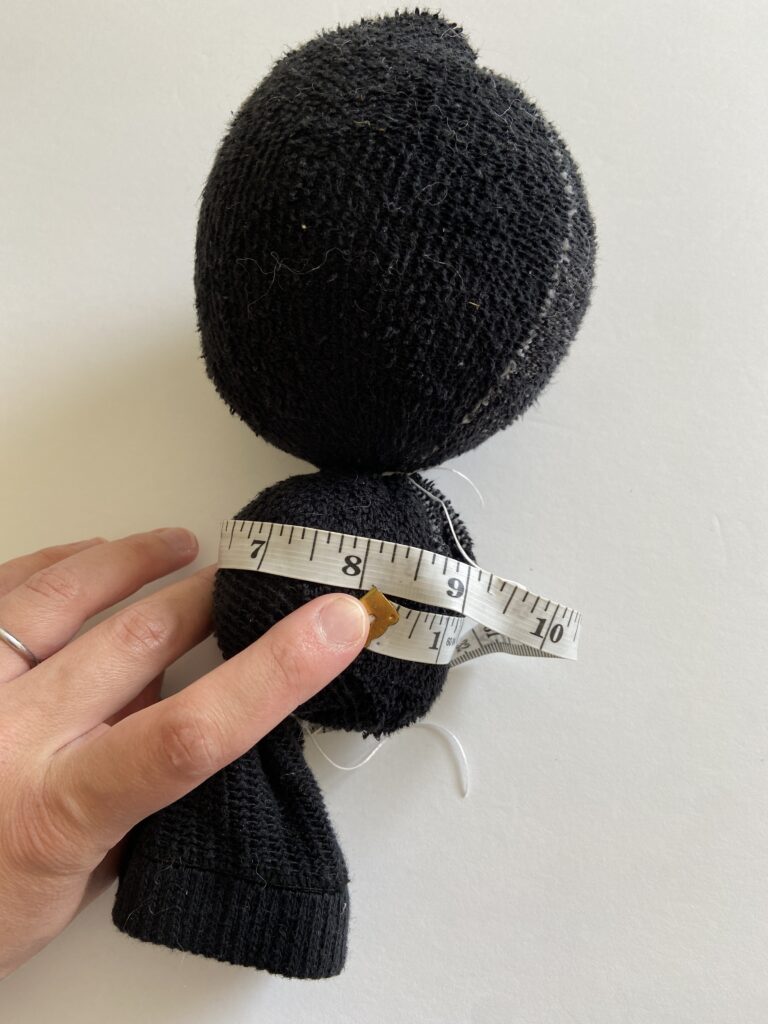
Stuff a little neck at the bottom of your sock with wool.
The neck should be about 8″ around.
Tie the neck closed with some unwaxed dental floss.
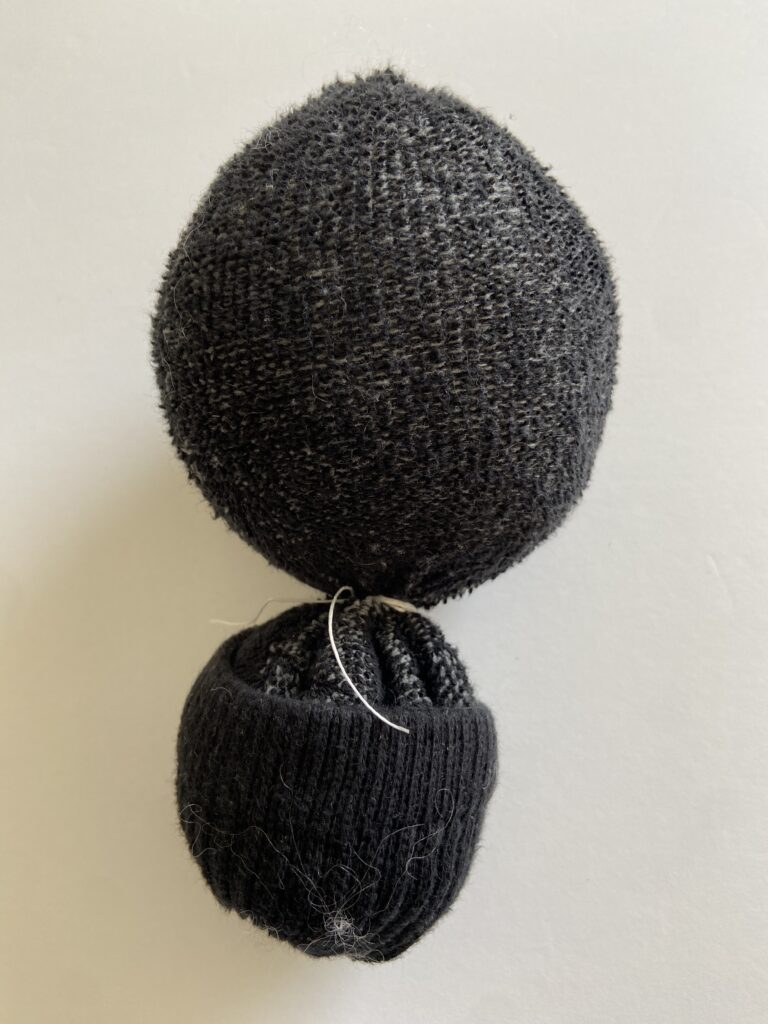
Pull up the ankle of your sock to cover the neck of your inner head. (above)
Next, you’ll need to shape your doll’s inner head.
Take some unwaxed dental floss and wrap it TIGHTLY around the head — first horizontally in the middle of the head right where you want your eyes to be, then vertically right in the middle of your head (about where you want the ears to lay).
Tie it very tightly so that it creates a nice shape/indent.
Then, use a needle and some unwaxed dental floss to sew the floss into place right at the “cross” where the two lines meet. (see top/first photo above)
Lastly, use a needle threaded with unwaxed dental floss to gather up a firm nose. You’ll want to be gathering up wool to the surface of your nose to make sure the nose is VERY firm. Just sew back and forth in a circle until the nose is how you like it.
Sewing the head and arms to the body of your doll
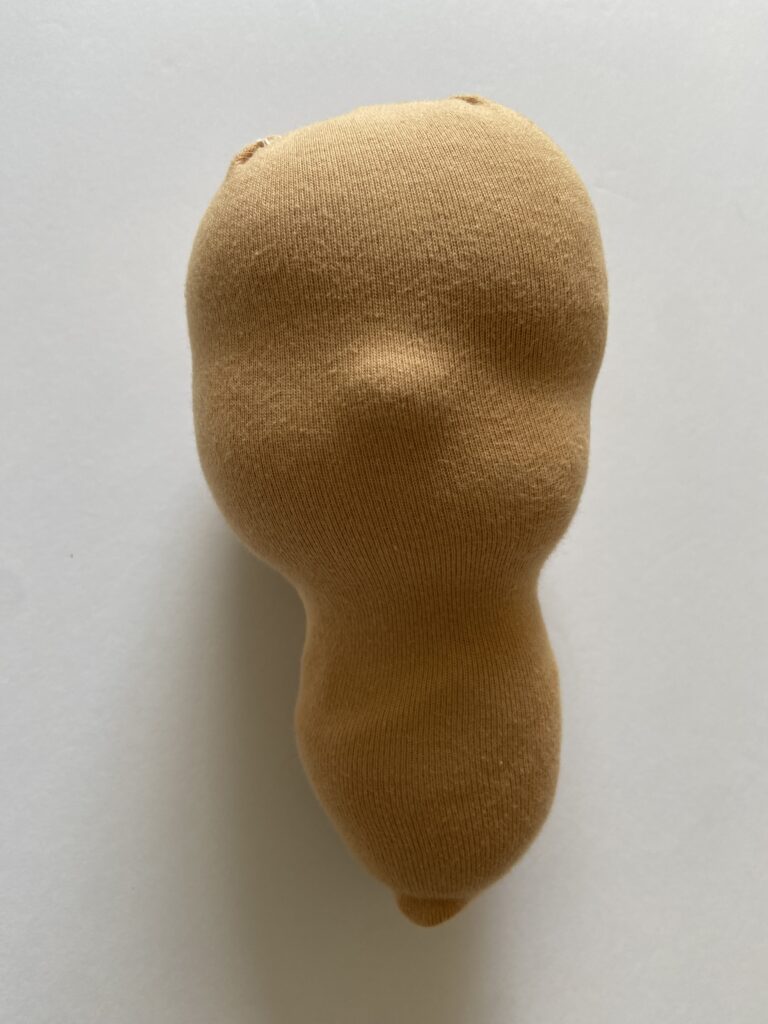
Slip the head fabric you have cut and sewn over the inner head.
The smaller round portion of the fabric will cover the neck.
The larger round portion of the fabric will cover the inner head. You will have your fabric opening at the top.
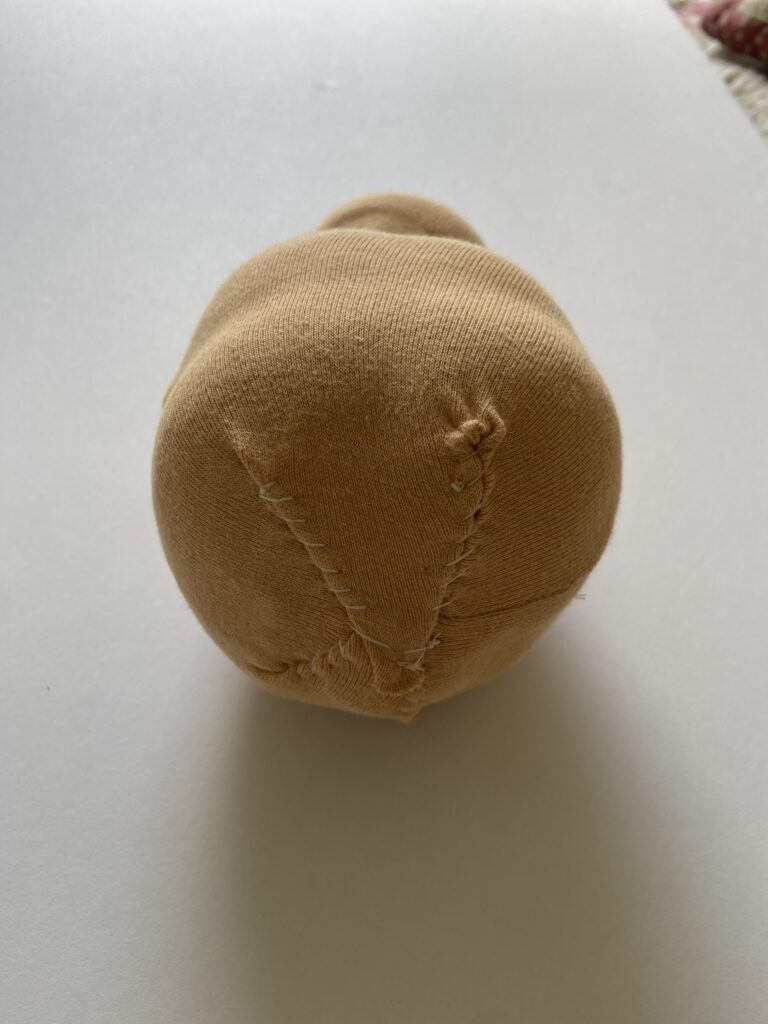
Make sure the seam of your fabric is at the center back of the inner head, then sew the top of the head closed.
See the photos above as a guide for how to fold and sew the top of the head closed.
Next, sew the arms onto the neck of your doll.
Make sure they are sewn on tightly, and that you leave enough of a seam allowance at the top of each arm so that the arms will not become loose over time.
Push the wool down towards the bottom of the body.
Then place the head/arms into the top of the body.
Use a ladder stitch to attach the arms and head into place, while folding down the raw edges of the top of the body inside the body so that they aren’t seen.
I like to sew a ladder stitch around the arms and neck TWICE so that the seams look extra neat.
Hair, Eyes, Mouth, and Ears
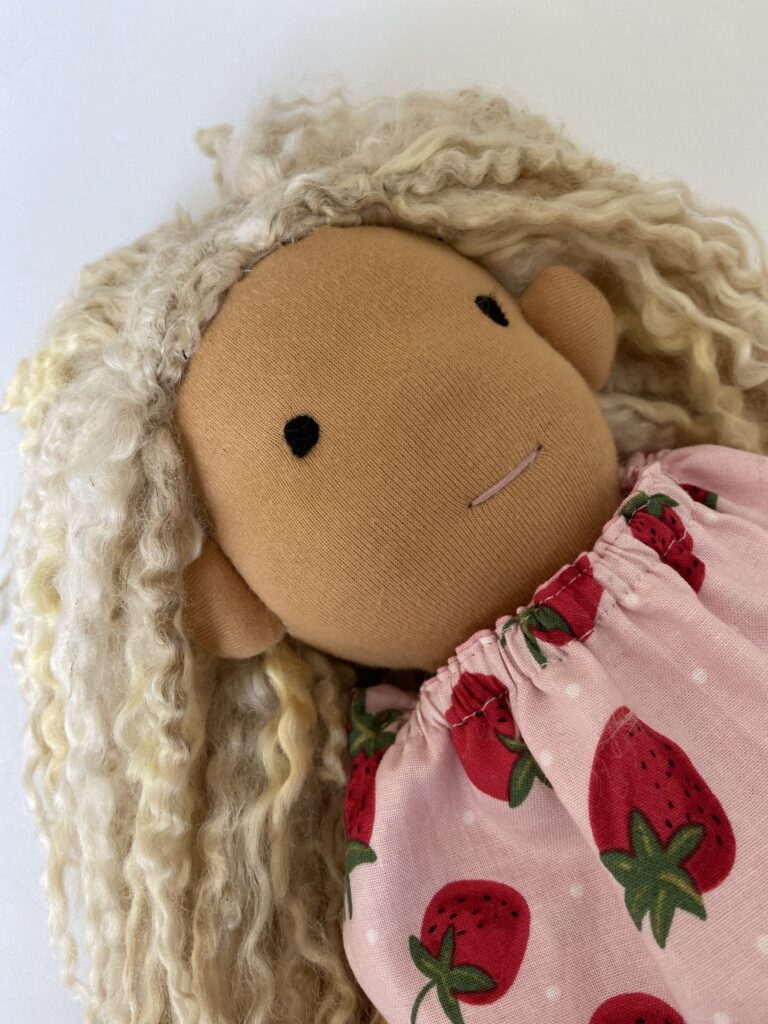
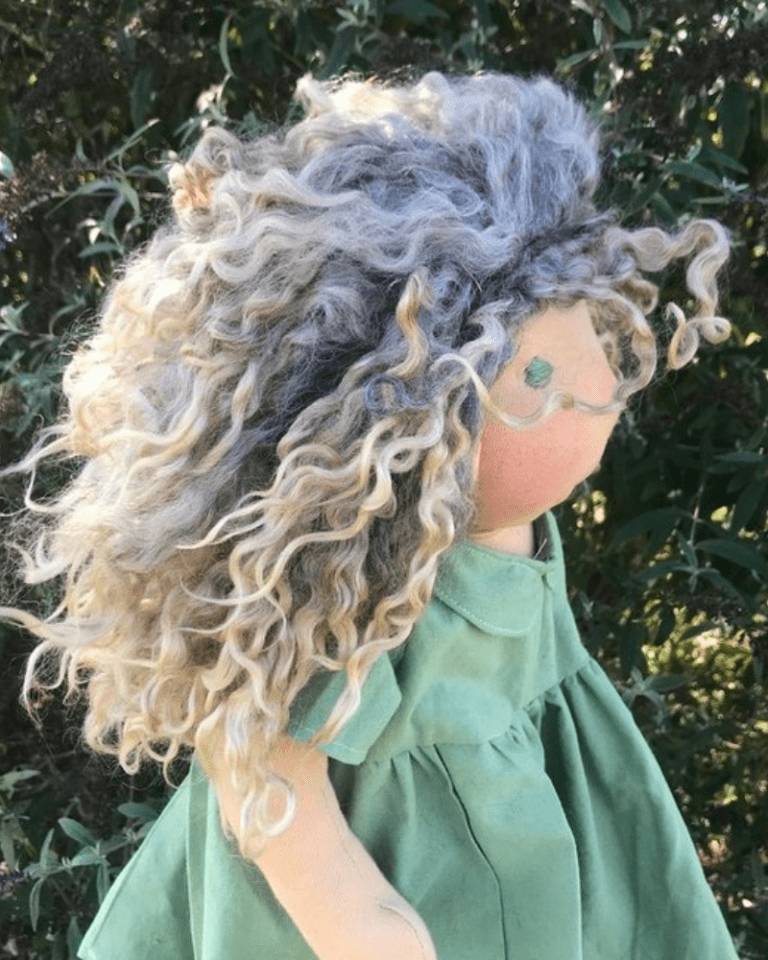
You have a couple of methods on how to make hair for your doll.
You can either use yarn for your doll’s hair, or wool locks like I did for this doll.
I used wool locks from my sheep — but you can order some mohair locks here!
I have tutorials for both — here’s how to make yarn hair. Follow this link to learn how to make hair from wool.
After your hair is attached to your doll, use round pins to play around with eye placement.
Once you’ve decided for certain where you want the eyes to lay (I find it’s best to take some pictures of different placements of the eyes on the doll, go to sleep, and then decide the next day what looks best), draw a circle right around the pins with a pencil before removing the pins.
Then use embroidery floss to embroider eyes on your doll.
Similarly, to decide on mouth placement, use a pencil to make where you think you’d like the mouth. Once you decided for sure where you’d like the mouth to be, use embroidery floss to stitch it onto your doll.
When using embroidery floss or doing any kind of hand sewing, leave a long tail of thread when you are done, and rethread each tail of thread with a needle before sewing it deeply into the body of the doll to hide it. This way your stitches stay strong, but the ends of the thread are neatly hidden from sight.
After your face and hair are both on the doll, this is when you attach the ears to your doll.
Remember — first you want your ears stuffed and sewn closed.
Once they are sewn closed, sew your ears to your doll’s head with a ladder stitch.
Again, even with the ears I like to sew around the ears TWICE with a ladder stitch.
Feel free to use a crayon to “blush” your doll, or leave your doll “as is!”
Happy sewing!

What a surprise to find such detail: I will do my best to create this doll.
Thank you so much. What lucky children you must have .
Granny in the UK.
Thank you so much for your sweet words! I hope you (and your grandchildren!) enjoy the pattern!
Emmeline, thank you so much for this lovely doll pattern. I’m going to put it to good use 🙂 My name is Liliane and I just subscribed to your site. 77 years young, Mom to a fantastic son and Grandma to 3 wonderful young adults, I love to do all sorts of crafts and looking forward to getting emails from you! Have a fun and wonderful day, Liliane 🙂
Thank you for your kind words, Liliane! What a beautiful name, and congratulations on such a beautiful family! I’m really glad you enjoyed this doll. I’m looking forward to keeping in touch through email! Warmly, Emeline
This doll will be a very lovely for my granddaughter and keep it for years to come . Thank you very much.
Hi, Victoria! How very sweet of you to make this for your granddaughter! She will certainly love it, especially because it was made by a grandma who loves her! Happy sewing!
Fantastic detailed instructions. Thank you so much.
thank you for your kind words!
Deseo mucho, poder realizar una muñeca . no se como adquirir los patrones.
Me gustaría información por favor. Muchas gracias.
Hello, Betty! There is an email form so that patterns can be emailed to you directly! Happy sewing!
I cannot find the place to get the pattern sent to me. could you send me the link? Please.
Thank you so much.
Joyce
Hello, Joyce! I’ve resent you the pattern. Check your “Other Tab” or your “Promotions Inbox” to see if it’s hiding in there! If you don’t see it, please email me directly and I’d be happy to send you the link!
greating, I would love to make this for my granddaughters (5 of them) for a gift from Grandpa. How can I get the patterns for the doll and dress? Thank you
Good morning! That is so very sweet, that makes me so happy to hear that you’re doing that for them! I’ve emailed you the pattern — please be sure to look in any “newsletter” or “socials” tabs in your email inbox, as sometimes my patterns get sorted into there!
I looked in both inbox and spam, but do see it. Did you send it to [email protected]
thank you for your time
Hello, Dave! Yes, I did — but I just tried sending it again now! Did you look in *all* of your inboxes? My patterns don’t really go into spam, but instead they go into other inboxes that Yahoo, Gmail, etc will automatically source them into. Since I use email automations to send out my patterns, Yahoo/Gmail/Hotmail etc will often automatically sort them into different email inbox tabs (NOT your spam folder), often labeled things like “promotions” “newsletter” or “socials”. Unfortunately anyone who uses email automations cannot do anything about it… even though my patterns are free!
I GOT IT. Thank you very much .
Thank you so much for your free detailed instructions and pattern. i can’t wait to make this doll for my little girl for her birthday!
That is so kind of you to say, thank you! I love that you’re making this doll for your daughter’s birthday, I designed this doll for my own daughter’s birthday as well! Happy sewing! 💗