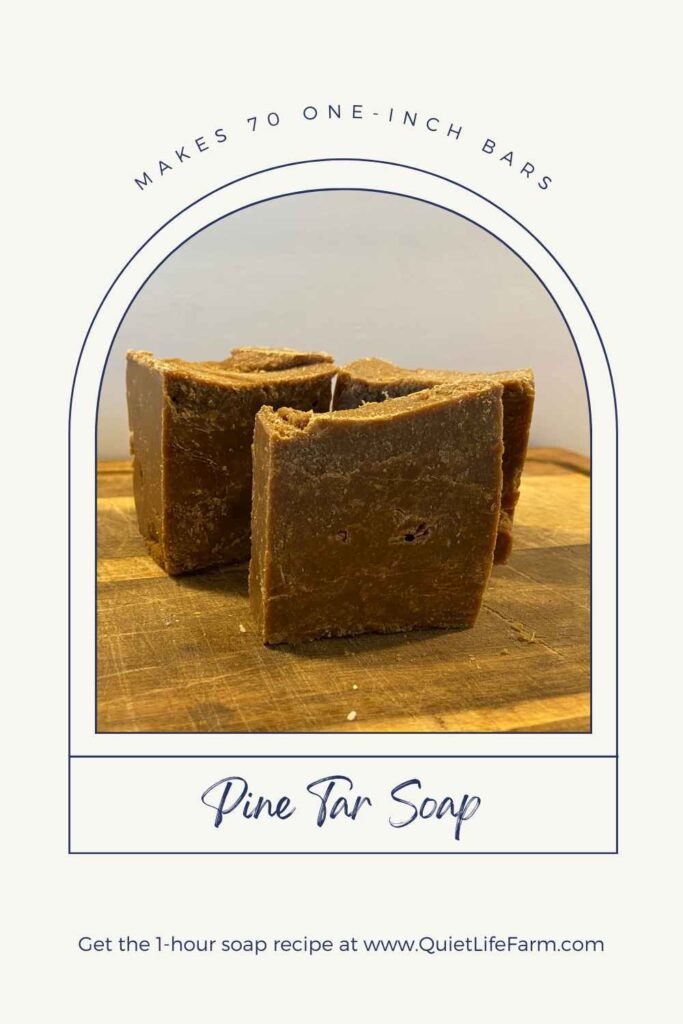
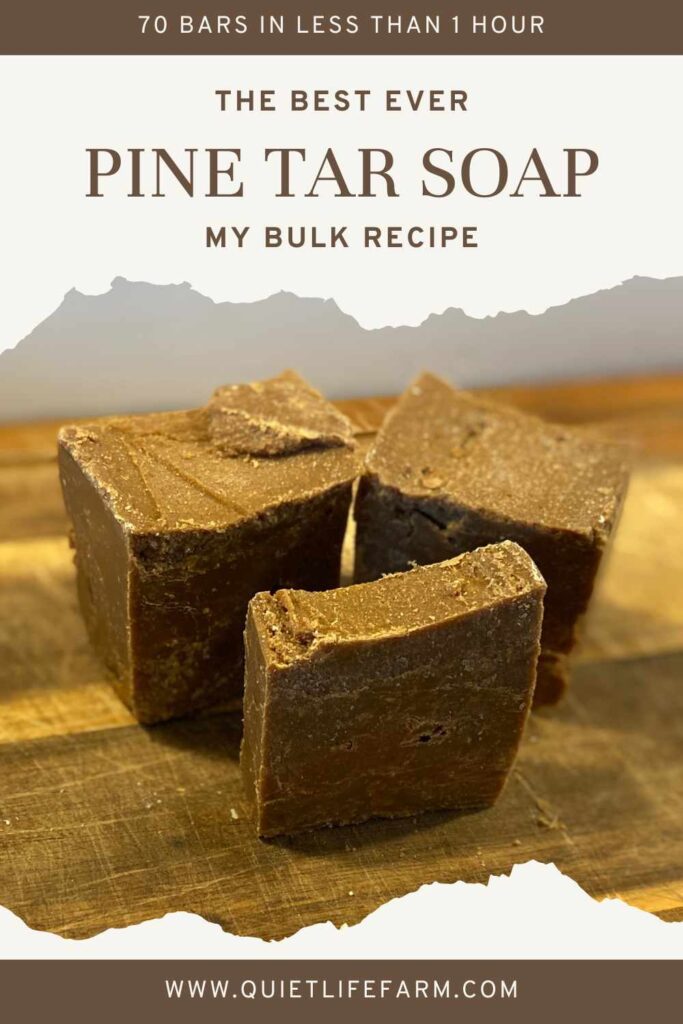
Pine Tar Soap Recipe
Here’s my recipe for a large batch of Pine Tar Soap! This recipe makes over 21 pounds of soap (70 1″ bars!) and takes less than an hour to make!
I had never even heard of pine tar soap until my husband’s friend asked if I could make him some.
Since then, I have loved using it in our own home!
Recently, I accidentally discovered that it’s even nice to wash my hair with. Very surprising to me, since I had a very negative “homemade Pinterest shampoo” experience many years ago. But that’s a story for another day… (a story my husband will never let me live down, LOL)
While I love using my handmade soap for all things outside of bathing, too, I love this particular soap so much that I usually save it just for bathing.
This recipe makes a very large batch of soap — over 21 pounds! It makes 70 standard sized soap bars, so it’ll last you a very long time.
Even with such a large yield, it only takes about an hour to make it all!
—->> Before you get started, please read this blog post here and review my soapmaking process, setup, and safety information. <<—-
This recipe is for cold process soap. Again — please read my post mentioned above to review all safety information and how I set up my soapmaking station!
Disclaimer: As an Amazon Associate, I earn from qualifying purchases.
Here’s what I used to make my Pine Tar soap:
- Pine Tar, 32 oz/the whole container (here’s what I used!)
- Seven soap molds (can be found here)
- Basalm Fir Needle Oil, the whole bottle (this is the brand I always use for soap)
- Corn Starch (non GMO, purchased here)
- Citric Acid (find it here)
- Lye (what I buy)
- Lard
- Tallow
- Water
- My other soapmaking supplies, listed in this blog post
Here’s what I did NOT use to make my Pine Tar soap

AN IMMERSION BLENDER.
I REPEAT — Do NOT use a stick blender for this project!!!!
Seriously, unless you want a complete, 21+ pound solid lump of soap stuck in your stock pot with a stick blender sticking out of the middle, DO NOT USE AN IMMERSION BLENDER FOR THIS RECIPE.
You will ONLY hand stir this soap recipe.
AND, you will not want to step away from mixing this soap, even for a brief moment!
If you’ve made soap before, you know that it typically takes a bit of time for your soap to come to trace.
This is definitely NOT the case with Pine Tar soap. After only a few minutes of mixing, your pine tar soap will begin to solidify.
In fact, if you wait too long, it will be absolutely disastrous getting it into your soap molds!
You will end up with a hot, crumbly mess that you end up forcibly shoving into your soap molds if you wait too long before transferring it to your molds.
Why use Cornstarch?
I add a small amount of cornstarch to this recipe because it helps stabilize any added scents to the soap.
Your soap will smell a lot more like the pine oil I add to this recipe if you mix it with a little cornstarch before adding it to your soap batter!
A little soapmaking trick: this applies to any other soap you add scents to in other recipes, too!
Make sure you mix your cornstarch and essential oil together FIRST, BEFORE you add your pine tar to your fat and lye! The moment you add in your pine tar, your soap is going to really start to become thick!
Then, once you’ve mixed up your soap mixture and are about to pour it, you can quickly add in your cornstarch/essential oil mixture before quickly transferring your soap into the molds!
Why use Citric Acid?
Citric acid can be added to soap to help prevent soap scum.
It’s also great if you decide to use your soap to wash dishes with — it’s great at combating hard water build up!
Citric acid is also great to keep on hand for any soapmaking related plumbing emergencies. (I plan to make a separate post for this eventually — for now, the short answer is to dissolve 1 TSP of citric acid in 2 cups of HOT water, open all the windows in your house, and SLOWLY pour it down your kitchen sink while standing very far back because anything in your sink WILL shoot up! It’s a dangerous process that should only be used as a last resort, proceed at your own risk!!)
Pine Tar Soap Ingredients:
- 10 lbs Lard
- 5 lbs Tallow
- 2 lbs (32 oz) Pine Tar
- 30 ML Balsam Fir Needle Oil
- Spoonful of cornstarch
- 5 TBSP Citric acid, dissolved in a little bit of water
- 31.25 oz Lye
- 69.88 oz COLD water
If you don’t have any tallow, you can just use a full 15 lbs of lard for this recipe.
I don’t recommend using only tallow for this recipe. The pine tar already makes this such a hard bar of soap, using tallow in this recipe would likely just make your soap brittle.
There are no exact measurements for the cornstarch or the water you dissolve your citric acid into. If you WANT exact measurements, I would say use 1 TBSP of cornstarch, and 1/2 cup of water to dissolve your citric acid.
The water you use to dissolve your citric acid in does NOT count towards your 69.88 oz of cold water you will use to mix into your lye! This is a separate water measurement!
Do NOT — I repeat: DO NOT mix your citric acid with your lye! It will cause a dangerous chemical reaction if you do!
Only add your dissolved citric acid to the very end of your soapmaking process, AFTER your lye has saponified with your lard/tallow.
How to make Pine Tar Soap
- Set up your soap making station, and make sure you are wearing all of your safety goggles, gloves, etc (see this post for safety recommendations and workspace setup). Dissolve your citric acid into a small amount of warm water and set aside. Mix in your pine essential oil with a spoonful of cornstarch and set that aside, too.
- Measure your lard/tallow and melt your lard/tallow on the stove in your large stockpot, on low heat. Then, make sure your fat comes back to room temperature before proceeding. (you don’t want it to re-solidify, but you don’t want it to be hot, and you don’t want your stockpot to melt your work table!)
- Bring your pot of fat outside and place it on your plastic table.
- Measure out your cold water and distribute even amounts of it into your four, 4-cup capacity glass measuring cups.
- Measure out your lye, and very carefully and slowly pour it in even amounts into each of your four glass measuring cups, stirring with your plastic spoon until the lye begins to dissolve. If you don’t stir your lye water enough, your lye will sit at the bottom and begin to harden in your water, making a dangerous scenario as you’re stuck with having to get it to break up off of the bottom of your measuring cup. So, mix slowly, carefully, and thoroughly as you pour your cold water into each measuring cup, one by one. And — always pour your lye into your water, never pour water into lye!
- Let your lye and water mixture sit and cool down for 30 minutes. Step away for fresh air, but don’t let your lye out of your sight!
- Mix your lye and lard/tallow mixture by hand for about 10 minutes. It’s okay to take breaks if you get tired, but again, don’t walk too far away from your soap making station! You don’t want any children or surprise guests to accidentally knock into anything dangerous!
- Make sure you have your dissolved citric acid, your pine oil/cornstarch mixture, and your soap molds nearby! You’re getting ready to add your pine tar and this is when you really need to be ready to move quickly!
- Add your pine tar into your soap mixture. Begin mixing by HAND only (NO STICK BLENDERS). Carefully, but quickly, make sure your pine tar is fully incorporated into your soap! Take time to scoop your soap from the bottom of your pot. It’s easy for that thick pine tar to hide in “chunks” throughout your soap!
- After mixing for about 3 minutes, add in your dissolved citric acid and pine oil/cornstarch mixture into your soap. Continue to mix for just a couple more minutes.
- Your soap should thicken very quickly. Your soap molds need to be close by! You’ll need to scoop your soap into your molds before it gets too thick, or it’ll be pretty terrible getting it into the molds. If you’ve made soap before, you’ll notice that your soap is hotter than it normally is when scooping it into your molds, so be aware/cautious of that, too! So — scoop your soap batter into your soap molds as soon as your soap begins to thicken, and not a moment later!
- Smooth out your soap into your molds, pushing out any air bubbles right away. It helps to gently drop your molds from a few inches above your workspace and tap the sides of the molds, as well. Do this as soon as the soap is in the molds — your soap is going to harden faster than normal!
- Keep your soap molds in a safe place for 24 hours. Then, remove your soap from the molds and cut it. I talk about how I get even cuts in my soap here.
- Allow your soap to cure for 2-6 weeks as it hardens even more and becomes more mild/gentle on your skin!