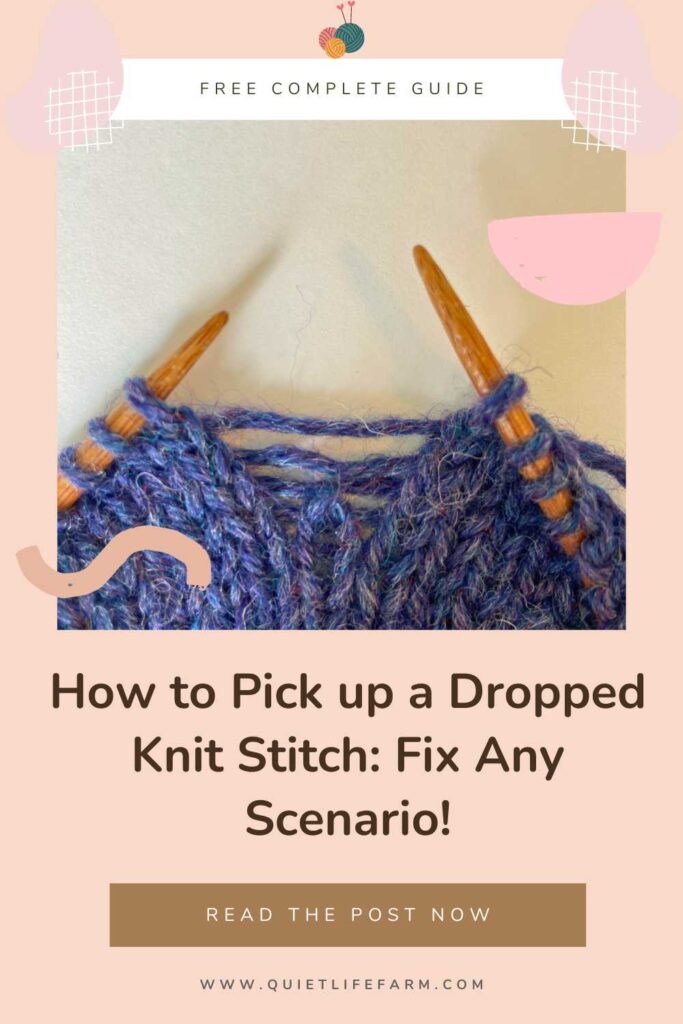
How to Pick up a Dropped Knit Stitch: Fix Any Scenario!
Dropping one or more stitches while knitting can feel daunting, but don’t fret — I’m here to teach you how to fix it!
One of the most common knitting mistakes, dropped stitches may make the knitter think that their project has been ruined and that they must start over.
Don’t be disheartened! Don’t tear out your knitting project quite yet!
This mistake is totally fixable!
Think of your dropped stitch as an excellent learning opportunity — once you learn how to fix it the first time, you’ll never break a sweat the next time you drop a stitch!
So — take some deep breaths, and let’s learn how to fix this together! (with pictures!)
This post will teach you how to fix one or more dropped stitches, in ANY given situation! Hooray!
Disclaimer: As an Amazon Associate, I earn from qualifying purchases.
#1. Fixing a Dropped Knit Stitch
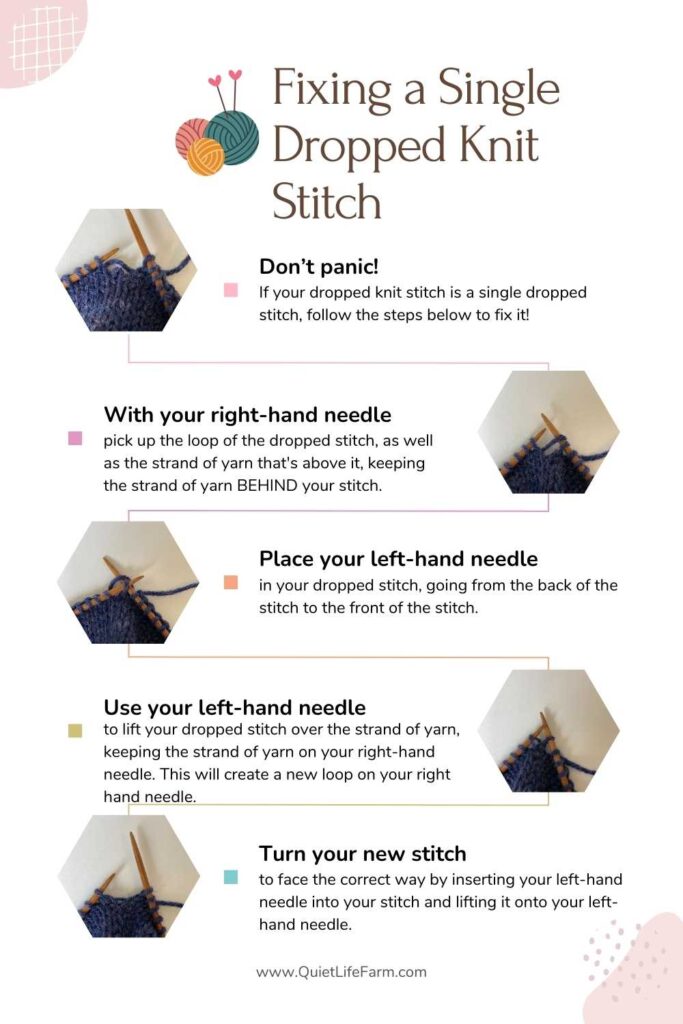
Let’s talk about fixing a dropped knit stitch.
If your dropped knit stitch is a single dropped stitch, follow the steps below to fix it!
- With your right-hand needle, pick up the loop of the dropped stitch, as well as the strand of yarn that’s above it, keeping the strand of yarn BEHIND your stitch.
- Place your left-hand needle in your dropped stitch, going from the back of the stitch to the front of the stitch.
- Use your left-hand needle to lift your dropped stitch over the strand of yarn, keeping the strand of yarn on your right-hand needle. This will create a new loop on your right hand needle.
- Turn your new stitch to face the correct way by inserting your left-hand needle into your stitch and lifting it onto your left-hand needle.
#2. Fixing a Dropped Stitch Purl-Wise
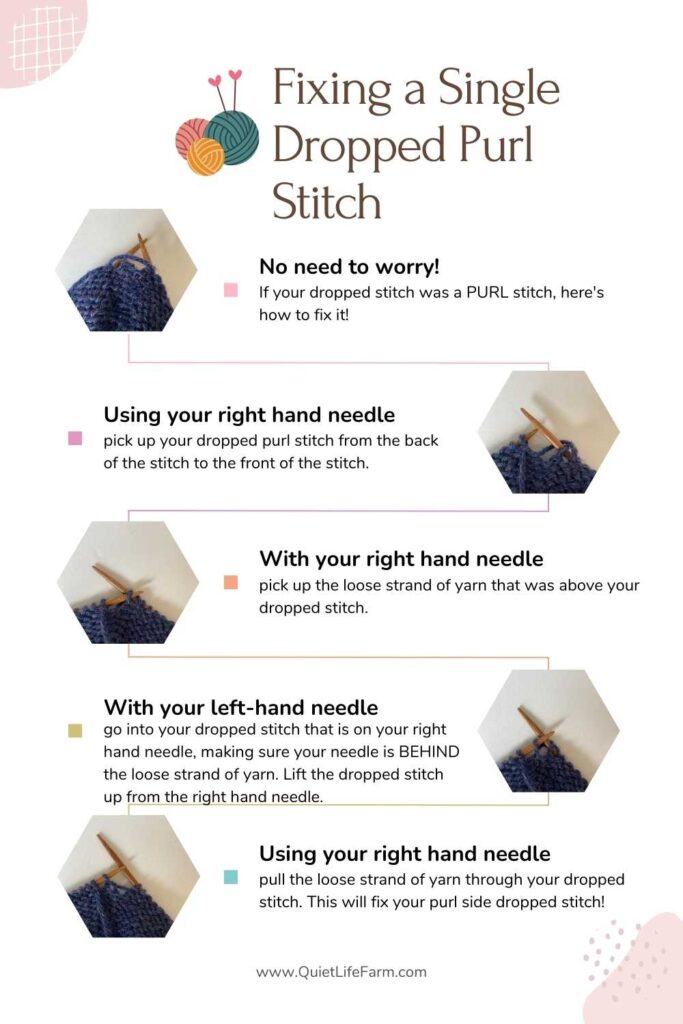
If your dropped stitch was a PURL stitch, here’s how to fix it!
- Using your right hand needle, pick up your dropped purl stitch from the back of the stitch to the front of the stitch.
- With your right hand needle, pick up the loose strand of yarn that was above your dropped stitch.
- With your left-hand needle, go into your dropped stitch that is on your right hand needle, making sure your needle is BEHIND the loose strand of yarn. Lift the dropped stitch up from the right hand needle.
- Using your right hand needle, pull the loose strand of yarn through your dropped stitch. This will fix your purl side dropped stitch!
#3. Fixing a dropped stitch several rows down: Stockinette Stitch
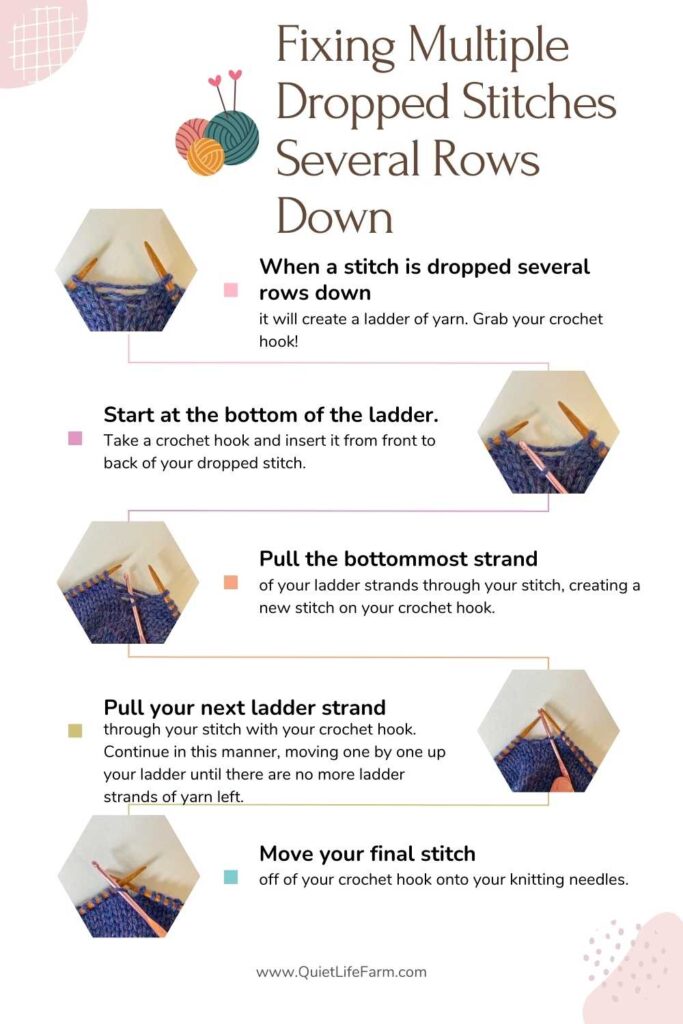
When a stitch is dropped several rows down, it will create a ladder of yarn. Don’t fret — this can be fixed, too! Grab your crochet hook — you’ll need it for this part.
You’ll want to work on the knit side of the stockinette stitch for this portion. (If your current row was a purl row — turn your work around so you see all of your knit stitches instead.)
- Start at the bottom of the ladder. Take a crochet hook and insert it from front to back of your dropped stitch.
- Pull the bottommost strand of your ladder strands through your stitch, creating a new stitch on your crochet hook. (there will be one stitch total on your crochet hook.)
- Pull your next ladder strand through your stitch with your crochet hook.
- Continue in this manner, moving one by one up your ladder until there are no more ladder strands of yarn left.
- Move your final stitch off of your crochet hook onto your knitting needles.
#4. Fixing a dropped stitch several rows down: Garter Stitch
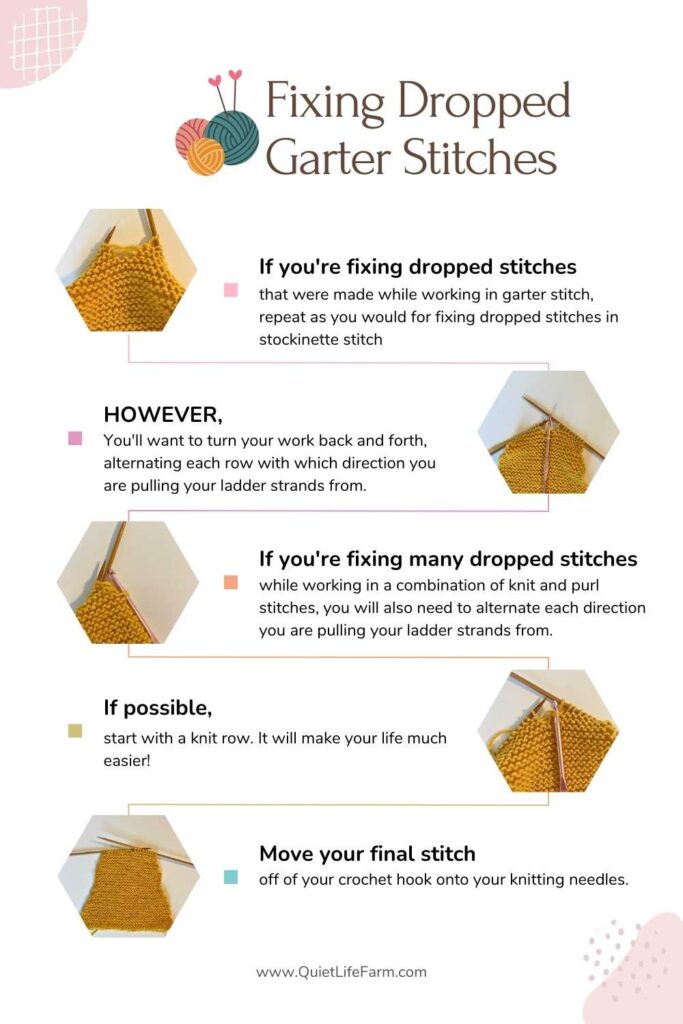
If you’re fixing dropped stitches that were made while working in garter stitch, repeat as you would for fixing dropped stitches in stockinette stitch (#3; see above), HOWEVER — You’ll want to turn your work back and forth, alternating each row with which direction you are pulling your ladder strands from.
If you’re fixing many dropped stitches while working in a combination of knit and purl stitches, you will also need to alternate each direction you are pulling your ladder strands from. If possible, start with a knit row, so that you can begin with the instructions in solution #3 above. Then, you can figure out which way you need to go from there.
General DO’S and DON’Ts When Dealing With Dropped Stitches:
- DON’T continue knitting once you realize that you’ve dropped a stitch. The extra movement can cause your dropped stitch to drop down extra rows, making it more difficult to pick back up.
- DO remember when taking breaks to place your knitting in a safe place away from pets, young children, and anyone else who might accidentally pick up your project and upset your stitches!
- DO keep a set of crochet hooks in your knitting bag for such a time as this! This is the very inexpensive set that I have owned for many years!
- DON’T worry if you don’t have a crochet hook to fix multiple dropped stitches! In a pinch, you can maneuver your knitting needles to move your stitches up your “yarn ladder” instead!
- DO check to make sure you have the correct number of stitches on your knitting needles after picking up your dropped stitch!
- DO secure multiple dropped stitches with a safety pin (one safety pin per dropped stitch) until you can fix each dropped stitch individually. You can also use a stitch marker to secure dropped stitches if you do not have any safety pins on hand!
Help! My stitches were pulled off of my needles!
If your stitches were pulled off of your needles entirely — don’t worry!
First, quickly perform an initial “rescue” of your stitches — one by one, slide them back onto your needle. Don’t be concerned about dropped stitches or about twisted stitches quite yet — your first goal is to get as many stitches back onto your needles as you can.
Secondly, use a safety pin or stitch marker to secure any dropped stitches.
Lastly, go stitch by stitch, untwisting each individual stitch as needed, and using the tutorial above to rescue any dropped stitches back onto your needles. Work one stitch at a time until you reach the end of your runaway stitches!
Remember — there’s no need to pull out all your beautiful knit work over dropped stitches! Have anymore questions about your dropped stitches? Leave an SOS in the comment section! I’m always happy to offer further help!